
Removing
Remove the lower trim of the dashboard (depending on equipment level).
Disconnect the brake light switch connector.
Rotate stop light switch (1) a quarter turn counterclockwise.
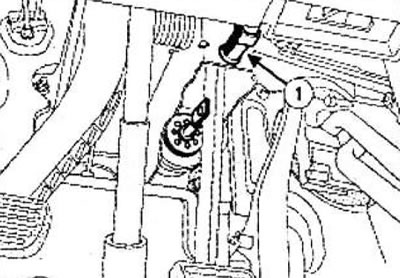
Remove the stoplight switch.
Installation
Attention! Handle the sensor (3) carefully.
Piston only (2) adjust the size (X).
Be sure to replace the switch if:
- piston (2) does not touch the switch (3),
- for stem adjustment (X) you need to repeat the operation more than 3 times.
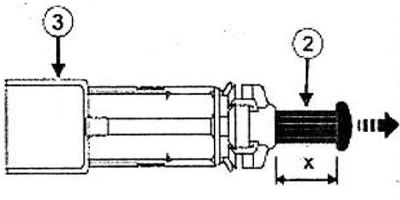
measure size (X) stock (2). If the stem length (X) less than 13mm, gently pull the stem end to adjust the stem length (X) ranging from 13 mm to 14 mm.
Press the brake pedal with your hand.
Install the brake light switch to the pedal assembly.
Secure the brake light switch by turning it a quarter of a turn clockwise.
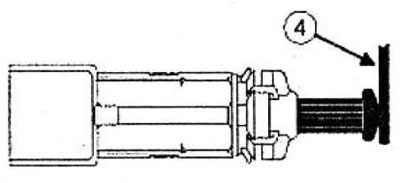
Note: To adjust the position of the brake light switch stem, install the shim (4) 2 mm thick between the rod head and the brake pedal.
Gently let the brake pedal return to its original position while holding it with your hand (make sure the gasket stays in place).
Note: The brake light switch adjusts automatically depending on the position of the brake pedal.
During automatic adjustment, clicks are heard and the transition is through fixed positions.
Connect the brake light switch connector.
Check the operation of the brake light switch:
press the brake pedal and make sure the brake light is on,
release the brake pedal and make sure the brake light is off.
Install the lower dashboard trim (depending on equipment level).