English Русский
Български
Беларускі
Український
Српски
Hrvatski
Română
Polski
Slovenský
Magyar
Bookmark Contacts Articles Sitemap
Company vehicles Peugeot Company vehicles Opel Company vehicles Skoda Company vehicles Land Rover Company vehicles Mitsubishi Company vehicles Volkswagen Company vehicles Honda
RenaultBook.ru


Duster   Fluence   Kangoo   Laguna   Logan   Megane   Sandero   Scenic   Symbol   Clio   Other
Duster 1 (2009-2017)

Vacuum brake booster (Renault Duster 1)

  • Main
  • Duster
  • Duster 1 (2009-2017)
  • Chassis, running gear
  • Control devices
  • Vacuum brake booster
0
Contents: Removal 🠛 Installation 🠛
Tightening torques: Brake booster mounting nuts - 21 Nm.

Removal


Place the vehicle on a two-post lift.

Disconnect the battery.

Remove:
  • master brake cylinder,
  • check valve (1) from the brake booster.
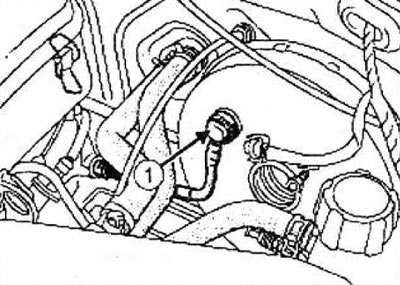
check valve (1) from the brake booster.


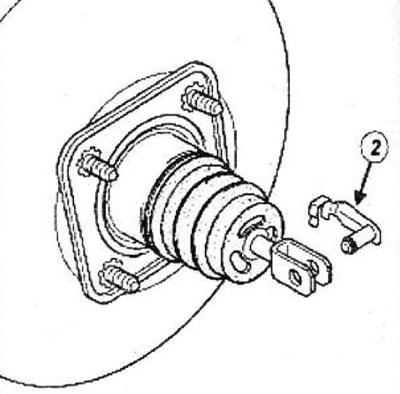
Remove, from the passenger compartment side, the axle (2) connecting the brake booster pushrod and the brake pedal by folding the connecting axle upwards.
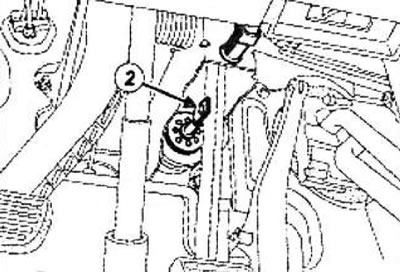
Remove, from the passenger compartment side, the axle (2) connecting the brake booster pushrod and…

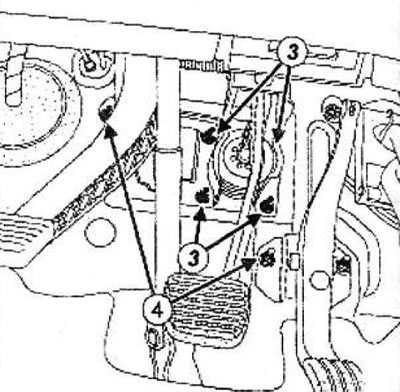
Unscrew the special nuts (4) securing the soundproofing foam pad.


Turn back the sound-absorbing material slightly.

Remove:
  • brake booster mounting nuts (3) from the passenger compartment side (pedal assembly and brake booster mounting nuts),
  • vacuum brake booster.

vacuum brake booster.


Installation


Check the presence of the brake booster gasket (5) and replace the gasket if it is damaged.
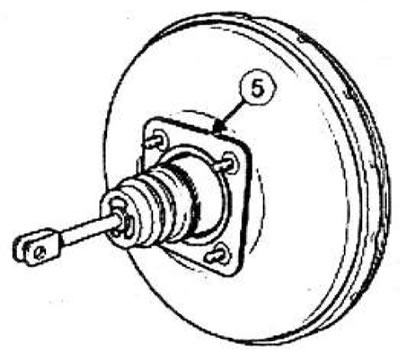
Check the presence of the brake booster gasket (5) and replace the gasket if it is damaged.


Parts that must be replaced: the connecting shaft between the brake pedal and the brake booster rod.

This article is taken from the website renaultbook.ru

Before installation, check the size (X1) = 145.8±0.5 mm.
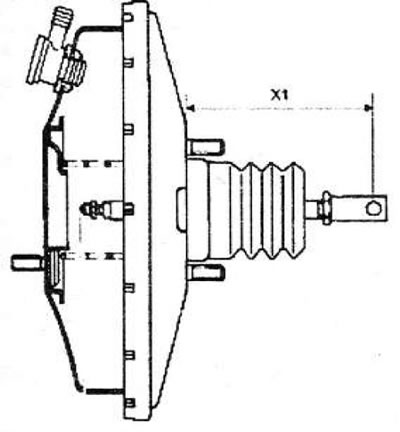
Before installation, check the size (X1) = 145.8±0.5 mm.


Install the brake booster.


Tighten the brake booster mounting nuts to the specified torque (21 Nm).

The axle between the brake booster pushrod and the brake pedal is installed only by moving from right to left and from top to bottom.

Install:
  • soundproofing foam pad,
  • special nuts for fastening the soundproofing foam pad.
  • check valve from the brake booster,
  • master brake cylinder.

Adjust the brake light switch.

Connect the battery.
This article is available on: russian, bulgarian, belarusian, ukrainian, serbian, croatian, romanian, polish, slovak, hungarian
Article has been reviewed by editor: Fedoseev Denis
Share with friends:
Previous
Duster 1: Control devices
Next

Brake booster check valve
Brake line between master cylinder and front left brake caliper
Brake line between master cylinder and front right brake caliper
Brake master cylinder
Vacuum pump (K9K engine)
Pedal assembly fork
Accelerator pedal (4x4 drive)
Accelerator pedal (K4M engine with 4x2 drive)
Accelerator pedal cable (K4M engine with 4x4 drive)
Other articles on other Renault models

➽ Vacuum brake booster Renault Fluence 1 (2009-2020, petrol)
➽ Vacuum brake booster Renault Kangoo 1 (1997-2007)
➽ Installing a vacuum brake booster Renault Laguna 2 (2001-2007)
➽ Brake booster vacuum — check Renault Scenic 1 (1996-2003)
➽ Vacuum brake booster — removal and installation Renault Symbol 2 (2008-2013, petrol)
Link to this article in different formats
Reviews and comments of visitors
No comments yet


Add two numbers 32 + 23


Duster 1 (2009-2017) 
  • User manual
  • Governing bodies
  • Car driving
  • Devices for comfort
  • Car care
  • Practical Tips
  • Power unit
  • Petrol engine (K4M)
  • Diesel engine (K9K)
  • Power system (K4M)
  • Power system (K9K)
  • Fuel system
  • Petrol injection system (K4M)
  • Diesel injection system (K9K)
  • Starting and ignition system
  • Cooling system
  • Exhaust system
  • Transmission
  • Clutch
  • Manual gearbox
  • Drive shafts
  • Chassis, running gear
  • Front bearing elements
  • Rear load-bearing elements
  • Steering
  • Control devices
  • Body and interior
  • Exterior (external elements)
  • Interior (internal elements)
  • Interior trim
  • Interior heating
  • Air conditioning
  • Electrical equipment
  • Equipment and devices
  • Headlights and lighting
  • Governing bodies
  • Wipers/washers
  • Audio system
  • Electrical circuits
RenaultBook.ru © 2018–2026 | Mobile version | News and articles | Sitemap: EN BG BY UA RS HR RO PL SK HU | Administration | Site search | Bookmark
Duster 1 (2009-2017) | Fluence 1 (2009-2020, petrol) | Kangoo 1 (1997-2007) | Laguna 2 (2001-2007) | Logan 1 (2004-2012, petrol) | Logan 2 (2012-2020) | Megane 1 (1995-2002) | Megan 2 (2002-2009, petrol) | Sandero 1 (2007-2012, petrol) | Scenic 1 (1996-2003) | Symbol 1 (1999-2008, petrol) | Symbol 2 (2008-2013, petrol) | Renault 19 (1988-1996) | Espace I and II (1984-1996) | Espace III (1996-2002) | Clio 1 (1990-1998) |
We want your visit to be comfortable 😌 and use cookies 🍪 to do so.