



Warning: Brake pad sets on coaxial wheels should be replaced at the same time - never replace pads on just one wheel, as this will result in uneven braking. Please note that dust generated by brake pad wear may contain asbestos, which is harmful to health. Never blow dust away with compressed air and try not to inhale it. DO NOT use gasoline based solvents to clean brake components. Use only a special cleaner or methyl alcohol.
1. Apply the handbrake, then jack up the front of the car and support it on axle stands. Remove the front wheels.
2. Trace the wear sensor wiring from the inner pad and disconnect its connector (see illustration).
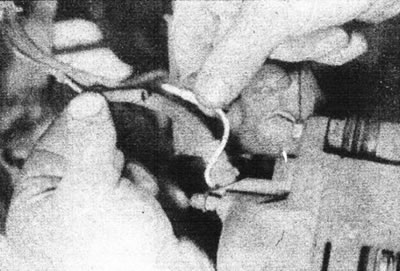
9.2. Disconnect the brake pad wear sensor wiring connector (girling support shown).
3. Push the piston into the caliper cylinder by pulling the caliper outward.
Bendix calipers
4. Remove the small spring clip from the brake pad mounting plate and remove the plate from the caliper (see illustrations).
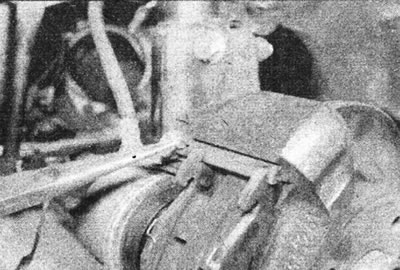
9.4a. On Bendix calipers, remove the spring clip...
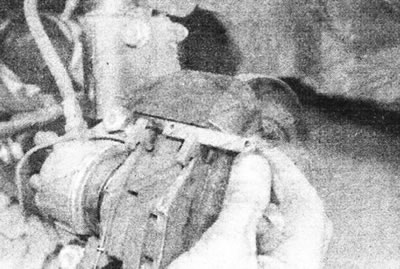
9.4b....And remove the brake pad mounting plate.
5. Using pliers, remove the pads from the caliper (see illustrations).
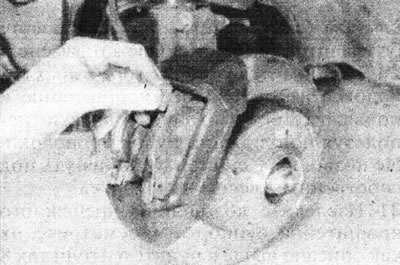
9.5a. Remove the outer...
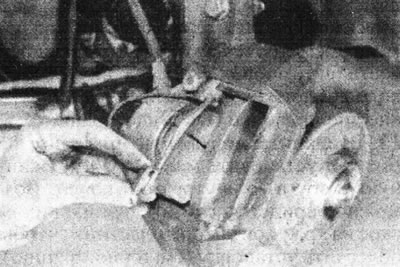
9.5b.... and the inner pad.
Draw the location of the pressure spring and remove the spring from each of the pads.
6. First, measure the thickness of each brake pad (together with the metal base). If any one pad is worn to the minimum thickness specified in the Specifications, all four pads must be replaced. The pads should also be replaced if they are contaminated with oil or grease. If such contamination is detected, or if any of the brake pads are worn unevenly, find and correct the cause.
7. Please note that there are two different types of brake pads available for the Bendix caliper (depending on the diameter of the caliper cylinder/piston). Calipers with a piston diameter of 45 mm require pads with symmetrical brake linings, while calipers with a cylinder diameter of 48 mm require pads with asymmetrical linings (the groove in the lining is not centered). Pad types can also be distinguished by the number of cutouts in the upper corners of the pads (see illustration).
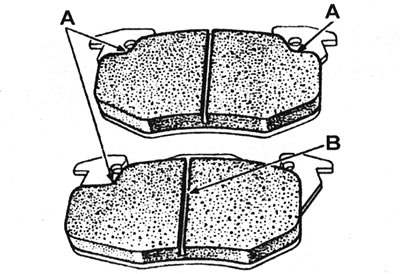
9.7. Symmetrical (top) and asymmetrical (bottom) Bendix caliper pads; the latter's overlay has only one cutout in the upper corner (A) and its groove (B) is not located in the center.
8. If the brake pads are still serviceable, carefully clean them with a soft wire brush, paying particular attention to the sides and the back of the metal backing. Clean the grooves in the brake pad linings and remove any large debris or dirt. Carefully clean the inside surface of the caliper/its support bracket.
9. Before installing the pad, make sure that the guide bushings slide smoothly in the caliper and that their rubber protective boots are not damaged. Clean any dust or dirt from the caliper and piston, being careful not to inhale any airborne particles. Inspect the dust seal around the piston for integrity, and the piston itself for leaks, corrosion, and damage. If the condition of any of these components is in doubt, see Chapter 10. Also inspect the brake disc (see Chapter 11).
10. If new brake pads need to be installed, push the caliper piston all the way into the cylinder to make room for them. Use a clamp or similar tool to do this and make sure that the brake fluid does not spill over the edge of the master cylinder reservoir (it's better to pump out the excess).
11. Install the pressure springs on the pads (see illustration).
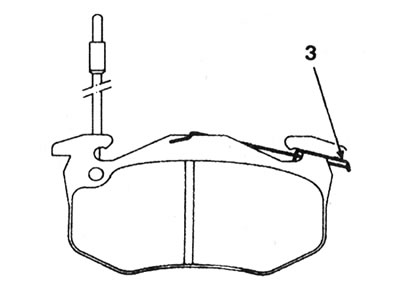
9.11. Install the pressure springs (3) onto the Bendix caliper pads (inner shoe).
12. Install the pads into the caliper, remembering that the pad with the wear sensor is the inner one. Check that the pressure springs are installed correctly. On models with asymmetrical brake pads, look at the pads from the front of the car; the groove of the inner pad should be higher than the groove of the outer pad (see illustration).
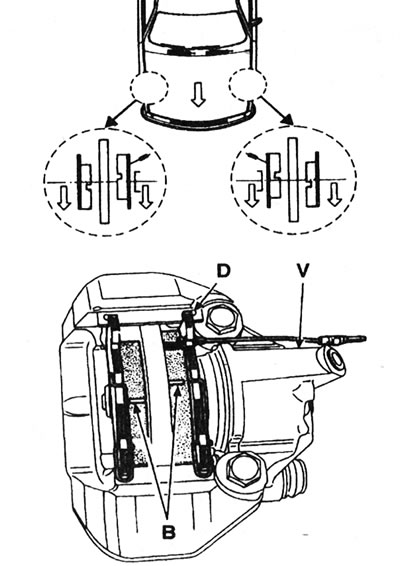
9.12. Correct installation of asymmetrical Bendix caliper pads: B - Grooves; D - Location of the mounting plate spring clip; V - Bleed nipple.
13. Push the mounting plate into place and install the small spring clip into its inner end. You may need to file a bevel on the edge of the mounting plate to make installation easier (see illustration).
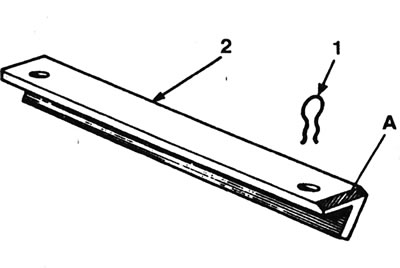
9.13. The mounting plate of the pads (2) with a ground-down edge (bevel A) and its spring bracket (1) - Bendix caliper.
14. Connect the brake pad wear sensor wiring connector, making sure the wire is routed correctly.
15. Press the brake pedal several times to press the pads against the brake disc.
Text published on the website: www.Renaultbook.ru
16. Repeat the above procedure on the other front brake caliper.
17. Install the wheels, then lower the vehicle to the ground and tighten the bolts to the torque specified in the Specifications.
18. Check the brake fluid level.
Girling calipers
Note: A suitable blocking compound will be required during installation.
19. Loosen and remove the upper and lower caliper guide pin bolts while holding the pins with a thin wrench (see illustrations).
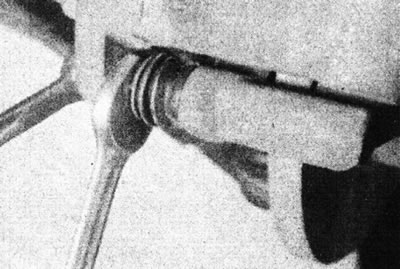
9.19a. Loosen the guide pin bolts while holding the pins with a double-ended wrench...
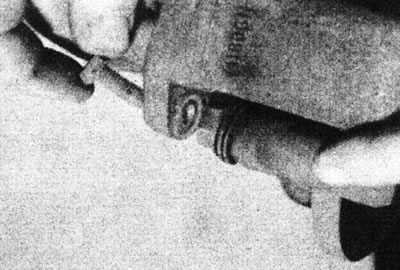
9.19b....then remove the bolts and remove the caliper.
Discard the stud bolts - they need to be replaced.
20. Lift the caliper off the brake pads and out of the mounting bracket and tie it to the suspension strut using a suitable piece of wire. Do not allow the caliper to hang under its own weight on the hose.
21. Remove the pads from the caliper mounting bracket and inspect them as described above in step 6 and steps 8-10, ignoring step 7, which applies only to the Bendix caliper.
22. Install the pads into the caliper mounting bracket. The shoe with the wear sensor is internal.
23. Place the caliper on the pads. Coat the threads of the new lower guide pin bolt with locking compound and install the bolt. Apply locking compound to the new upper guide pin bolt, push the caliper into position and install the bolt. Make sure the brake shoe springs are installed correctly (see illustration), then tighten the pin bolts, starting from the bottom, to the specified tightening torque Specifications.
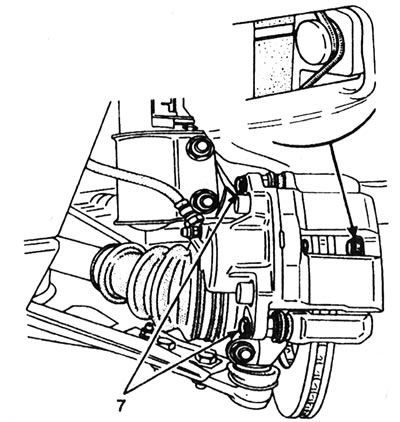
9.23. Guide pin bolts (7) and correct positioning of the shoe pressure spring.
24. Follow the steps described above in points 14-18.
All calipers
25. If new pads have been installed, full braking performance will not be achieved until the brake linings have been bedded in. Be prepared for longer braking distances and avoid hard braking for the first 150 km after replacing the pads.