



Contents: General description 🠛 Pumping sequence 🠛 Pumping is the main method (for two…🠛 Bleeding with a device with a…🠛 Pumping under pressure 🠛 All methods 🠛
Warning: Brake fluid is poisonous. Rinse any body parts that come into contact with the liquid with plenty of cold running water and seek immediate medical attention if the liquid comes into contact with your mouth or eyes. Some types of brake fluid are flammable and may ignite when in contact with hot components. Take appropriate fire safety measures. Brake fluid is aggressive to paint and plastics - if it comes into contact with such surfaces, immediately rinse the fluid with plenty of water. In addition, the liquid is hygroscopic (absorbs moisture from the air) - old liquid may be contaminated with water and unsuitable for use. When adding or replacing fluid, use the recommended fluid type from a freshly opened, sealed container.
Note: On models with ABS, if any part of the brake hydraulic system has been disconnected, the system must be completely bled before the vehicle is used again. Failure to follow this procedure can result in air entering the hydraulic return pump, which will be virtually impossible to bleed.
General description
1. Correct functioning of the hydraulic brake system is only possible if its components are free of air. To remove air from the system, bleed it.
2. During the bleeding procedure, add only clean, fresh brake fluid of the type specified in the Specifications. Never reuse liquid.
3. If there is any doubt about the type of fluid in the system, flush the system with clean fluid and replace all seals.
4. If the brake fluid level in the master cylinder has dropped, find and repair the cause of the leak before continuing.
5. Park the car on a level spot(not downhill), turn off the ignition and select first gear or reverse (or position "P"). Block the wheels and release the handbrake.
6. Make sure all tubes and hoses are securely attached, couplings are tight, and bleed nipples are closed. Remove the dust caps and clean any dirt from the bleed nipples.
7. Loosen the brake fluid reservoir cap and fill the fluid level to the "MAX" line. Replace the cap and be sure to maintain the fluid level above the "MIN" line throughout the entire procedure, otherwise air will reenter the system.
8. There are a number of devices available for bleeding the brake system by one person. It is recommended to use one of these kits, as they make the job much easier and also reduce the risk of air and liquid being drawn back into the system. If such a device is not available, use the basic pumping method (for two people), described in detail below.
9. If using a tool, prepare the vehicle as described above and follow the kit manufacturer's instructions. The procedure may vary slightly depending on the type of device used, but the basic procedure is also described below.
10. Whatever method you use, follow the correct pumping sequence.
Pumping sequence
11. If components of only one circuit have been disconnected or removed (for example, a caliper or a wheel cylinder), only this circuit needs pumping.
12. If the entire system needs to be bled, proceed in the following sequence:
Models without ABS
- Rear right brake.
- Front left brake.
- Rear left brake.
- Front right brake.
Models with ABS
- Left front brake.
- Right front brake.
- Left rear brake.
- Right rear brake.
Pumping is the main method (for two people)
13. Prepare a clean glass container, a plastic or rubber tube of suitable length that fits tightly onto the bleed nipple. The assistance of a second person will be required.
14. If not already done, remove the dust cap from the bleed nipple and place the prepared bleed tube onto the nipple (see illustration).
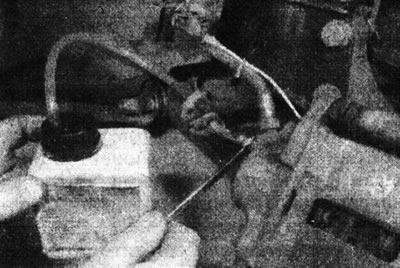
6.21. Bleeding the front brake caliper.
Immerse the other end of the plastic tube into the brake fluid previously poured into the reservoir.
15. Make sure the master cylinder reservoir is full and maintain the fluid level above the "MIN" line throughout the procedure.
16. Have an assistant press the brake pedal all the way down several times to build up pressure, then hold the pedal down.
17. Open the bleed nipple (approximately one turn) and let the liquid drain into the container. When fluid stops flowing from the bleed nipple, tighten the bleed nipple and have an assistant slowly release the pedal.
18. Repeat this procedure (paragraphs 16 and 17), until the leaking brake fluid is free of air bubbles. Don't forget to check the fluid level in the master cylinder reservoir. If you are bleeding the entire system, allow at least five seconds between cycles on the first brake unit to allow the fluid to fill the master cylinder channels.
19. Clamp the bleed nipple, remove the plastic tube and install the dust cap.
20. Repeat the procedure on the remaining calipers in the sequence indicated above.
Bleeding with a device with a non-return valve
21. These devices are a tube with a non-return valve that prevents air and liquid that has escaped from it from being drawn back into the system. Some kits also include a clear container (see illustration).
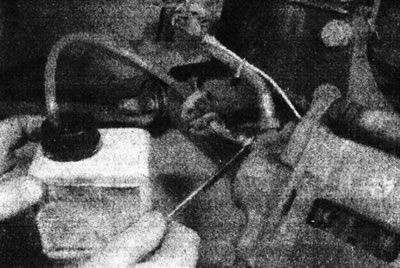
6.21. Bleeding the front brake caliper.
22. Place the tube on the bleed nipple and open it. Press the brake pedal slowly and smoothly, then release it slowly. Repeat this action until the liquid coming out of the nozzle is free of air bubbles.
23. Remember to keep the fluid level in the reservoir above the "MIN" line.
Pumping under pressure
24. These devices are operated by compressed air contained in the spare wheel chamber. However, note that the air pressure needs to be reduced (see the instructions included with the device).
25. Attach the supplied container filled with brake fluid to the master cylinder reservoir and to the spare tire. Bleed by opening the nipples one by one (in the given sequence) and draining the liquid until it is free of air bubbles.
26. This method has the advantage that the large amount of fluid in the installed reservoir prevents air from entering the master cylinder during bleeding.
27. Bleeding under pressure is especially effective when bleeding "problem" systems (the airlock is stuck in a place where it is difficult to expel) or when completely bleeding the system during the next fluid change.
All methods
28. When bleeding is complete, wash away any spilled fluid, tighten the bleed nipples and install their dust caps.
29. Check and top up the liquid level in the feed tank.
30. Pour out the brake fluid that comes out during bleeding; it is not suitable for reuse.
31. Check the elasticity of the brake pedal. If you feel any dips in the flow as it moves, there is still air in the system and further bleeding is required. If repeated bleeding does not produce satisfactory results, the master cylinder seals may be worn out.