



Note: Before you begin, please see the Warning at the beginning Chapter 14. If a drum requires replacement or resurfacing, do the same with the other drum to ensure equal and effective braking; it is also recommended to install new brake pads. A new hub nut will be required for installation.
Removal
1. Block the front wheels, select reverse (or "P") and release the handbrake. Jack up the rear of the vehicle and support it on axle stands. Remove the rear wheel.
2. Using a hammer and a large flat-head screwdriver, carefully pry the cover out of the center of the brake drum (see illustration).
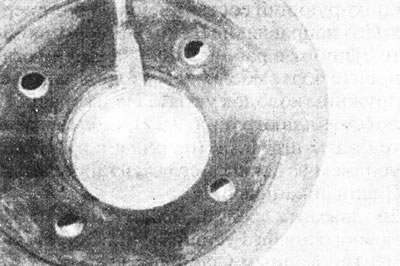
13.2. Press the cover out from the center of the brake drum...
3. Using a socket and a long rod, loosen and remove the rear wheel hub nut and remove the thrust washer (see illustration).
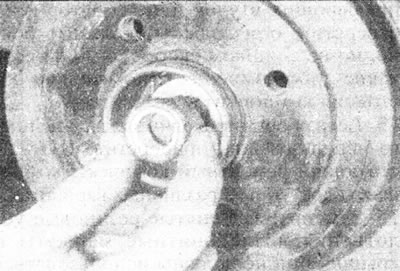
13.3. ... then remove the rear wheel hub nut and thrust washer.
Discard the hub nut - it needs to be replaced.
4. Remove the brake drum and hub bearing assembly from the steering knuckle. If this cannot be done manually, this is due to a tight fit of the hub bearing or drag of the brake pads. In the first case, tap the periphery of the drum with a mallet or use a universal puller, securing it to the drum with wheel bolts. In the second case, proceed as follows.
5. Make sure the handbrake is fully released. Working under the vehicle, loosen the handbrake cable adjuster locknut, then unscrew the adjusting nut on the handbrake lever shaft. Please note that on some models you may first need to remove the mounting nuts and lower the exhaust heat shield.
6. Insert a screwdriver through one of the wheel bolt holes in the brake drum until it touches the handbrake operating lever on the driven shoe (see illustration).
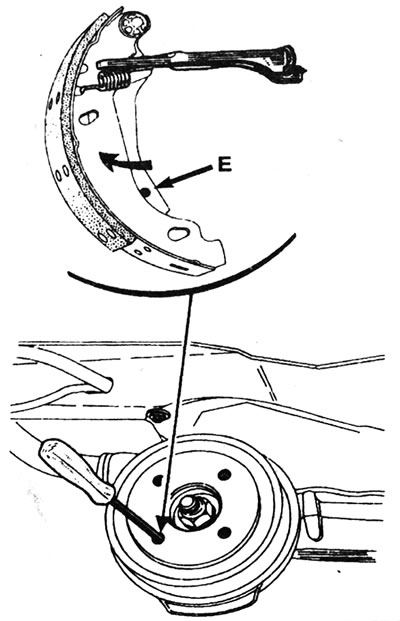
13.6. Insert a screwdriver through the hole in the drum and release the handbrake operating lever. E - Location of the handbrake operating lever limiter.
Push the lever in until the stop is behind the brake shoe bridge, allowing the shoes to fully disengage from the drum. Remove the drum and spacer from the steering knuckle.
Inspection
7. Carefully remove dust from the drum resulting from wear of the pads, being careful not to inhale it.
8. Clean the outside of the drum and inspect it for damage (for example, cracks around the wheel bolt holes) and signs of wear. Replace the drum if necessary.
9. Carefully inspect the inner surface of the drum. The presence of shallow scratches on the friction surface is quite acceptable, but if deep grooves are found, replace the drum. Typically, a ridge forms on the inside edge of the drum, consisting of a mixture of rust and dust resulting from wear on the brake pads. This growth must be scraped off and the exposed surface sanded with fine sandpaper. If the thickness difference is due to wear of the friction surface, regrind the drum, taking into account the maximum thickness value specified in the Specifications, or replace it.
10. If you suspect that the drum is excessively worn or has become oval, measure its inside diameter in several places using an inside micrometer. Measurements must be taken on axes perpendicular to each other to determine the ovality of the drums. Minor ovality can be corrected by re-sharpening; if ovality is excessive, replace the drum.
Installation
11. Before installing a new brake drum, remove the protective coating from its inner surface using a suitable solvent.
12. Make sure that the handbrake lever stop is at the edge of the brake shoe (see illustration).
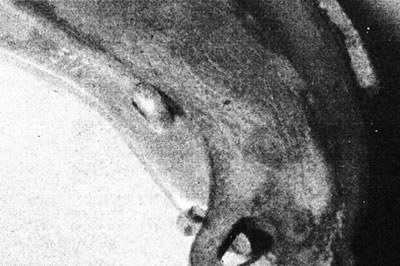
13.12. Make sure that the handbrake lever limiter is in contact with the driven shoe.
Apply a small amount of transmission fluid to the steering knuckle and install the spacer shim and brake drum, being careful not to allow any oil to come into contact with the brake shoes or the contact surface of the drum. Install the thrust washer and new hub nut; tighten the nut to the specified tightening torque Specifications. Place the hub cap back into place in the center of the brake drum.
13. Press the brake pedal several times to activate the clearance compensator.
14. Repeat the above procedure on the second rear brake assembly (where necessary), then adjust the handbrake (see Section 1).
15. Finally, install the wheel, lower the vehicle to the ground and tighten the wheel bolts to the specified torque Specifications.
Original version on our portal www.RenaultBook.ru