



Contents: Removal 🠛 Installation 🠛
Removal
Place the vehicle on a two-post lift.
Remove the hydraulic unit assembly.
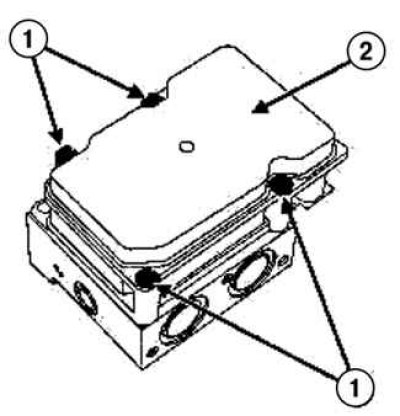
Fig. 6.99. Removing the ECU: 1 – mounting bolts; 2 – ECU housing
Unscrew the ECU mounting bolts on the pressure control unit and remove the ECU (Fig. 6.99).
Installation
Do not clean the pressure control unit.
Be sure to replace the ECU mounting bolts.
Install the ECU, holding it by the edges.
Note: Do not apply pressure to the ECU when installing, it should snap into place without any effort.
The hydraulic pump must be pressed tightly against the pressure control block.
When installing a new ECU, do not forget to secure the fork part of the connector located between the pressure control unit and the ECU.
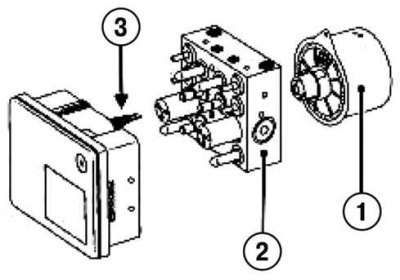
Fig. 6.100. Assembly of the ECU unit: 1 – hydraulic pump; 2 – pressure control unit; 3 – ECU connector
Tighten the ECU mounting bolts on the pressure control unit (fig. 6.100).
(Original publication on the website: «renaultbook.ru»)
Tighten the ECU mounting bolts to the specified torque of 3 Nm using the tool (Mot. 1608).
Install the hydraulic unit assembly.
Configure the speed measurement index using the diagnostic tool.
Clear fault codes stored by the ECU.
Perform a road test to confirm the problem has been corrected.