
Removing
Place the car on a lift.
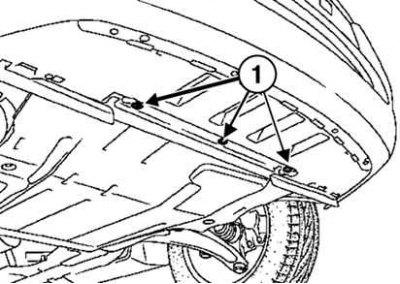
Pic. 8.3. Unscrewing the screws securing the lower base of the bumper: 1 - screws
Loosen the screws (pic. 8.3).
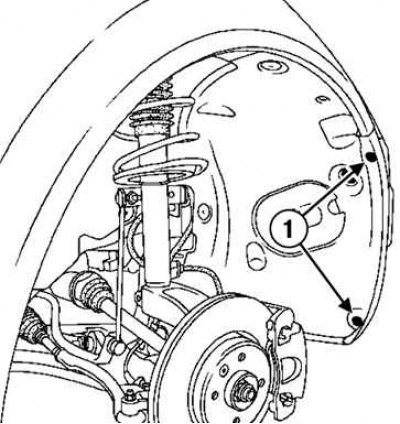
Pic. 8.4. Unscrewing the screws securing the bumper in the wheel arch: 1 - screws
Loosen the screws (pic. 8.4).
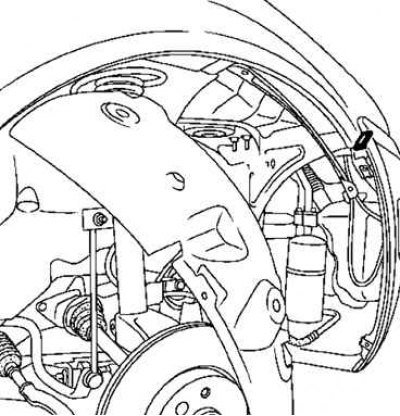
Pic. 8.5. Removing the side of the bumper
Detach the side of the bumper (pic. 8.5).
Disconnect the plastic rivets and remove the side trim.
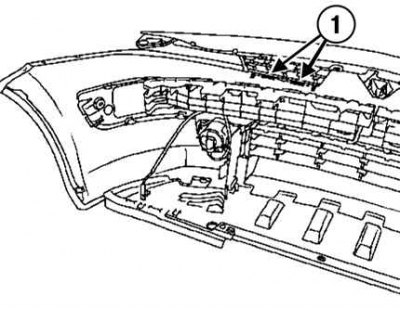
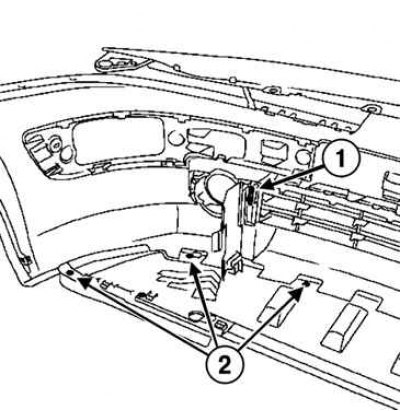
Pic. 8.6. Removing the side and middle facings: 1 - rivets for fastening the side lining; 2 - rivets fastening the middle lining
Disconnect the plastic fastening rivets and remove the middle lining (pic. 8.6).

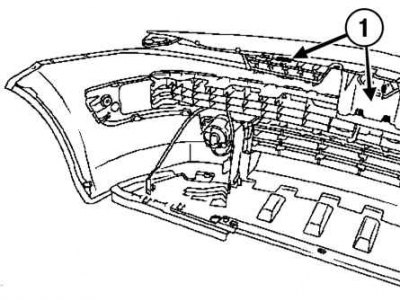
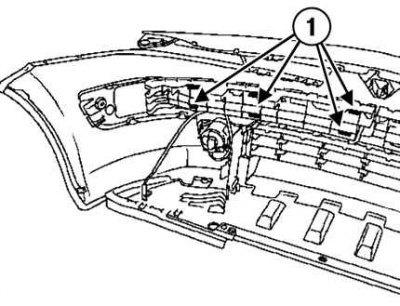
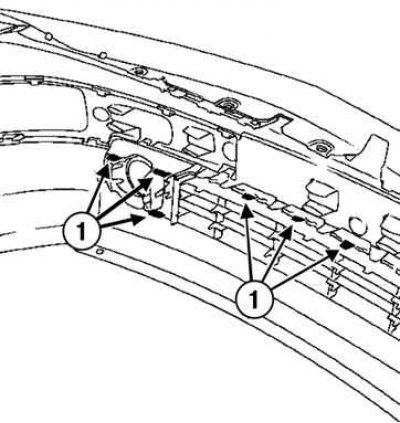
Pic. 8.7. Removing the upper bumper mounts: 1 - rivets fastening the upper part of the bumper
Remove the plastic rivets securing the top of the bumper (pic. 8.7).
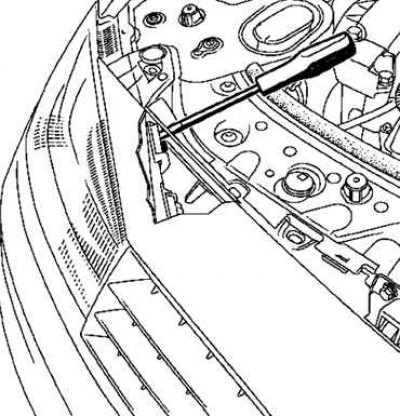
Pic. 8.8. Bumper shift
Using a flat-blade screwdriver, press the latches while sliding the bumper forward (pic. 8.8).
Partially remove the front bumper.
Disconnect the wiring harness from the fog lights and the fluid supply tube to the headlight washer jets.
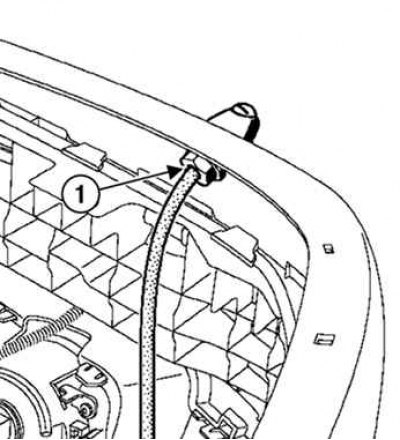
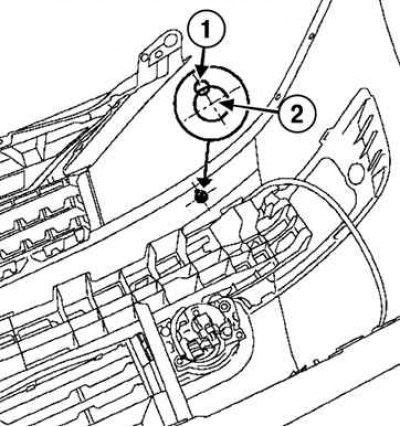
Pic. 8.9. Removing the headlight washer jet: 1 - fastening nut
Loosen the nut securing the headlight washer jet and remove it (pic. 8.9).
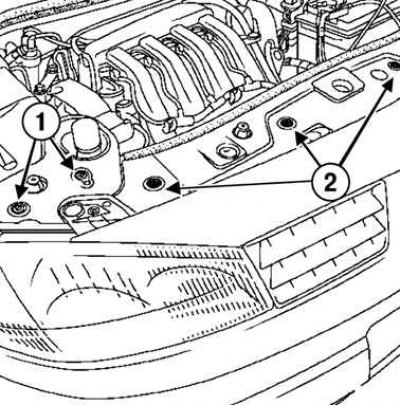
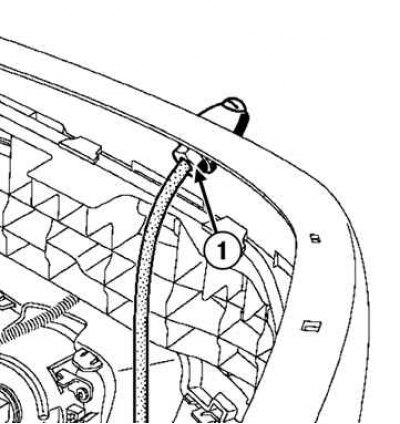
Pic. 8.10. Removing the amplifier: 1 - amplifier
Disconnect the amplifier (pic. 8.10).
Pic. 8.11. Removing the radiator grille: 1 - bottom latches
Press the lower latches and remove the radiator grille by pulling it towards you (pic. 8.11).
Pic. 8.12. Removing the buffer: 1 - clamps
Remove the clips and remove the buffer (pic. 8.12).
Pic. 8.13. Removing the guide
Disconnect the clips and remove the outer guide tab (pic. 8.13).
Remove the two fog lamp mounting bolts.

Pic. 8.14. Disconnecting the fog lamp connector
Disconnect connector (pic. 8.14).
Pic. 8.15. Removing the bottom cover: 1 - retainer; 2 - rivets
Drill out the rivets, disconnect the retainer and remove the lower casing (pic. 8.15).
Pic. 8.16. Removal of a decorative overlay of an antifog lamp and the central lattice: 1 - clamps
Disconnect the clips, remove the fog lamp trim and the central grille (pic. 8.16).
Installation
Note. Before installing the headlight washer jets on the bumper, drill the bumper according to the preliminary markings.
Pic. 8.17. Drilling holes for the jet: 1 - mounting hole; 2 - guide hole
Use a 3mm drill to drill the mounting hole as well as the pilot hole, which is then enlarged to the jet diameter with a conical cutter (countersink) (fig 8.17).
Before installing the jets, make sure that the sealing gasket is present.
Pic. 8.18. Jet installation: 1 - fastening nut
Tighten the nut lightly (pic. 8.18).
Connect:
- liquid supply tube;
- fog lamp wiring harness.
Install the remaining components in the reverse order of removal.