
Cars of the 1st and 2nd stages of production
Removing
1. Unfasten the fastening buttons and remove the mudguards from both wheels (see fig.).
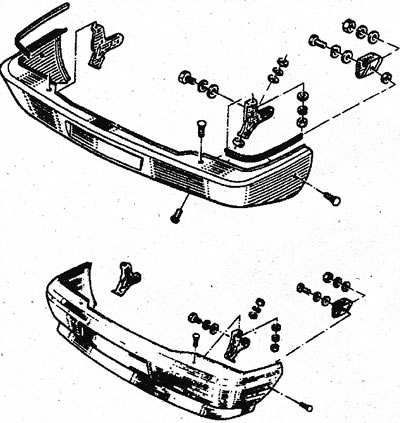
24.1 Fastening elements of the front bumper (cars of the 1st and 2nd stages of production)
2. Operating from the engine compartment, unscrew 2 bolts securing the bumper side brackets to the body..
3. Turn away bolts of fastening of forward arms of a bumper to headlights.
4. Remove the bumper and disconnect the wires from the fog lights (if necessary).
Installation
5. Installation is carried out in the reverse order. Install the mudguards in their places.
Cars of the 3rd stage of production
Removing
6. The side bumper mounting screws are located in the engine compartment in the wheel space. To access them, you must first remove all relevant body parts. The location of these elements varies depending on the type of engine and attachments, but in any case, it is necessary to remove the following components and assemblies:
- A) air filter assembly;
- b) bracket for multi-pin connector;
- With) relay and fuse block;
- d) injection computer.
You can not remove these elements completely, but only unscrew their fastening and take them aside.
7. After that, you can unscrew the screws of the side mounting of the bumper.
8. Remove the two front bumper mounting bolts located on the headlight bracket posts (see illustration).
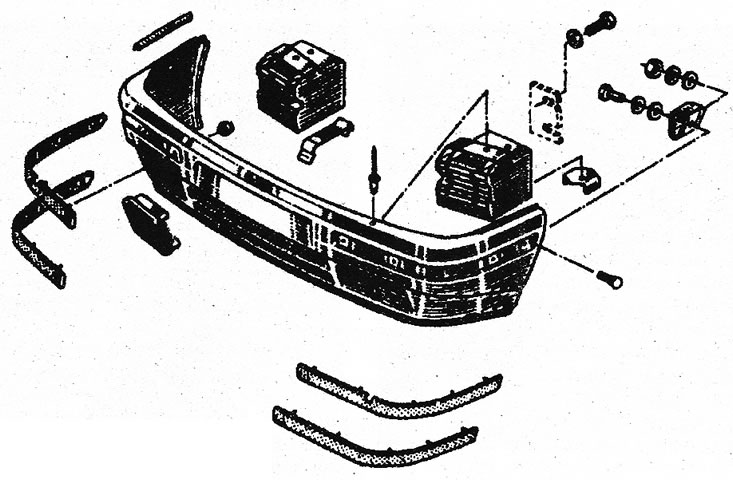
24.8 Fastening elements of the front bumper (cars of the 3rd stage of production)
9. Remove the front bumper from the vehicle. Disconnect the wires from the fog lights (if they are installed).
10. If necessary, by removing the rivets, you can remove the impact protection of the bumper.
11. Note the number of impact protection seals and install the same number when assembling.
Installation
12. Installation is carried out in the reverse order. Apply a layer of sealant to the threads of the bolts.