



Cars of the 1st and 2nd stages of production
Removal
1. Working from underneath the vehicle, unscrew the bolts securing the bumper to the outer cross member of the body on each side (see illustration). Unscrew the bolt as well (in cars of the 1st stage of production) or two bolts (in cars of the 2nd stage of production) fastening the bumper to the inner cross member of the body.
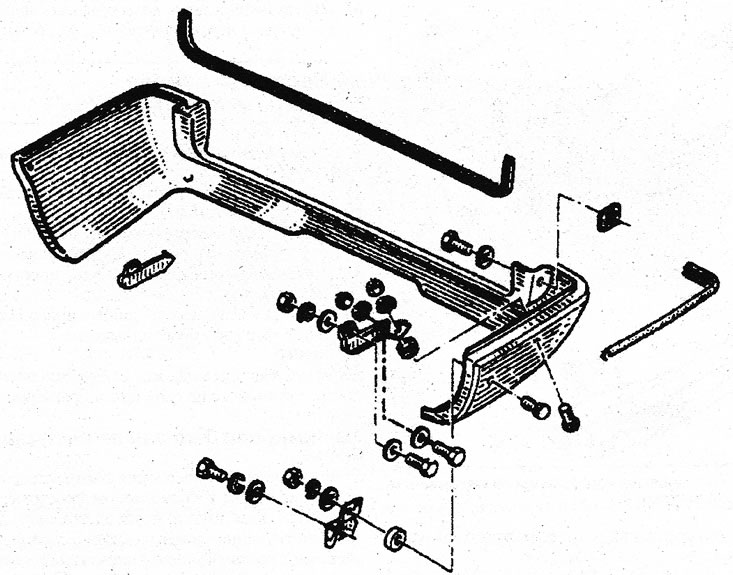
25.1 Rear bumper fastening elements (cars of the 1st and 2nd stages of production)
2. Open the rear door and unscrew the bolts securing the bumper to the rear door pillars.
3. Remove the bumper.
Installation
4. Installation is carried out in reverse order.
Cars of the 3rd stage of production
Removal
5. Remove the rear light assembly.
6. Remove the rivet securing the bumper to the impact protection (upper protruding part of the bumper) (see illustration).
7. Working from underneath the vehicle, unscrew the bolts securing the bumper to the outer cross member of the body.
8. Remove the bumper.
9. To remove the impact protection, remove the wheel arch trim.
10. Unscrew two bolts on each side and remove the shock protection.
Installation
11. Installation is carried out in the reverse order. Apply a layer of sealant to the bolt threads.