
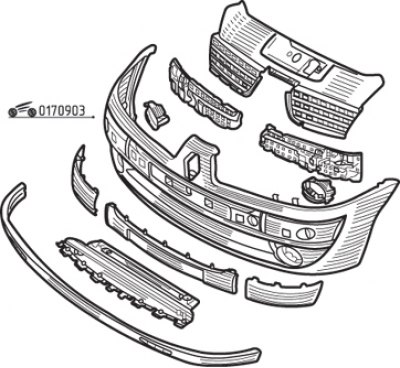
Pic. 9.3. Front bumper elements
The constituent elements of the front bumper are shown in Fig. 9.3.
Withdrawal procedure:
- on a vehicle equipped with fog lamps, disconnect the wire from the negative battery terminal;
- for convenience of work, place the car on a lift or raise its front part, remove the front wheels and place the supports under the body;
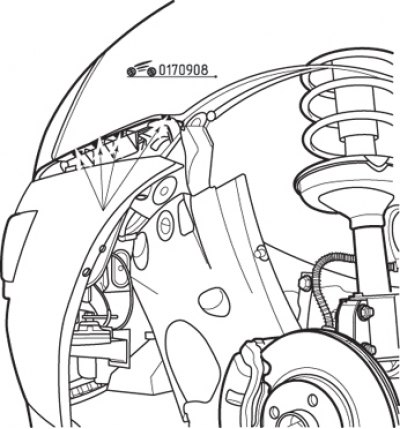
- remove the mudguards in the wheel arches;
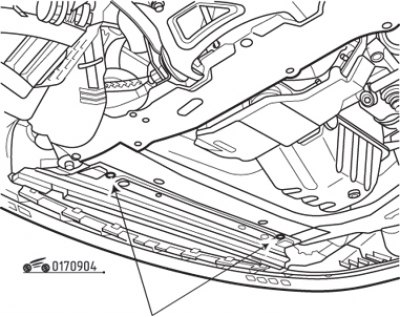
Pic. 9.4. Bolts of the lower fastening of a forward bumper
- unscrew the two bolts of the lower bumper mounting from below (pic. 9.4);

Pic. 9.5. Removing the front bumper mounts: B - holders; C - bolts
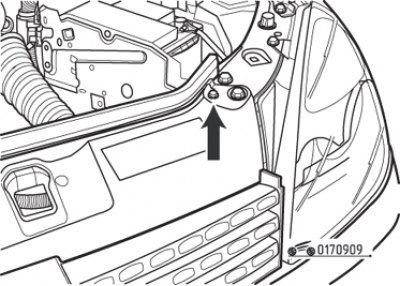
- remove the three holders and unscrew the two bolts (pic. 9.5) on the right and on the left side;
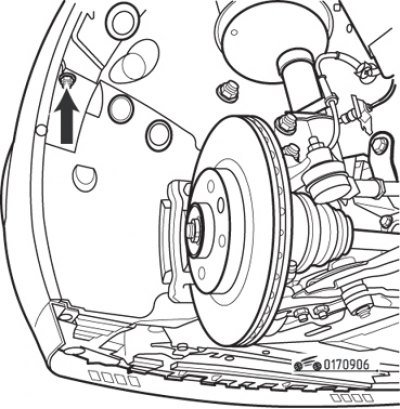
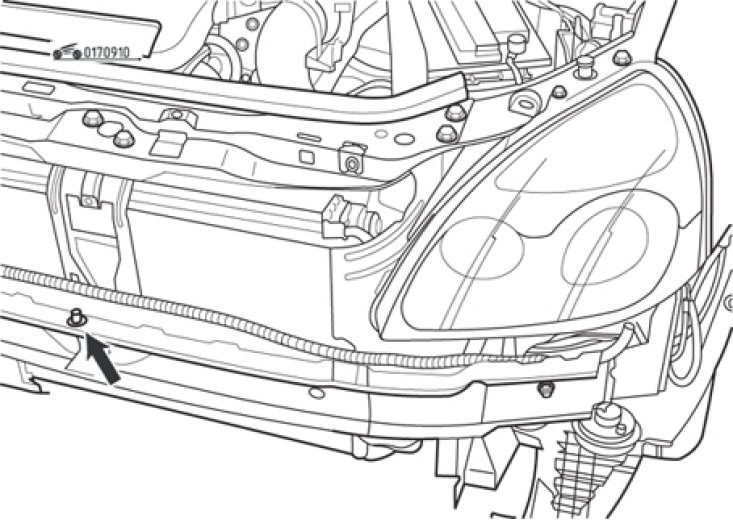
Pic. 9.6. Side bolts of fastening of a forward bumper
- unscrew the side bolts (pic. 9.6);
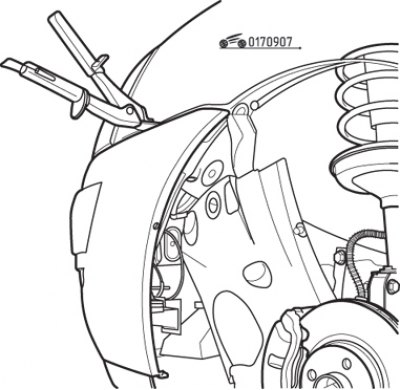
Pic. 9.7. Facing retainer remover installed during front bumper removal
Pic. 9.8. Four front bumper clips
- insert a tool for removing the trim holders into the gap between the fender and the bumper (pic. 9.7), protecting paintwork (cloth or sticky tape) fender and bumper, press the tool and gently pull the bumper down until it is free of the four latches (pic. 9.8);
Pic. 9.9. Spring retainer bumper
- remove the two spring clips (pic. 9.9);
- disconnect (if installed) hoses from the tubes of the headlight washer nozzles;
- together with an assistant, disconnect the bumper from the car.
Pic. 9.10. Front bumper centering guide
The bumper is installed in the reverse order of removal. Before installing the bumper, make sure that the centering guide is in place (pic. 9.10), to ensure the correct position of the bumper.
Connect the headlight washer hoses and connect the fog lamp connector.