
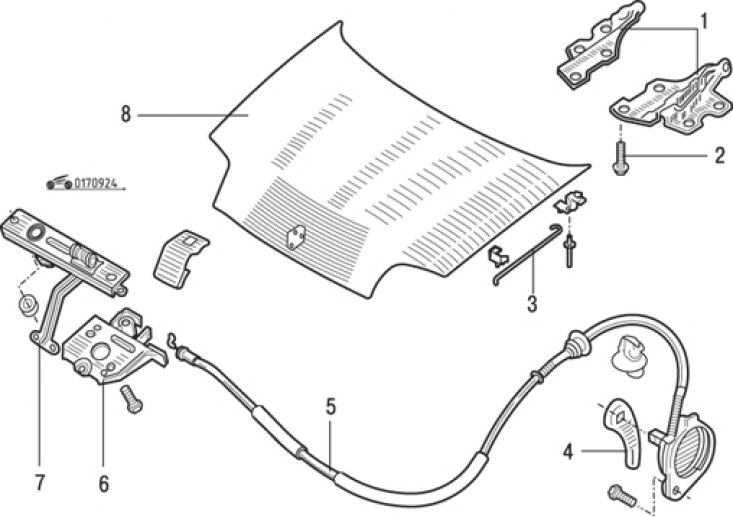
Pic. 9.24. Hood details: 1 - loops; 2 - bolt; 3 - emphasis; 4 – lock drive lever; 5 - cable; 6 - lock; 7 - safety device; 8 - hood
Details of the hood are shown in fig. 9.24.
Withdrawal procedure:
- be sure to mark the position of the hood hinges with a felt-tip pen;
- disconnect the fluid supply pipe to the washer jet, mounted on the hood;
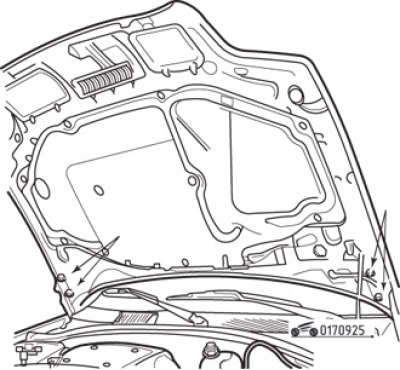
Pic. 9.25. Hood bolts
- unscrew the bolts securing the hood to the hinges (pic. 9.25), then, with an assistant, carefully remove the hood from the vehicle.
Installation order:
- screw in the hood mounting bolts, installing the hinges according to the previously applied marks, then tighten them securely;
- slowly lower the hood and check that the latch is engaged in the lock. With the hood closed, make sure that the gaps between it and the fenders are the same on both sides, and that the front edge of the hood is at the same height as the fenders;
- adjustment of the side clearances of the hood is carried out by moving the hinges, if the bolts of their fastening to the hood are released. The height of the front edge of the hood is adjusted by moving the hood latch. Clearance values are given at the beginning of the section.
Removal and installation of the lock of a cowl
Withdrawal procedure:
- open the hood;
- mark the position of the lock on the panel to facilitate installation;
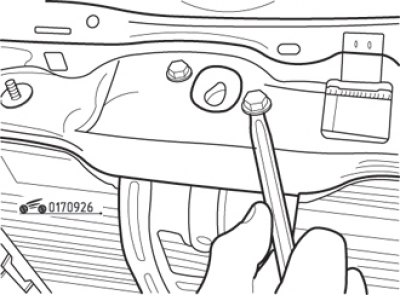
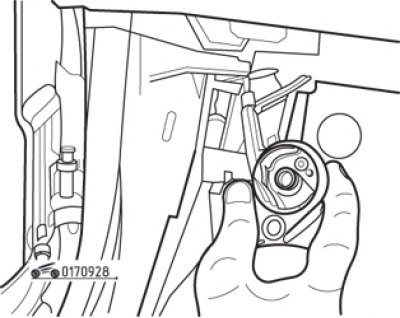
Pic. 9.26. Removing the hood latch bolt
- unscrew the two mounting bolts and remove the lock from the panel (pic. 9.26);
- disconnect the cable sheath from the lock, marking its position on the cross member of the body;
- disconnect the tip of the cable from the lock control lever and remove the lock;
- before installing the lock, check the condition of its parts and connections, lubricate them with grease.
Install in the reverse order of removal. Align the marks made during removal. Connect the lock control cable correctly. Adjust, if necessary, the position of the hood by moving the lock.
Removal and installation of a cable of the lock of a cowl
Withdrawal procedure:
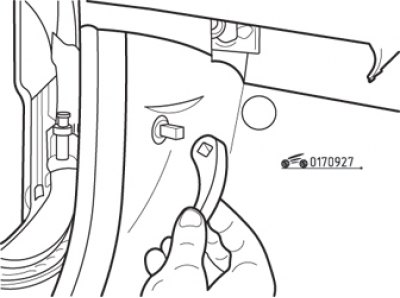
Pic. 9.27. Removing the hood lock lever
- in the cabin, disconnect the hood lock lever by removing it from the axle (pic. 9.27);
- remove the left side sill trim;
Pic. 9.28. Removing the hood latch lever assembly from the side sill
- unscrew the fastening screw and remove the cable lever assembly from the body (pic. 9.28);
- under the hood, disconnect the cable sheath from the lock and disconnect the cable tip from the lock lever;
- inside the car, carefully pull the cable through the seal in the engine shield, noting how the cable is routed.
Install in the reverse order of removal. Make sure that the cable seal is correctly installed in the motor shield. Lay the cable in the same way as it was laid before removal.