
Note. The outer ball joint can be replaced without removing the steering gear from the vehicle. Dir. 1305 allows the inner ball joints of the tie rods to be turned out through the wheel arch.
Removing
Place the car on a two post lift.
Disconnect the ball joint of the tie rod end from the steering knuckle using a puller! Av. 476.
Loosen the tie rod adjusting bolt and unscrew the tie rod end while holding the inner joint from turning with a wrench.
Mark the position of the tip or count the number of threads of the tip when unscrewing, so that you can pre-adjust the toe of the front wheels during installation.
Remove collars of a corrugated cover of a lath and remove a cover.
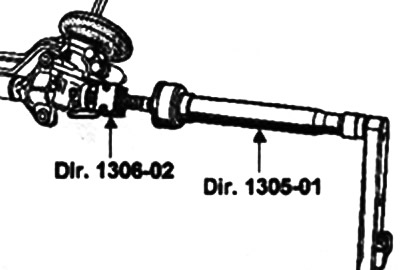
Turn the wheels so that the rack teeth come out of the steering gear housing on the side of the hydraulic distributor valve.
Install Dir. 1306-02 on the rails from the side of the hydraulic distributor.
In this position, unlock the inner ball joint using tool Dir. 1305-01.
Installation
Note. Before installing new tie rods, run a 12x100 tap through the threads of the parts to completely remove the LOCTITE adhesive sealant left from the factory assembly and to avoid seizing the threads during installation.
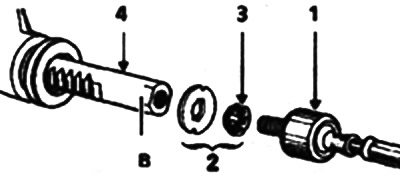
Always replace the thrust and lock washers 2. If the threaded end of the ball joint 1 is not damaged, it can be reused.
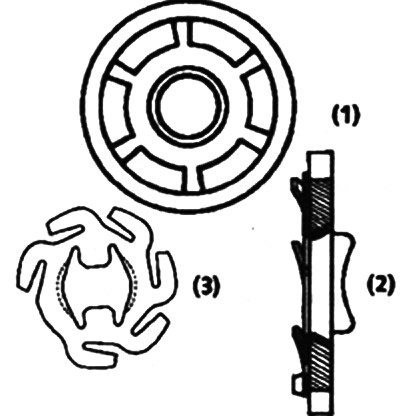
Install on rack 4, thrust washer 2, lock washer 3 and inner ball joint 1, pre-lubricating the threads with LOCTITE FRENBLOC.
Before final tightening of the axial ball joint with tool Dir. 1305, check that the tabs of the lock washer 2 are aligned with flats B on the steering rack.
Put on the bellows with new clamps.
Tighten the tie rod end by the number of turns noted during removal.
Attach the tie rod end ball joint to the steering knuckle and tighten the nuts to the specified torque.
Check and, if necessary, adjust the toe-in of the front wheels, then tighten the tie-rod end adjusting clutch bolt to the required torque.