
Required special tool
- Mot. 997-01 Tool for removing the injector and injection advance solenoid valve.
Tightening torques, Nm
- Injection advance solenoid valve 30.
Removing
1. Disconnect the electrical connector from the pump.
2. Disconnect the lugs of the two wires of the injection advance solenoid valve from the pump 10-pin connector.
To disconnect the tips from the pump connector:
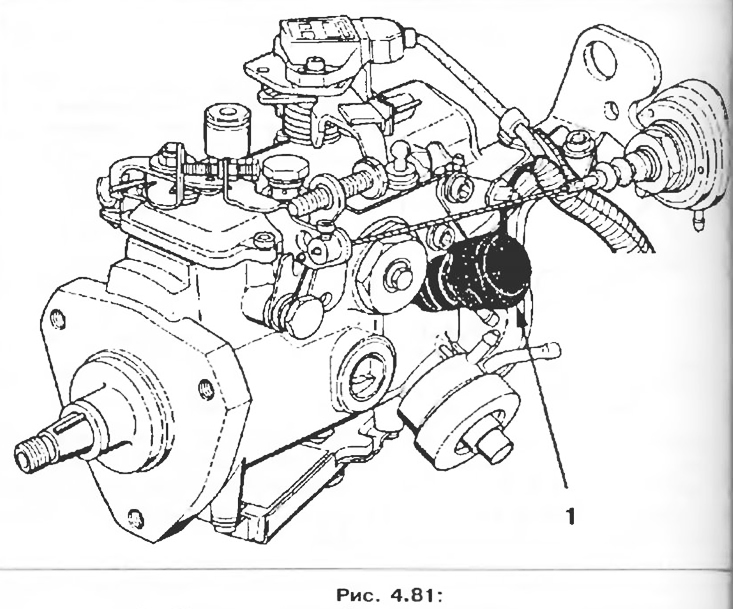
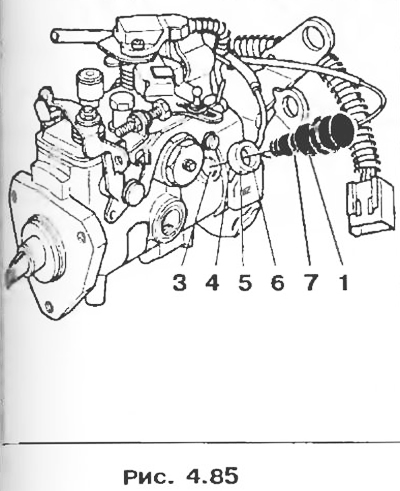
1 - Injection advance solenoid valve.
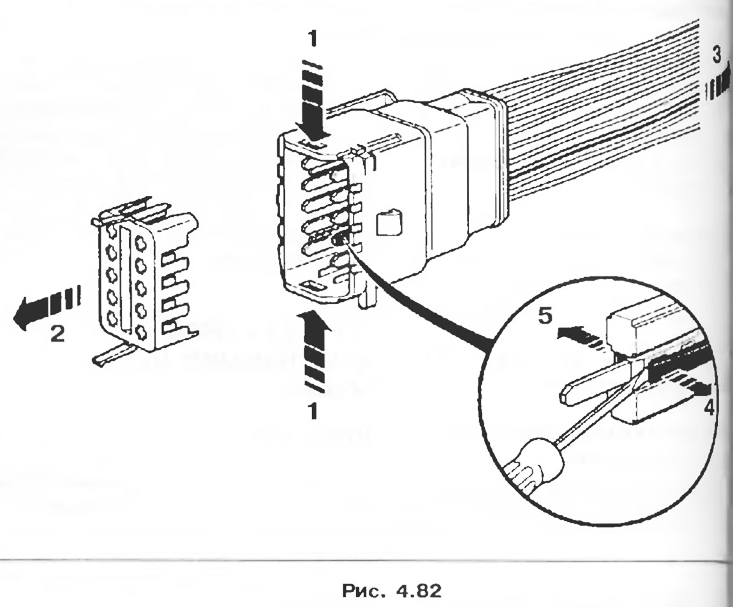
- pull the yellow plug 2 towards you to release it from the lugs, then press the two latches located on both sides of the connector;
- remove the yellow guide plug;
- tension the removed conductor;
- the tip is fixed in the connector by latches located on both sides; use a screwdriver to pry out one latch (a stretched wire will not allow the latch to return to its place);
- press the other latch with a screwdriver;
- remove the tip from the socket.
3. Remove the protective cover of the solenoid valve.
4. Remove the solenoid valve cover.
5. Remove the valve solenoid using tool Mot. 997-01.
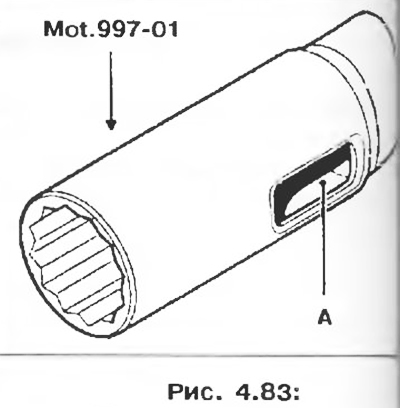
A - Groove for skipping the connector.
Installation
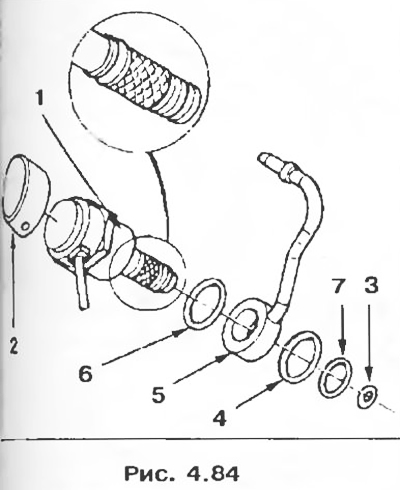
Attention! Be sure to remove the small mesh filter installed at the bottom of the channel, using tongs with fine jaws. Replace the filter with a new one. The outer part of the filter is a gasket that crushes when tightened to the recommended valve torque.
1. Install in order:
- gasket 4 of the return pipe 5;
- new valve 1, equipped with a strainer;
- two sealing rings 6 and 7.
3. Tighten the valve with cement to 30 Nm using tool Mot. 997-1.
4. Put a new protective boot on the valve.
5. Connect two of its tips to the connector.
6. Connect the connector.
7. Install the protective cover of the harness and its retaining ring.
8. Bleed the diesel fuel circuit with the booster pump before starting the engine.
Attention! Be sure to delete the information about the malfunction from the computer's memory by typing the command «GO**» on the RX25 diagnostic tool.
9. After completing the operation, do not forget to test the vehicle.