



Contents: Tightening torques for removing and…🠛 Removal 🠛 Preparing for installation 🠛 Installation 🠛
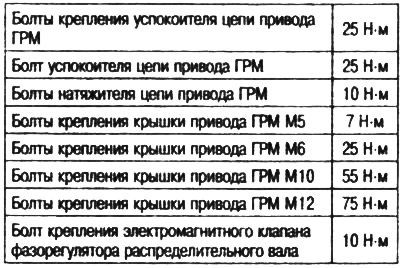
Tightening torques for removing and installing the timing chain
Removal
Remove the engine assembly with the gearbox.
Place the engine on a stand for assembly and disassembly. Drain the oil from the engine.
Remove the accessory drive belt.
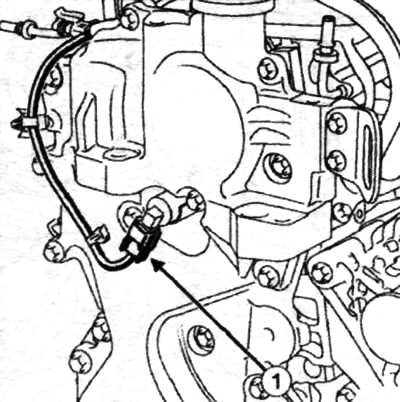
Disconnect the wiring (1) of the camshaft phase adjuster solenoid valve.
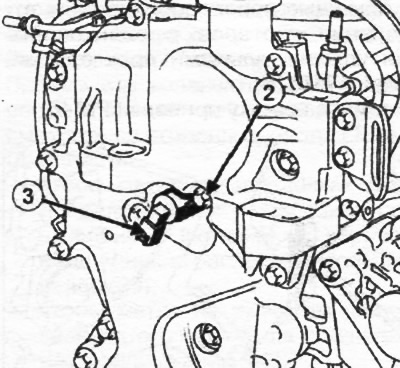
Remove:
- bolt (2) for fastening the electromagnetic valve of the camshaft phase regulator;
- electromagnetic valve of the camshaft phase regulator (3).
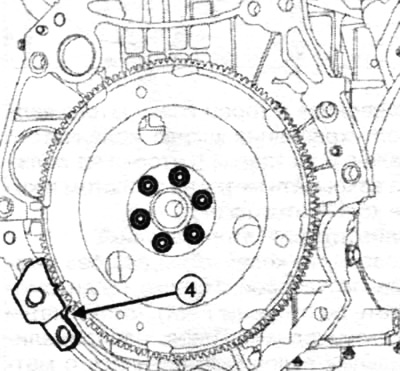
Install the flywheel retainer (4) of the drive disk onto the cylinder block.
Remove the crankshaft pulley and side seal.
Remove the timing belt cover mounting bolts, noting their position.
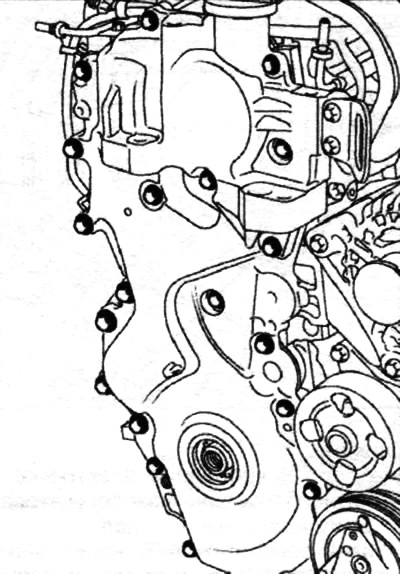
Remove the timing belt cover using the crankcase separator with silicone seals (Mot. 1716) (5).
Remove the timing belt cover (6).
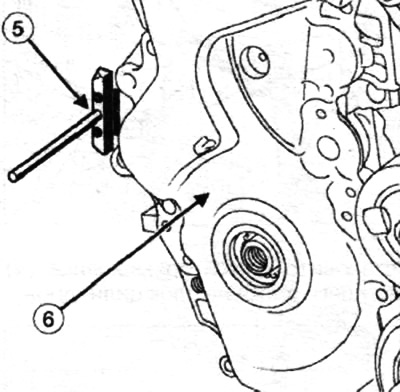
Screw the crankshaft pulley mounting bolt with a spacer into the end of the crankshaft (which should not cover the mark on the toothed pulley of the crankshaft).
Remove the flywheel retainer.
Turn the crankshaft clockwise without jerking (if you look from the timing belt side), so that the marks (7) on the camshaft toothed pulleys are aligned with the marks (8) on the cylinder head cover, and make sure that the mark (9) on the crankshaft toothed pulley is in the lower vertical position.
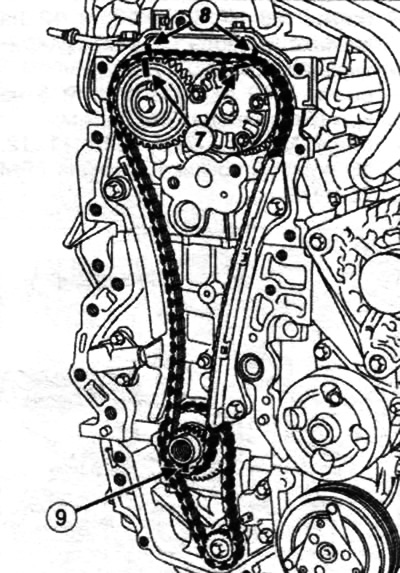
Install the flywheel retainer.
Loosen the crankshaft pulley mounting bolt.
Press the timing chain tensioner.
Insert the metal rod (10) into the tensioner to loosen the chain.
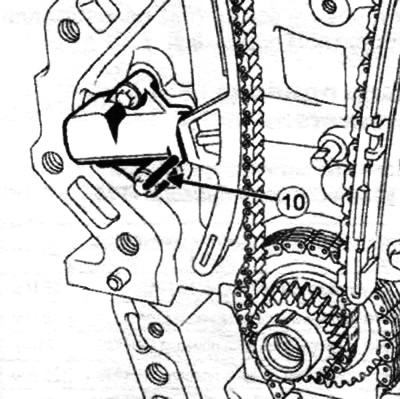
Remove:
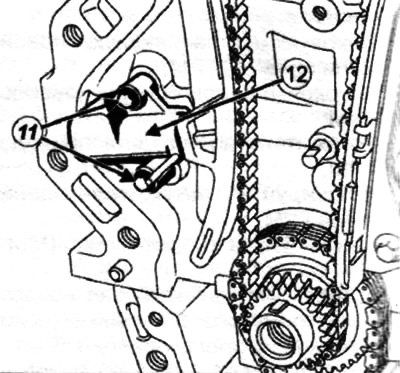
- timing chain tensioner mounting bolts (11);
- timing chain tensioner (12).
Remove:
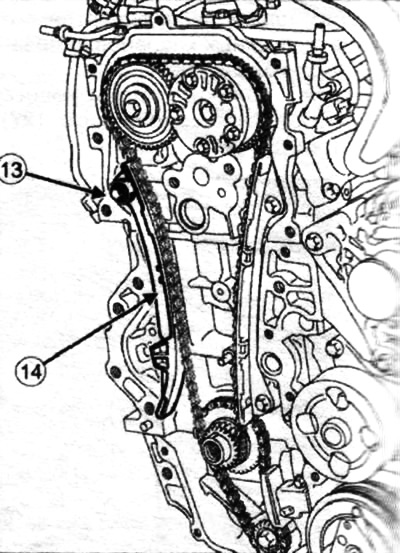
- mounting bolt (13) of the timing chain damper;
- timing chain damper (14).
Remove:
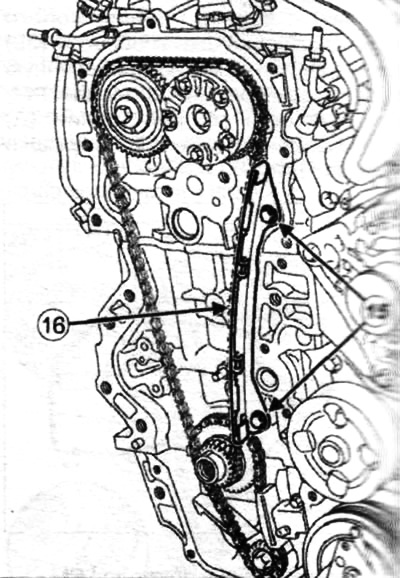
- bolts (15) for fastening the timing chain guide;
- timing chain shoe (16).
 |
 |
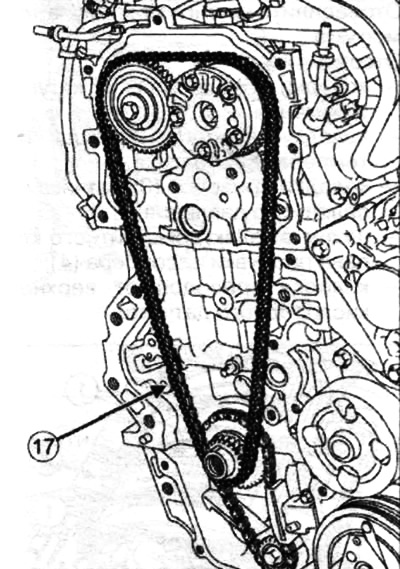
Remove the timing chain (17).
Preparing for installation
Clean the timing case mating surfaces with a mating surface solvent.
Remove any residue with a plastic spatula.
Finish cleaning the mating surfaces with a mating wheel.
Use surface cleaner to clean:
- the mating surface of the timing cover on the cylinder block and the cylinder head;
- timing mechanism drive cover.
Parts that must be replaced:
- crankshaft pulley mounting bolt;
- timing chain tensioner damper;
- timing chain tensioner;
- timing chain;
- crankshaft side seal;
- timing chain damper.
Installation
Check:
- so that the marks (18) on the cylinder head cover are aligned with the marks on the camshaft toothed pulleys;
- so that the mark on the crankshaft toothed pulley (19) faces vertically downwards.
Set the piston of the 1st cylinder to TDC.
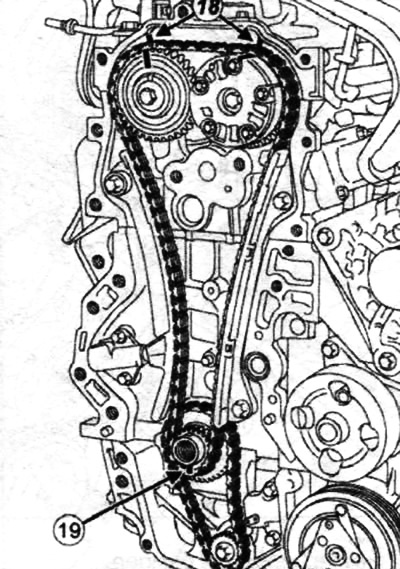
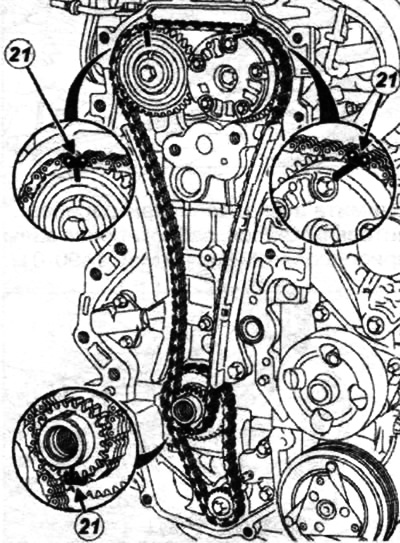
Install the new chain by aligning the timing chain marks (21) with the marks on each sprocket.
(Text published on the website www.Renaultbook.ru)
Install:
- new timing chain guides;
- timing chain guide mounting bolts.
Tighten the timing chain guide mounting bolts to the required torque of 25 Nm.
Install:
- new timing chain tensioner;
- timing chain tensioner mounting bolts.
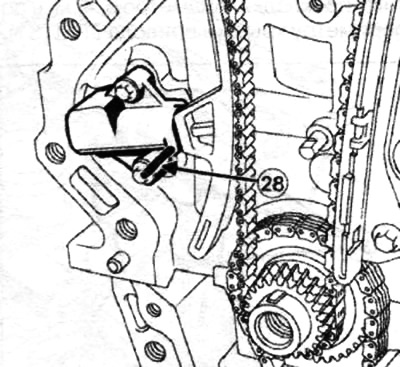
Tighten the timing chain tensioner bolts to the specified torque of 10 Nm. Remove the metal rod (28) to unlock the timing chain tensioner.
Screw the old crankshaft pulley mounting bolt with a spacer into the end of the crankshaft (which should not cover the mark on the toothed pulley of the crankshaft). Remove the flywheel retainer.
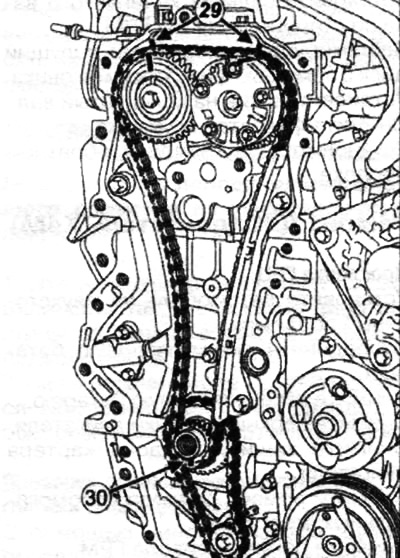
Turn the crankshaft two revolutions clockwise (if you look from the timing drive side).
Check:
- so that the marks on the camshaft sprockets are aligned with the marks on the camshaft bearing housing (29);
- so that the mark on the crankshaft toothed pulley faces vertically downwards (30).
Lock the flywheel or drive plate with a flywheel lock. Remove the old crankshaft pulley bolt and spacer. Remove the flywheel lock.
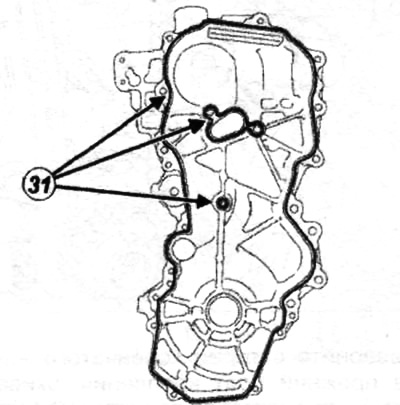
Apply a 4 mm diameter bead of silicone sealant gasket around the perimeter of the timing belt cover (31).
Install:
- timing mechanism drive cover;
- timing belt cover mounting bolts.
Tighten in the order shown to the specified torque:
- timing belt cover mounting bolts M5 7 Nm;
- timing belt cover mounting bolts MB 25 Nm;
- timing belt cover mounting bolts M10 55Nm;
- timing belt cover mounting bolts M12 75 Nm.
Install the crankshaft oil seal on the timing drive side.
Lock the flywheel or drive plate with the flywheel lock. Install the pulley on the crankshaft. Remove the flywheel lock.
Install all parts in reverse order.