
Removing
Front doors
1. Remove an internal covering of a door.
2. Disconnect the door wiring, then coil the wire so that it protrudes from the other side.
3. Using pliers, remove the cotter pin securing the door stopper.
4. Remove the bottom trim to gain access to the door hinge nuts.
5. Ask an assistant to hold the door. You can also put wooden wedges covered with rags from below.
6. Using a socket of the desired size with an extension, unscrew the 2 nuts securing each of the hinges on the body pillar (see illustration).
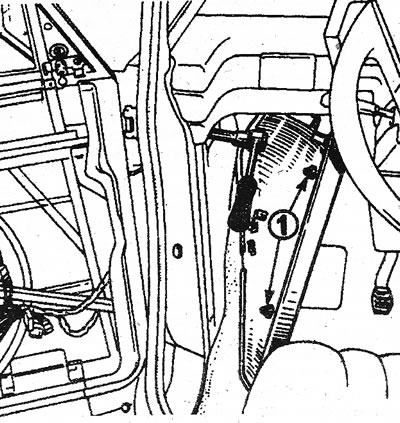
5.6 Remove trim (clips 1), then unscrew the door hinge nuts
7. Carefully lift the door and remove the wooden wedges.
Rear doors
8. Remove the inner door trim (see chapter 8).
9. Disconnect the door wiring, then coil the wire so that it protrudes from the other side.
10. Using pliers, remove the door stopper cotter pin.
11. To gain access to the inner nuts, unscrew the lower seat belt mounting bolt and partially remove the trim around the body pillar.
12. Ask an assistant to support the door.
13. Turn away two bolts of fastening of the top hinge and two nuts of fastening of the lower hinge and carefully remove a door, lifting it. Remove the wedging gaskets, remembering their location (see illustration).
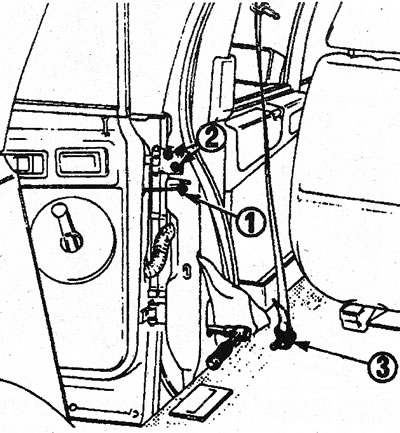
5.13 Attaching the rear door 1. Lock pin; 2. Bolts for fastening the upper hinge; 3. Bolt of fastening of a seat belt
Installation
14. Installation is carried out in the reverse order. To accurately set the door at the desired level, use wedging gaskets.