
| Torque | |
| Support bolts | 105 Nm |
| Fastening of rigid pipelines to wheel cylinders | 14 Nm |
| Fastening rigid pipelines to brake hoses | 14 Nm |
Removing
Release the parking brake.
Place the car on a two post lift.
Remove rear wheels.
Install the pedal hold down tool
on the brake pedal to reduce the amount of brake fluid escaping.
Remove brake drums.
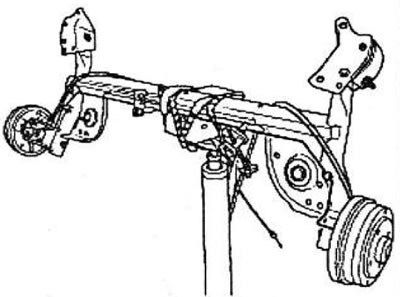
Disconnect the parking brake cables (1), by pulling the lever (2) using pliers and a screwdriver.
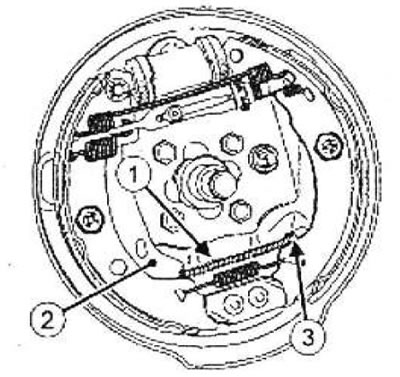
Disconnect:
- shells (3) cables of the parking brake drive from the shield of the brake mechanism,
- wheel speed sensors (if they are).
Disconnect the rear wheel speed sensors from the rear suspension beam (if they are).
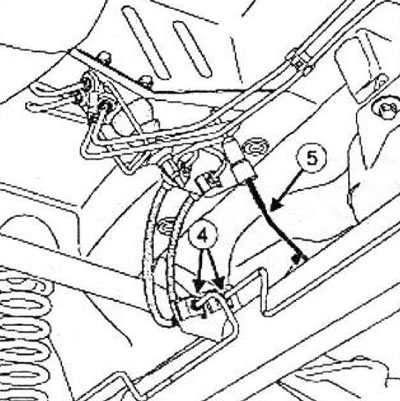
Turn away unions of connections of rigid pipelines with brake hoses (4).
Disconnect from a beam of a back suspension bracket draft of a regulator of brake forces (5) (if he is).
Remove the rear suspension springs.
Loosen the fittings securing the rigid brake lines to the wheel cylinders.
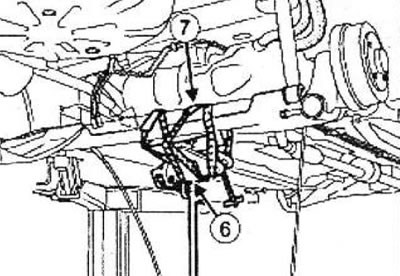
Place hydraulic jack tool (6) under the center of the rear suspension beam.
Attach the rear suspension beam to the hydraulic jack using a safety strap (or belts) (7).
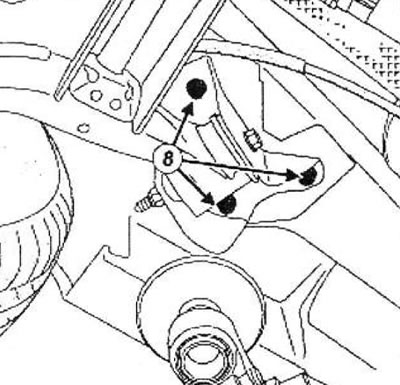
Loosen the bracket bolts (8).
Lower the rear suspension beam using a hydraulic jack.
Remove:
- rear suspension beam with hydraulic jack,
- nodes attached to it from the rear suspension beam.
Installation
Silent block bolts must be replaced.
Secure the rear suspension beam with straps to the hydraulic jack.
Install the rear suspension beam under the vehicle.
Apply high-strength locking compound to the threads of the bearing bolts.
Position the mounting tabs of the brackets against the centering holes.
Wrap fastening bolts, since the left arm.
Establish brake pipelines in sockets.
Fix the compensator rod (5) on the rear suspension (if it is installed).
Wrap unions of connections of rigid brake pipelines with brake hoses.
Remove the safety strap (or belts) and hydraulic jack.
Install the brake shields.
Torque tighten the support mounting bolts (105 Nm).
Torque tighten:
- fittings for fastening rigid pipelines to wheel cylinders (14 Nm),
- unions of fastening of rigid pipelines to brake hoses (14 Nm).
Install:
- rear suspension springs
- parking brake cables.
Make sure the parking brake cable stoppers are correctly inserted into their sockets.
Install brake drums.
Install wires and wheel speed sensors (if this equipment is installed on the vehicle).
Connect the wiring from the parking brake drive and control unit to the equalizer.
Adjust rear wheel alignment.
Install the rear wheels.
Remove the retainer to hold the pedal depressed.
Remove air from the brake system.