
English Русский
Български
Беларускі
Український
Српски
Hrvatski
Română
Polski
Slovenský
Magyar
Bookmark Contacts Articles Sitemap
Company vehicles Peugeot Company vehicles Opel Company vehicles Skoda Company vehicles Land Rover Company vehicles Mitsubishi Company vehicles Volkswagen Company vehicles Honda
RenaultBook.ru


Duster   Fluence   Kangoo   Laguna   Logan   Megane   Sandero   Scenic   Symbol   Clio   Other
Clio 1 (1990-1998)

Crankshaft — removal (Renault Clio 1)

  • Main
  • Clio
  • Clio 1 (1990-1998)
  • Power unit
  • Overhaul of engines
  • Crankshaft — removal
0
1. Remove the timing belt/chain, rear drive cover and front plate (e- and F-series engines), or flywheel/drive plate, pistons, oil pump and crankshaft rear oil seal housing (d-series engine), proceed as follows.

2. Before removing the crankshaft, check the axial play using a micrometer (see illustration).
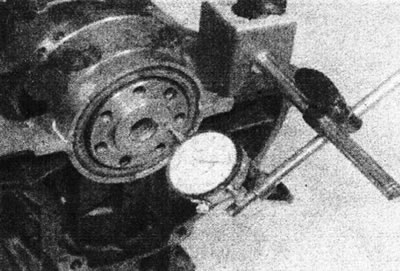
13.2. Check the axial play of the crankshaft with a micrometer.

13.2. Check the axial play of the crankshaft with a micrometer.


Push the crankshaft all the way to one side, then set the micrometer to zero. Extend the crankshaft completely to the other side and check the axial clearance. The result can be compared with that stated in the Specifications to determine whether new thrust washers are required.

3. If you don't have a micrometer, you can use feeler gauges. First push the crankshaft towards the flywheel/drive plate, then insert a feeler gauge between the counterweight of the crankshaft journal No. 2 and the thrust washer of the center main bearing (c-, D- and E-series engines) (see illustration), or between the counterweight of the crankshaft journal No. 1 and the thrust washer of the main bearing No. 2 (f-series engine).
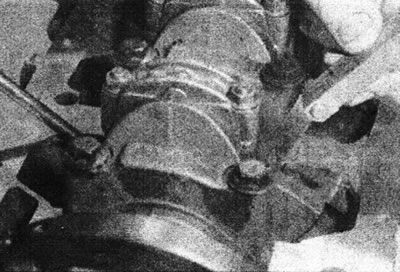
13.3. Check the crankshaft axial play with a feeler gauge - C- and E-series engines.

13.3. Check the crankshaft axial play with a feeler gauge - C- and E-series engines.


4. The main bearing caps must be marked with numbers. If this is not the case, number the cover and crankcase using a punch, as was done for the connecting rods and their caps (see illustration).

13.4. Identification numbers (marked with arrows) on main bearings.

13.4. Identification numbers (marked with arrows) on main bearings.


5. Unscrew the main bearing cap mounting bolts and remove the caps together with the liners (see illustration).
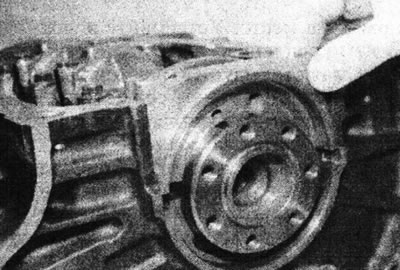
13.5. Remove main bearing cap No. 1.

13.5. Remove main bearing cap No. 1.


If this does not work, hit the lid with a wooden or copper mallet.

6. Carefully lift the crankshaft out of the crankcase.

7. Remove the thrust washers from each side of the center main bearing (c- and E-series engines) or main bearing No. 2 (f-series engine), then remove the upper halves of the liners from the crankcase. On D-series engines, the thrust washers are mounted in the center upper main bearing, which has no locating lug, so it can be installed in any orientation - remember the bearing/thrust washer orientation if they will not be changed (see illustrations).
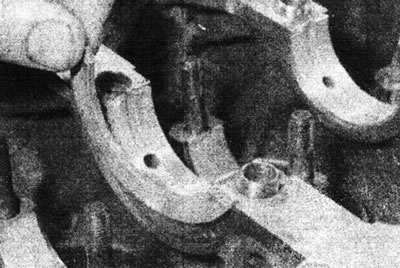


13.7a. Remove the thrust washers...
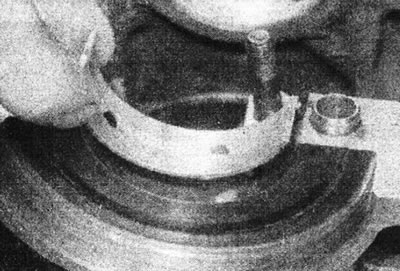
13.7a. Remove the thrust washers...


13.7b....and the upper halves of the main bearings...
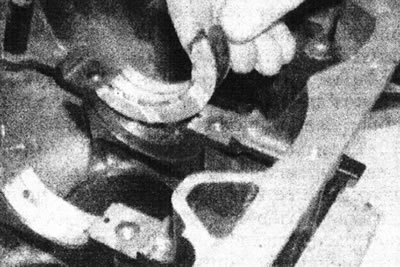
13.7b....and the upper halves of the main bearings...


13.7s....or bearing shells with thrust washers on D-series engines.

13.7s....or bearing shells with thrust washers on D-series engines.


Store liners with the appropriate lid.

8. Where necessary, remove the oil seal from the rear of the crankshaft.
This article is available on: russian, bulgarian, belarusian, ukrainian, serbian, croatian, romanian, polish, slovak, hungarian
Article has been reviewed by editor: Fedoseev Denis
Share with friends:
Previous
Clio 1: Overhaul of engines
Next

Piston/Connecting Rod Assemblies — removal
Camshaft and Rocker Arms (C-Series Engine) — removal, inspection, and…
Intermediate Shaft (Early F-Series Engines) — removal, inspection,…
Cylinder head assembly
Cylinder head and valves — cleaning, inspection and maintenance
Cylinder block/crankcase and cylinders — cleaning and inspection
Piston/Connecting Rod Assemblies — inspection and assembly
Crankshaft — inspection
Main and connecting rod bearings — inspection
Engine overhaul — assembly sequence
Other articles on other Renault models

➽ Crankshaft oil seal on the timing drive side Renault Duster 1 (2009-2017)
➽ Cylinder block and crankshaft of the K4M engine Renault Fluence 1 (2009-2020, petrol)
➽ Front crankshaft oil seal Renault Kangoo 1 (1997-2007)
➽ Replacing crankshaft seals Renault Logan 1 (2004-2012, petrol)
➽ Replacing crankshaft seals Renault Megane 1 (1995-2002)
Link to this article in different formats
Reviews and comments of visitors
No comments yet


Add two numbers 17 + 18


Clio 1 (1990-1998) 
  • General information
  • Maintenance
  • Troubleshooting
  • Power unit
  • Petrol engines 1.1 l (C)
  • Petrol engines 1.2 l (D)
  • Petrol engines 1.2/1.4 l (E)
  • Petrol engines 1.8 l (F)
  • Diesel engines
  • Overhaul of engines
  • Cooling and heating
  • Fuel system (carburetor)
  • Central fuel injection
  • Distributed fuel injection
  • Fuel system (diesel)
  • Starting and charging system
  • Ignition system (transistor)
  • Ignition system (electronic)
  • Pre-heating of diesel engines
  • Transmission
  • Clutch
  • Manual gearbox
  • Automatic gearbox
  • Drive shafts
  • Chassis, running gear
  • Brake system
  • Car suspension
  • Steering system
  • Body and interior
  • Exterior (external elements)
  • Doors, locks and windows
  • Electrical equipment
  • Equipment and devices
  • Electrical circuits
RenaultBook.ru © 2018–2026 | Mobile version | News and articles | Sitemap: EN BG BY UA RS HR RO PL SK HU | Administration | Site search | Bookmark
Duster 1 (2009-2017) | Fluence 1 (2009-2020, petrol) | Kangoo 1 (1997-2007) | Laguna 2 (2001-2007) | Logan 1 (2004-2012, petrol) | Logan 2 (2012-2020) | Megane 1 (1995-2002) | Megan 2 (2002-2009, petrol) | Sandero 1 (2007-2012, petrol) | Scenic 1 (1996-2003) | Symbol 1 (1999-2008, petrol) | Symbol 2 (2008-2013, petrol) | Renault 19 (1988-1996) | Espace I and II (1984-1996) | Espace III (1996-2002) | Clio 1 (1990-1998) |
We want your visit to be comfortable 😌 and use cookies 🍪 to do so.