
English Русский
Български
Беларускі
Український
Српски
Hrvatski
Română
Polski
Slovenský
Magyar
Bookmark Contacts Articles Sitemap
Company vehicles Peugeot Company vehicles Opel Company vehicles Skoda Company vehicles Land Rover Company vehicles Mitsubishi Company vehicles Volkswagen Company vehicles Honda
RenaultBook.ru


Duster   Fluence   Kangoo   Laguna   Logan   Megane   Sandero   Scenic   Symbol   Clio   Other
Clio 1 (1990-1998)

Camshaft — removal, inspection and installation (Renault Clio 1)

  • Main
  • Clio
  • Clio 1 (1990-1998)
  • Power unit
  • Petrol engines 1.2 l (D)
  • Camshaft — removal, inspection and installation
0
Contents: Removal 🠛 Inspection 🠛 Installation 🠛
Note: A new front camshaft oil seal will be required for installation.


Removal


1. Remove the cylinder head as described in Chapter 11, and place it on the workbench.

2. Gradually loosen the bolts holding the rocker arm shaft to the mounting plates on the cylinder head and remove the rocker arm shaft assembly (see illustration).
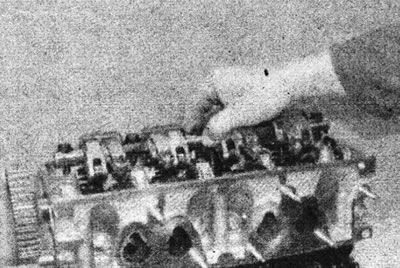
10.2 Remove the rocker arm shaft assembly.

10.2 Remove the rocker arm shaft assembly.


3. Loosen the camshaft sprocket mounting bolt and remove it together with the washer. To prevent the camshaft from rotating, make a tool from two steel plates (long and short) and three nuts and bolts. One bolt and nut should form the axis of the forked grip, and the other two pairs at the ends of the forks are inserted into the holes in the sprocket (see illustration 8.6).
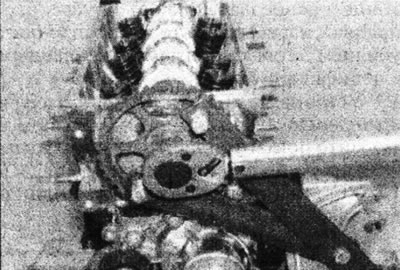
8.6. Hold the camshaft sprocket from rotating using a homemade tool.

8.6. Hold the camshaft sprocket from rotating using a homemade tool.


Alternatively, if the valve cover and rocker shaft have been removed, the camshaft can be held using a suitable spanner on the splines on the timing belt side of the shaft. Remove the camshaft sprocket (see illustration).
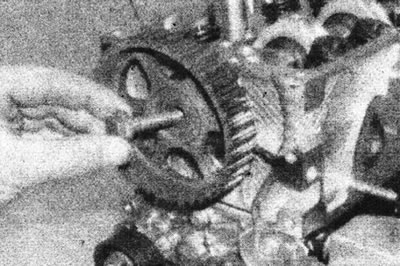
10.3. Remove the camshaft sprocket bolt.

10.3. Remove the camshaft sprocket bolt.


4. Using a micrometer, measure the axial clearance of the camshaft and compare it with the one given in Specifications (see illustration).
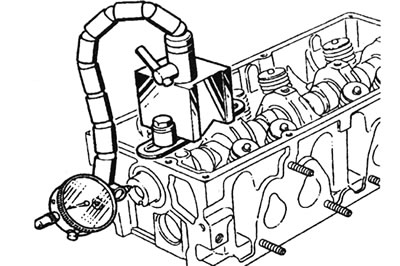
10.4 Measure the axial clearance of the camshaft using a micrometer.

10.4 Measure the axial clearance of the camshaft using a micrometer.


In this way, the degree of wear of the support plate can be determined.

5. Remove the front camshaft oil seal, see Chapter 9.

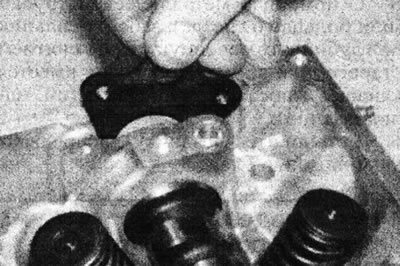
6. Unscrew the two bolts and remove the support plate from the groove in the cylinder head (see illustrations).
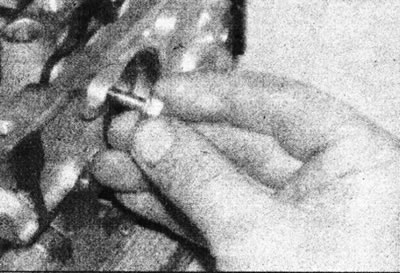


10.6a. Unscrew the two bolts...
10.6a. Unscrew the two bolts...


10.6b....and remove the support plate from the groove in the cylinder head.

10.6b....and remove the support plate from the groove in the cylinder head.


Remember the orientation of the plate so that it can be installed in the same position.

Text of the original source on this website [renaultbook.ru]

7. Carefully remove the camshaft from the cylinder head from the sprocket side, without damaging the working surfaces (see illustration).
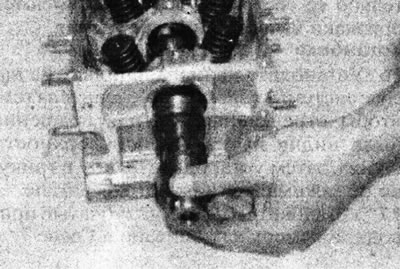
10.7. Remove the camshaft.

10.7. Remove the camshaft.


Inspection


8. Inspect the working surfaces of the bearings and camshaft cams for wear and scratches. Replace the camshaft if such damage is found.

9. Check the condition of the working surfaces on the camshaft and in the cylinder head. If the working surfaces in the head are excessively worn, the head must be replaced.

Installation


10. Lubricate the bearing surfaces in the cylinder head and the camshaft lobes, then insert the camshaft into the head.

11. Install the support plate (if the old one is installed, orient it correctly as noted before removal), then insert and tighten the bolts.

12. Measure the axial play as described in point 4 and ensure that it is within the limits given in Specifications. Excessive axial play can only be due to wear of the support plate or camshaft.

13. Install the new front camshaft oil seal, see Chapter 9.

14. Install the camshaft sprocket, the protrusion on it should enter the slot at the end of the camshaft. Lock the camshaft, then insert and tighten the bolt to the specified tightening torque Specifications.

15. Install the rocker arm shaft assembly and mounting plates, then insert and tighten the bolts to the specified torque Specifications.

16. Install the cylinder head as described in Chapter 11.
This article is available on: russian, bulgarian, belarusian, ukrainian, serbian, croatian, romanian, polish, slovak, hungarian
Article has been reviewed by editor: Fedoseev Denis
Share with friends:
Previous
Clio 1: Petrol engines 1.2 l (D)
Next

Front camshaft oil seal — replacement
Timing Belt and Sprocket Tensioner Mechanism — removal, inspection…
Toothed drive belt — removal, inspection, installation and adjustment
Timing Belt Covers — removal and installation
Crankshaft pulley — removal and installation
Cylinder head — removal and installation
Oil pump sump and intake pipe — removal and installation
Oil pump — removal and installation
Oil pump — disassembly, inspection and assembly
Crankshaft seals — replacement
Other articles on other Renault models

➽ Camshaft Renault Duster 1 (2009-2017)
➽ Replacement of camshaft seals of the K4M engine Renault Fluence 1 (2009-2020, petrol)
➽ Engine with camshaft pulley with marks Renault Kangoo 1 (1997-2007)
➽ Replacing camshaft seals Renault Laguna 2 (2001-2007)
➽ Replacing the camshaft seal Renault Logan 1 (2004-2012, petrol)
Link to this article in different formats
Reviews and comments of visitors
No comments yet


Add two numbers 11 + 26


Clio 1 (1990-1998) 
  • General information
  • Maintenance
  • Troubleshooting
  • Power unit
  • Petrol engines 1.1 l (C)
  • Petrol engines 1.2 l (D)
  • Petrol engines 1.2/1.4 l (E)
  • Petrol engines 1.8 l (F)
  • Diesel engines
  • Overhaul of engines
  • Cooling and heating
  • Fuel system (carburetor)
  • Central fuel injection
  • Distributed fuel injection
  • Fuel system (diesel)
  • Starting and charging system
  • Ignition system (transistor)
  • Ignition system (electronic)
  • Pre-heating of diesel engines
  • Transmission
  • Clutch
  • Manual gearbox
  • Automatic gearbox
  • Drive shafts
  • Chassis, running gear
  • Brake system
  • Car suspension
  • Steering system
  • Body and interior
  • Exterior (external elements)
  • Doors, locks and windows
  • Electrical equipment
  • Equipment and devices
  • Electrical circuits
RenaultBook.ru © 2018–2026 | Mobile version | News and articles | Sitemap: EN BG BY UA RS HR RO PL SK HU | Administration | Site search | Bookmark
Duster 1 (2009-2017) | Fluence 1 (2009-2020, petrol) | Kangoo 1 (1997-2007) | Laguna 2 (2001-2007) | Logan 1 (2004-2012, petrol) | Logan 2 (2012-2020) | Megane 1 (1995-2002) | Megan 2 (2002-2009, petrol) | Sandero 1 (2007-2012, petrol) | Scenic 1 (1996-2003) | Symbol 1 (1999-2008, petrol) | Symbol 2 (2008-2013, petrol) | Renault 19 (1988-1996) | Espace I and II (1984-1996) | Espace III (1996-2002) | Clio 1 (1990-1998) |
We want your visit to be comfortable 😌 and use cookies 🍪 to do so.