



Camshaft sprocket
Removal
1. Remove the timing belt as described in Chapter 7. Note that it is not necessary to remove the belt completely; it is sufficient to remove it only from the camshaft sprocket. Do not rotate the crankshaft or camshaft until the belt is in place.
2. Loosen the camshaft sprocket mounting bolt and remove it together with the washer. To prevent the camshaft from rotating, make a tool from two steel plates (long and short) and three nuts and bolts. One bolt and nut should form the axis of the forked grip, and the other two pairs at the ends of the forks are inserted into the holes in the sprocket (see illustration 8.6). Alternatively, if the valve cover and rocker shaft have been removed, the camshaft can be held using a suitable spanner on the splines on the timing belt side of the shaft. Do not allow the camshaft to rotate when loosening the sprocket bolt.
3. Remove the sprocket from the camshaft.
Inspection
4. Clean the sprocket thoroughly and replace it if it is worn, damaged or cracked.
Installation
5. Install the sprocket so that the protrusion on it fits into the slot on the end of the camshaft (see illustration).
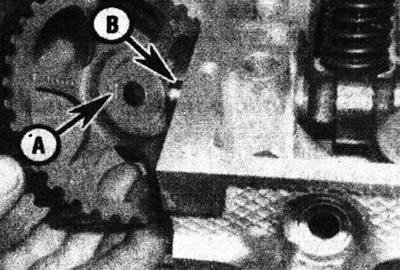
8.5 Make sure that the projection (A) on the sprocket fits into the slot (B) on the end of the camshaft.
6. Lock the sprocket using the same method used during removal, then tighten the mounting bolt to the tightening torque specified in the Specifications (see illustration).
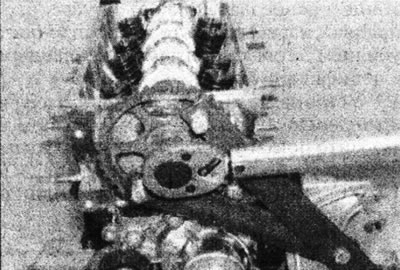
8.6. Hold the camshaft sprocket from rotating using a homemade tool.
Do not allow the camshaft to rotate when tightening the sprocket bolt.
7. Install and tension the timing belt as described in Chapter 7.
Crankshaft sprocket
Removal
8. Proceed as described in point 1.
9. Remove the sprocket from the end of the crankshaft.
Inspection
10. Clean the sprocket thoroughly and replace it if it is worn, damaged or cracked.
Installation
11. Install the sprocket so that the protrusion on it fits into the slot on the end of the crankshaft. The sprocket should be facing inward with the flange, and the TDC mark on the sprocket should be aligned with the corresponding mark on the bottom of the oil pump flange (see illustration).
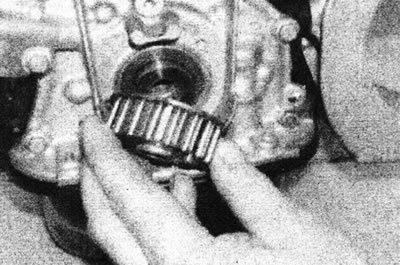
8.11. Install the crankshaft sprocket.
12. Install and tension the timing belt as described in Chapter 7.
Tensioner pulley
Removal
13. Proceed as described in point 1.
14. Loosen the mounting nut and remove the washer, then remove the tensioner pulley from the stand on the coolant pump.
Inspection
15. Clean the tensioner pulley, but do not use a strong solvent that may get into the pulley bearing. Make sure the pulley rotates freely, without binding or play. Replace the assembly if you are unsure about its condition or if there are signs of wear or damage.
Installation
16. Install the pulley onto the stud on the water pump, making sure the direction of rotation arrow is visible on the outside of the pulley, then install the washer and nut, but do not tighten the nut at this stage.
17. Install and tension the timing belt as described in Chapter 7.
Coolant pump pulley
18. The pulley is built into the cooling system pump and cannot be removed separately.