



Contents: Removal 🠛 Installation 🠛
The mechanisms installed on right-hand and left-hand drive vehicles are different, but the methods for removing them are the same.
Removal
Disconnect the wires from the battery terminals, starting with the negative terminal.
Remove the nut caps.
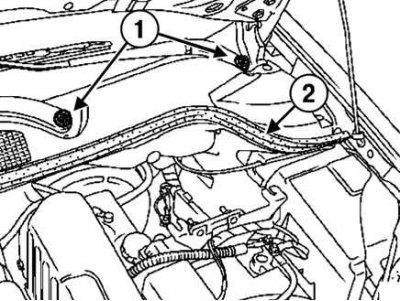
Fig. 7.103. Removing the windshield wiper arm fastening: 1 – fastening nuts; 2 – air intake niche seals
Remove the windshield wiper arm mounting nuts (fig. 7.103).
Remove the windshield wiper arms using a special tool (Ele. 1294-01).
Remove the air intake niche seals.
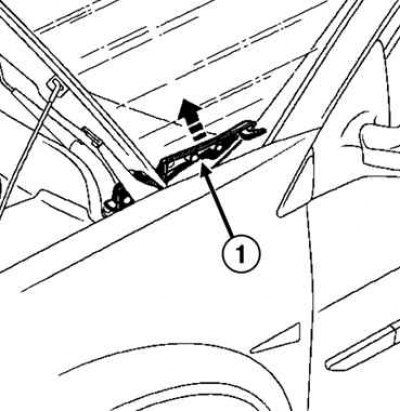
Fig. 7.104. Removing the side decorative trims of the windshield: 1 - pads
Remove the lower side windshield trim panels (fig. 7.104).
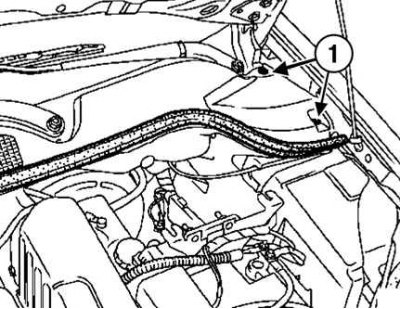
Fig. 7.105. Removing the air intake niche grille fasteners: 1 – mounting screws
Remove the screws securing the air intake grille (fig. 7.105).
Disconnect the windshield wiper motor connector.
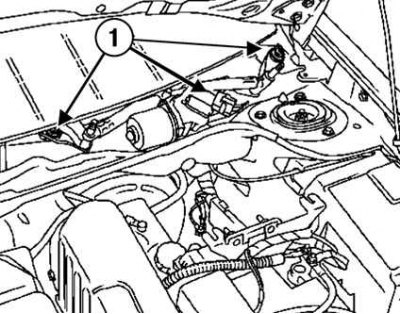
Fig. 7.106. Removing the windshield wiper mechanism fasteners: 1 – mounting bolts
Unscrew the three bolts securing the mechanism (fig. 7.106).
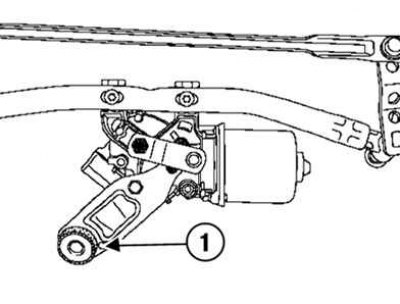
Fig. 7.107. Loosening the fastening nut: 1 – mounting bolt
Loosen the fastening lug nut (fig. 7.107).
Remove the foot from the socket. Tilt and remove the mechanism.
Installation
Tilt the mechanism and put it back in place.
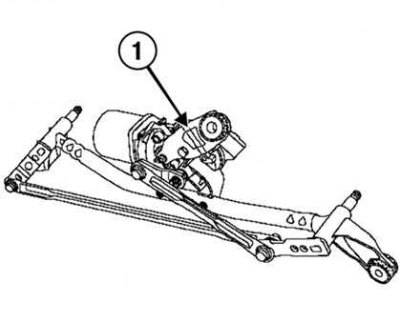
Fig. 7.108. Installing the fastening foot: 1 – fastening paw
Install the mounting tab without tightening the bolt (fig. 7.108).
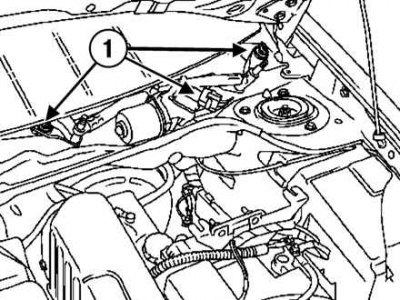
Fig. 7.109. Installing the mechanism mounting bolts: 1 – mounting bolts
Tighten the three bolts that secure the mechanism (fig. 7.109).
Tighten the mechanism mounting bolts to the required torque of 8 Nm.
Install:
- air intake niche grille;
- lower side decorative trims of the windshield;
- air intake niche seal.
Caution: Before installing the wiper arms, make sure that the wiper motor is in the position that corresponds to the original position of the blades on the windshield.
This article is taken from the website (renaultbook.ru)
Caution! When installing the windshield wiper arms, make sure that the arms are in good condition (no cracks or damage to splines).
Clean the splines of the motor shafts.
Use new mounting nuts.
Install the right lower arm with brush (from the passenger side) according to the mark on the windshield.
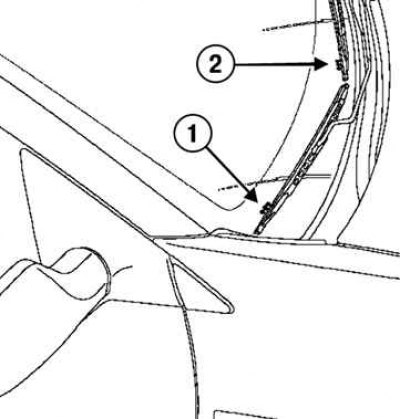
Fig. 7.110. Installing the lower and upper arms: 1 – lower arm; 2 – lower arm
Install the right upper control arm (from the driver's side) along the mark parallel to the air intake niche (fig. 7.110).
Tighten the wiper arm mounting nuts to the specified torque of 21 N·m.
Note: The wiper arms are different - the passenger side arm is more curved.
Connect the battery.
Connect the windshield wiper motor connector.