



Contents: Removal 🠛 Installation 🠛
Note: When installing the pan, you will need CAF 4/60 THIXO paste and a suitable sealant to coat the ends of the cylindrical pins that connect the drive shaft to the gearbox.
Removal
1. Disconnect the negative and positive cables from the battery (start with the negative).
2. Drain the engine oil as described in Section 1. Install and tighten the drain plug using a new washer.
3. Jack up the front of the vehicle and place it on axle stands. Remove the right front wheel.
4. Remove the plastic cover from inside the wheel arch to gain access to the engine.
5. Remove the hood as described in Section 11.
6. Remove the air cleaner assembly according to the relevant Part Section 4.
7. Unscrew and remove the short rod connecting the engine subframe to the right wing panel.
8. When working under the vehicle, loosen (but don't take it off) rear bolt of the engine mount mounting link. Loosen and remove the front bolt and swing the link down.
9. Remove the exhaust outlet pipe and heat shield.
10. Working on the right drive shaft, use a suitable punch to knock out the roll pins.
11. Loosen up (but don't take it off) lower bolt securing the right steering knuckle to the base of the suspension strut. Loosen and remove the top bolt, then tilt the steering knuckle and disconnect the drive shaft from the transmission differential. Move the drive shaft to the side.
12. Remove the bolts securing the oil pan to the cylinder block, but leave two bolts in place (see illustration).
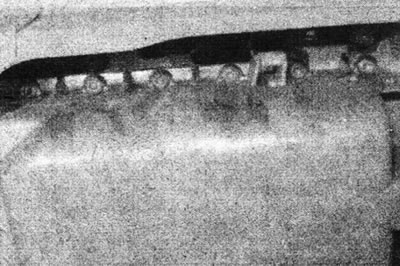
14.12. Front pan mounting bolts (view from under the car) - F7P engine (with 16 valves).
13. Unscrew the nuts and remove the four studs connecting the pan to the gearbox.
14. Mark the position of the right engine mount stud relative to the upper bracket, then remove the nut. Attach a winch to the engine mounting eyes and lift the engine as high as possible without deforming the left hanger.
15. Completely unscrew the two remaining bolts, then separate the oil pan from the crankcase by hitting it with your palm. Lower the tray and remove it from under the vehicle.
Installation
16. Clean all traces of gasket or sealant from the mating surfaces of the oil pan and crankcase.
17. Apply a strip of CAF 4/60 THIXO paste to the mating surfaces of the tray (see illustration).
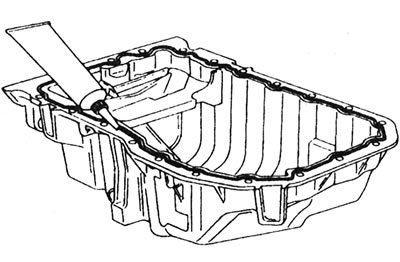
14.17. Apply a bead of sealant to the mating surfaces of the oil pan - F7P engine (with 16 valves).
18. It is important to position the pan correctly the first time and not to move it after the paste has touched the crankcase. Long bolts or pins can be used as guides.
19. To prevent oil from leaking from the oil pump and crankcase, wipe these areas clean before installing the pan.
20. Raise the tray to its working position, insert two diagonally opposite bolts and tighten them with your hands.
21. Insert and tighten the four studs connecting the pan to the gearbox.
22. Insert the remaining pan bolts and tighten them gradually to the specified tightening torque Specifications.
23. Install four nuts on the studs and tighten them to the specified tightening torque Specifications.
24. Lower the engine onto the right suspension stand and tighten the nut. Make sure the nut is in the same position it was in before removal, then tighten it to the specified torque Specifications.
25. Connect the right drive shaft to the gearbox differential and secure it with new roll pins. Apply sealant to each pin.
26. Install the upper bolt securing the right steering knuckle to the base of the suspension strut, then tighten both bolts to the specified torque Specifications (see section 10).
27. Install the exhaust outlet pipe and heat shield.
28. Connect the rear engine mount link and tighten the bolts to the specified tightening torque Specifications.
29. Install the rod on the subframe and tighten the bolts.
30. Install the air filter assembly.
31. Install the hood as described in Section 11.
32. Install the plastic cover inside the right wheel arch.
33. Install the wheel and lower the car to the ground.
34. Fill the engine with oil as described in Section 1.
35. Connect the battery.