



Contents: Vacuum drive and cable 🠛 Checking and adjusting the Bosch…🠛 Checking and Adjusting the Lucas…🠛 Solenoid valve 🠛
Vacuum drive and cable
Removal
1. The vacuum actuator is mounted on a bracket installed at the end of the fuel pump.
2. Loosen the screw or nut and remove the end cap from the cable on the fast idle lever on the fuel pump.
3. Disconnect the vacuum hose from the drive.
4. Unscrew the nut securing the drive to the bracket and remove the drive, passing the cable through the bracket (see illustrations).
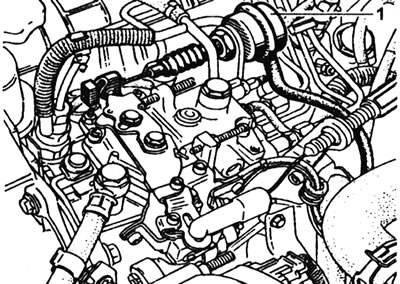
10.4a. Fast idle vacuum drive "1" - Bosch pump.
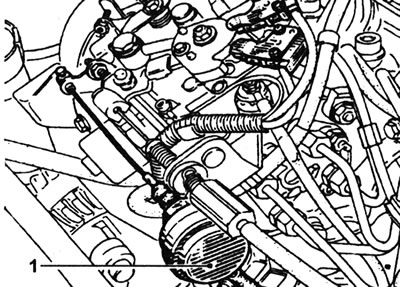
10.4b. Fast idle vacuum drive "1" - Lucas pump.
Installation
5. Install the drive onto the bracket and tighten the mounting nut.
6. Connect the vacuum hose.
7. Insert the cable through the fast idle lever and place the end on the cable, but do not tighten the screw or nut yet.
8. Adjust the cable as described in the following steps.
Checking and adjusting the Bosch fuel pump
9. Proceed as described in Chapter 9, points 11-18 inclusive, and following the note at the beginning of point 11, the distance between the edge of the fast idle lever and the tip should be 2±1 mm.
10. If a vacuum actuator fault is suspected, first check the solenoid unit as described later in this Chapter.
11. The drive can be tested using a vacuum pump. (The engine must be turned off), disconnect the vacuum hose from the drive and connect the vacuum pump to it. At 500 mBar, the drive should move the cable so that the lever touches the fast idle adjustment screw. If this is not the case, the vacuum drive is probably faulty.
Checking and Adjusting the Lucas Fuel Pump
12. The increased idle speed is set at the factory on a test bench and cannot be adjusted.
13. With the engine off and the fast idle lever in the home position, carefully insert the fast idle cable.
Article reprinted from the website: RenaultBook.ru
14. Place the tip on the cable so that the distance between the edge of the fast idle lever and the tip is 2±1 mm.
15. Once the tip is correctly positioned, tighten the nut.
16. The drive can be checked using points 10 and 11, but note that the fast idle lever must touch the stop and not the fast idle adjustment screw.
Solenoid valve
Removal
17. The solenoid valve is located on the bulkhead in the engine compartment, next to the pre-heating/post-heating control unit.
18. Disconnect the wiring and disconnect the vacuum hoses from the solenoid valve.
19. Loosen the two mounting screws and remove the valve.
Installation
20. Install in reverse order. Then make sure that the vacuum hoses and electrical wiring are securely connected. Tighten the screws.
Examination
21. Remove the solenoid valve as described above.
22. Try blowing air through one of the vacuum hose connections. Air should not pass through the valve.
23. Connect power (12 volts) to the terminals of the valve coil and try blowing air through the valve again. Now the air should pass.
24. If the valve does not operate as described, it should be replaced.