
English Русский
Български
Беларускі
Український
Српски
Hrvatski
Română
Polski
Slovenský
Magyar
Bookmark Contacts Articles Sitemap
Company vehicles Peugeot Company vehicles Opel Company vehicles Skoda Company vehicles Land Rover Company vehicles Mitsubishi Company vehicles Volkswagen Company vehicles Honda
RenaultBook.ru


Duster   Fluence   Kangoo   Laguna   Logan   Megane   Sandero   Scenic   Symbol   Clio   Other
Clio 1 (1990-1998)

Every 10,000 km or 6 months — Check spark plugs (Renault Clio 1)

  • Main
  • Clio
  • Clio 1 (1990-1998)
  • General information
  • Maintenance
  • Every 10,000 km or 6 months — Check spark plugs
0
1. The correct operation and performance of the engine depends on the correct functioning of the spark plugs. It is important that the spark plugs installed are suitable for the engine (the appropriate type is defined at the beginning of this Section). If this type is used and the engine is in good condition, the spark plugs should not require attention between scheduled replacements. Cleaning a spark plug is rarely necessary and should not be attempted unless special equipment is available, as the plug can be easily damaged.

2. To remove the spark plugs, first open the hood.

3. On models with F7P engine (with 16 valves), remove the top engine cover, which is secured with two screws (see illustration).
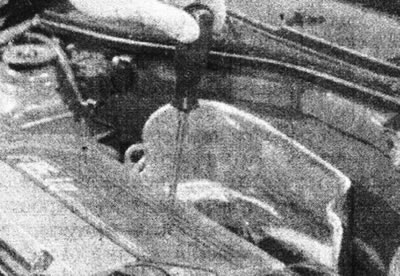
8.3 Remove the top engine cover to access the spark plugs - F7P engine only (with 16 valves).

8.3 Remove the top engine cover to access the spark plugs - F7P engine only (with 16 valves).


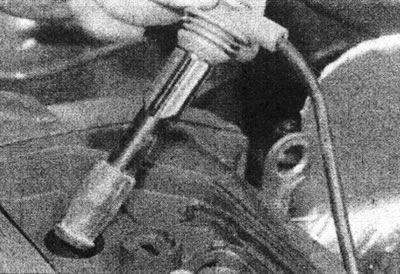
4. Disconnect the high-voltage wires from the spark plugs (see illustrations).
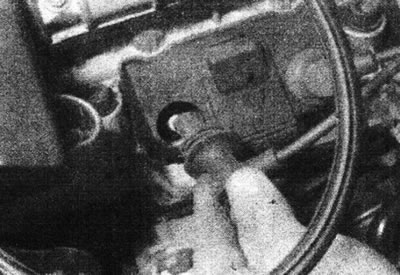
8.4a Disconnect the high voltage wires - F3P engine.
8.4a Disconnect the high voltage wires - F3P engine.


8.4b Disconnect the high voltage wires - engine F7P (with 16 valves).

8.4b Disconnect the high voltage wires - engine F7P (with 16 valves).


5. To prevent dirt from entering the cylinders, clean the spark plug holes using a clean brush, vacuum cleaner, or compressed air.

6. Unscrew the spark plugs using a special key (see illustration).
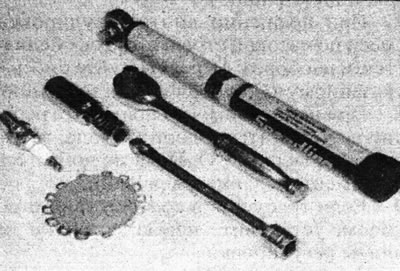
8.6 Tools required for removing, adjusting the gap and installing the spark plug.

8.6 Tools required for removing, adjusting the gap and installing the spark plug.


7. The condition of the spark plugs can be used to determine the condition of the engine. If the tip of the spark plug insulator is clean and white, without carbon deposits, this indicates a weak mixture or a spark plug that is too hot.

8. If the tip and nose of the insulator are covered with hard black carbon, this indicates that the mixture is too rich. If the spark plug is black and oily, the engine is probably very worn out.


9. If the nose of the insulator is covered with a light brown coating, the mixture is correct and the engine is probably in good condition.

10. If the last spark plug replacement was carried out in accordance with the service schedule 10,000 km ago, they will still be suitable for use for about 10,000 km. However, it is recommended to readjust the gap to compensate for its slow increase during engine operation (approximately 0.025 mm every 1600 km). If the engine condition makes it impossible to repair the spark plug, it should be replaced.

11. The spark plug gap is of great importance. If it is too large or too small, the ignition spark size and performance will be seriously weakened. The clearance shall be as given in the Specifications at the beginning of this Section.

12. To set the gap, measure it with a feeler gauge, then bend the open or closed outer electrode until the correct gap is obtained. The gap is correct if a feeler gauge of the correct size is held firmly and slides freely (see illustration).
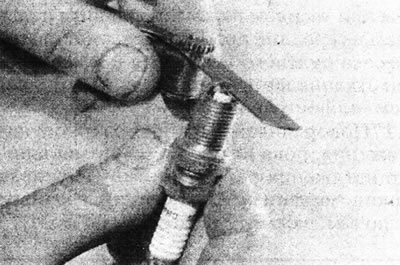
8.12 Measure the spark plug gap with a feeler gauge.

8.12 Measure the spark plug gap with a feeler gauge.


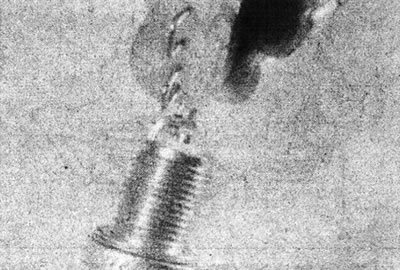
13. To check and adjust the spark plug gap, you can use a special tool (see illustrations).
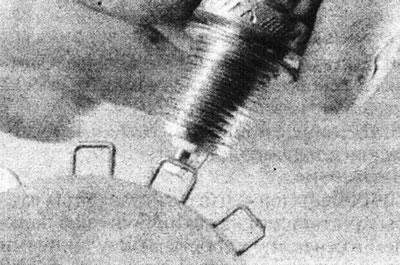


8.13a Measure the spark plug gap with a wire gauge...
8.13a Measure the spark plug gap with a wire gauge...


8.13b...and adjust the gap using the special tool.

8.13b...and adjust the gap using the special tool.


14. Before installing the spark plug, apply a small amount of anti-lock compound to the threads.

15. It is often difficult to insert spark plugs into their holes without distortion. To avoid this, place a piece of hose over the end of the spark plug.

16. Remove the hose (if used) and tighten the spark plug to the tightening torque specified in the Specifications (see illustration).
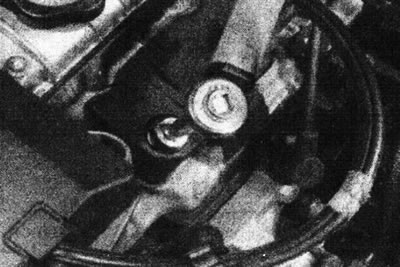
8.16 Tighten the spark plug using a torque wrench.

8.16 Tighten the spark plug using a torque wrench.


Install the remaining spark plugs in the same manner.

17. Wipe the high voltage wires, then connect them in the correct order. Where necessary, install the top engine cover.
This article is available on: russian, bulgarian, belarusian, ukrainian, serbian, croatian, romanian, polish, slovak, hungarian
Article has been reviewed by editor: Fedoseev Denis
Share with friends:
Previous
Clio 1: Maintenance
Next

Every 10,000 km or 6 months — check idle speed and mixture
Every 10,000 km or 6 months — check the auxiliary drive belt
Every 10,000 km or 6 months — check for fluid leaks
Every 10,000 km or 6 months — check the transmission fluid level
Every 10,000 km or 6 months — Change engine oil and filter
Every 10,000 km or 6 months — check the contact plates of the breaker…
Every 10,000 km or 6 months — check ignition timing (c-series engine)
Every 10,000 km or 6 months — check the clutch operation
Every 10,000 km or 6 months — check the exhaust system
Every 10,000 km or 6 months — check front brake pads and discs
Other articles on other Renault models

➽ Spark plugs Renault Fluence 1 (2009-2020, petrol)
➽ Ignition system with static voltage distribution across spark… Renault Laguna 2 (2001-2007)
➽ Engine diagnostics by the appearance of spark plugs Renault Logan 1 (2004-2012, petrol)
➽ Replacing spark plugs and checking the ignition system Renault Megane 1 (1995-2002)
➽ Diagnostics of engine condition by external condition of spark… Renault Sandero 1 (2007-2012, petrol)
Link to this article in different formats
Reviews and comments of visitors
No comments yet


Add two numbers 15 + 23


Clio 1 (1990-1998) 
  • General information
  • Maintenance
  • Troubleshooting
  • Power unit
  • Petrol engines 1.1 l (C)
  • Petrol engines 1.2 l (D)
  • Petrol engines 1.2/1.4 l (E)
  • Petrol engines 1.8 l (F)
  • Diesel engines
  • Overhaul of engines
  • Cooling and heating
  • Fuel system (carburetor)
  • Central fuel injection
  • Distributed fuel injection
  • Fuel system (diesel)
  • Starting and charging system
  • Ignition system (transistor)
  • Ignition system (electronic)
  • Pre-heating of diesel engines
  • Transmission
  • Clutch
  • Manual gearbox
  • Automatic gearbox
  • Drive shafts
  • Chassis, running gear
  • Brake system
  • Car suspension
  • Steering system
  • Body and interior
  • Exterior (external elements)
  • Doors, locks and windows
  • Electrical equipment
  • Equipment and devices
  • Electrical circuits
RenaultBook.ru © 2018–2026 | Mobile version | News and articles | Sitemap: EN BG BY UA RS HR RO PL SK HU | Administration | Site search | Bookmark
Duster 1 (2009-2017) | Fluence 1 (2009-2020, petrol) | Kangoo 1 (1997-2007) | Laguna 2 (2001-2007) | Logan 1 (2004-2012, petrol) | Logan 2 (2012-2020) | Megane 1 (1995-2002) | Megan 2 (2002-2009, petrol) | Sandero 1 (2007-2012, petrol) | Scenic 1 (1996-2003) | Symbol 1 (1999-2008, petrol) | Symbol 2 (2008-2013, petrol) | Renault 19 (1988-1996) | Espace I and II (1984-1996) | Espace III (1996-2002) | Clio 1 (1990-1998) |
We want your visit to be comfortable 😌 and use cookies 🍪 to do so.