
Attention! Due to the design of the suspension, remove the springs only one at a time.
Tightening torques:
- Shock absorber lower support bolt - 105 Nm
Removing
- turn on reverse gear (or set the selector lever to position «R»);
- raise the rear of the car and install safety stops under the body;
- remove the wheel from the desired side;
- slightly raise the rear trailing arm with a jack to unload the shock absorber;
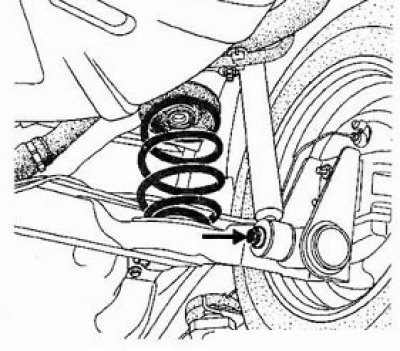
Figure 5.12. Removing the rear shock absorber bottom bolt
- remove the lower shock absorber mounting bolt (see Figure 5.12);
Note. To facilitate removal of the bolt, lift the axle beam with a lever.
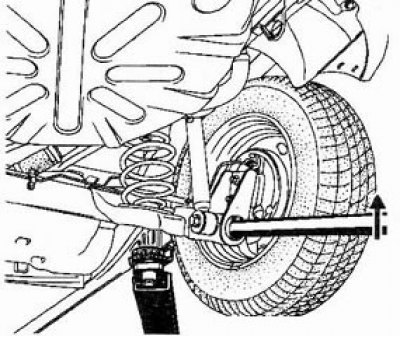
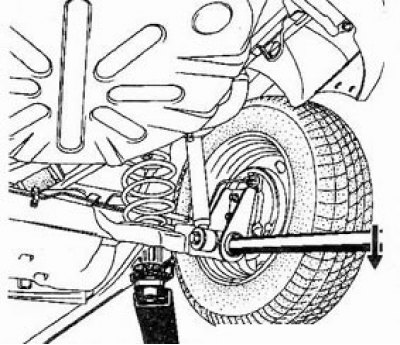
Figure 5.14. Pulling down the suspension arm and removing the spring
- use a suitable lever to move the transverse arm as low as possible without damaging the brake hose (Figure 5.14);
- remove the spring along with the rubber pads (at both ends of the spring);
Attention! Two shock absorbers (respectively two springs) do not shoot at the same time.
- inspect the spring and, if damaged, replace the springs on both sides of the suspension.
Installation
Installation is carried out in the reverse order of removal, while doing the following:
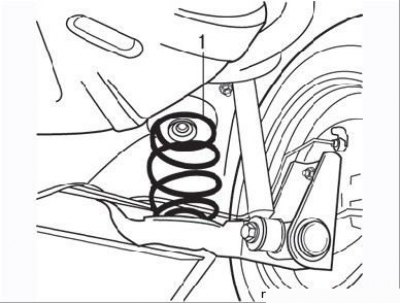
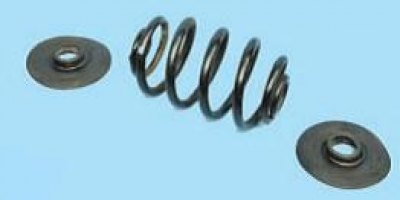
Figure 5.15. Spring installation: 1 - green label
- the green mark on the spring must be up and facing the rear of the vehicle (Figure 5.15);
- the spring must be correctly installed in the cavities of the rubber pads;
- tighten the shock absorber mounting bolt after lowering the car on the wheels.