
Removing
1. Remove an amortization rack.
2. Clamp the spring strut in a vise, and compress the strut spring with an appropriate clamp with handles. The spring should be compressed by about 10 mm (see illustration).
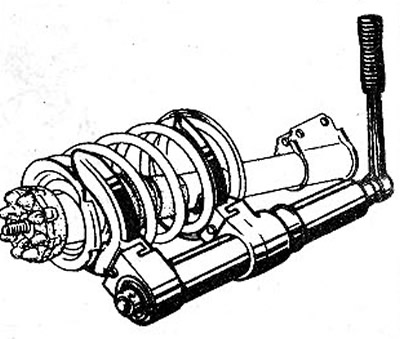
3.2 Clamp the suspension strut in a vise, and compress the strut spring with a suitable clamp with handles
Attention! When using a clamp, make sure that the coils of the spring fit snugly into the clamping handles. Otherwise, the possibility of spring slippage cannot be ruled out. Do not use wire to tie the coils of the spring. It has a high degree of compression and incompetent handling can lead to injury. The damper rod nut can only be unscrewed after the spring has been properly compressed.
3. Unscrew the shock absorber rod nut with a spanner wrench, holding the rod from turning with a socket wrench nab mm. In workshops, a special tool FACOM D83 RENA is used for this purpose (see illustration).
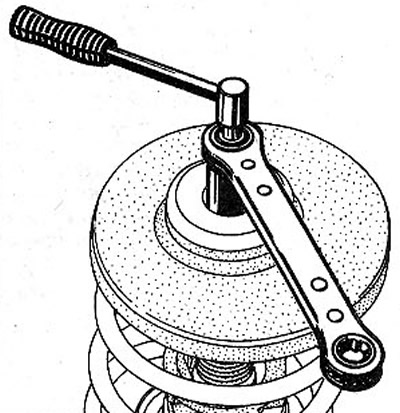
3.3 Unscrew the damper rod nut with a box wrench, holding the rod from turning with a 6 mm socket wrench
4. Disassemble the suspension strut by removing the parts in sequence from 1 to 5 (see illustration). Details 3 and 4 form a rotating support of the rack.
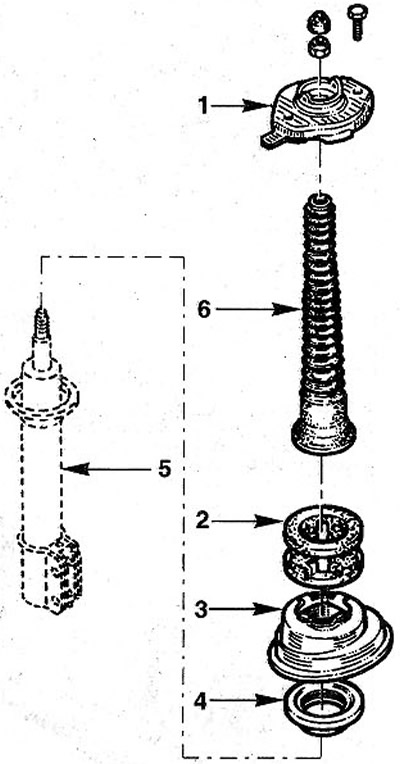
3.4 Disassemble the suspension strut by removing the parts in sequence from 1 to 5. The illustration does not show the coil spring of the strut
1 - upper shock absorber support
2 - compression stroke buffer
3 - upper spring cup
4 - bearing of the upper support of the suspension strut
5 - shock absorber
6 - protective cover
Attention! When replacing the shock absorber spring, the spring must be slowly released. When replacing the shock absorber, the spring does not need to be dissolved.
Installation
Attention! New shock absorbers are stored in the spare parts warehouse in a horizontal position. For this reason, the shock absorber may not work properly at first. When installing a new shock absorber, it is recommended, while holding it vertically, to completely push in its rod several times to ensure the shock absorber is working: If this is not done during installation, then after some time after installation, the shock absorber will begin to work properly.
5. Check up shock-absorbers of amortization racks.
6. Collect an amortization rack, being guided by an illustration 3.4. Make sure the top and bottom ends of the springs are in contact with the stops on the cups.
7. Compress a spring of an amortization rack a clamp.
8 Screw on and tighten the new damper stem self-locking nut to keep it from turning. The tightening torque of the nut is 60 Nm.
9. Slowly release the strut spring.
10. Establish an amortization rack into place.