
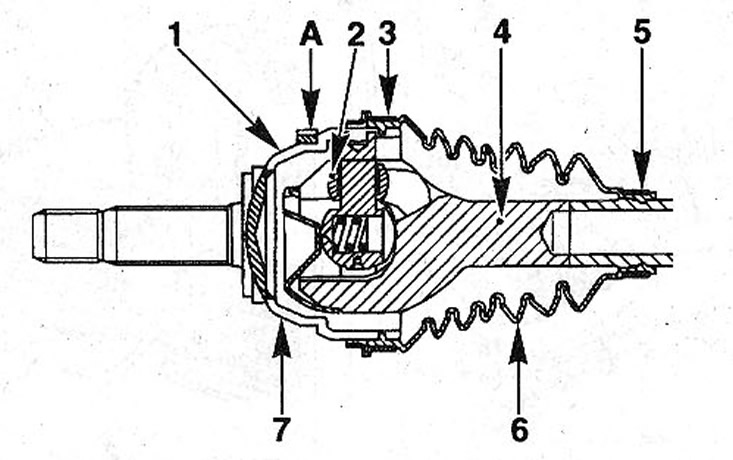
11.0 Outer Joint Components
1 - body; 2 - cross; 3, 5 - fastening clamps for large and small diameters; 4 - clutch; 6 - rubber cuff; 7 - cross separator; A - ABS pulse sensor ring (if available)
CV joint with cross
Removing
1. Remove the drive shaft.
2. Saw with a hacksaw the clamps for fastening the cuff of the outer CV joint (see illustration). At the same time, be careful not to damage the grooves on the CV joint housing.
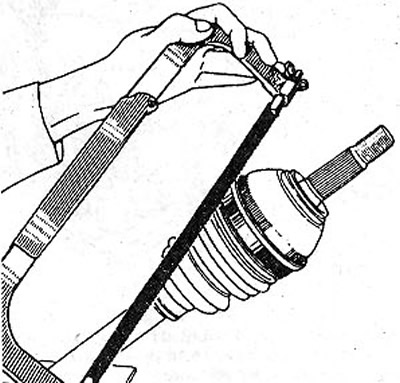
11.2 Saw with a hacksaw the clamps for fastening the cuff of the outer CV joint
3. Cut the cuff lengthwise and remove.
4. Remove CV joint grease. If dirt gets into the hinge, wash it and apply new grease. Grease is included in the kit.
Installation
5. Check the hinge by hand for ease of movement.
6. Wash the CV joint if dirt gets into it and fill it with new grease. Lubricant (320 g MOBILCVJ825 or MOBILEXF 57C) included in the repair kit. This amount of grease should be stuffed into the cuff and CV joint.
7. Insert the ends of the cuff into the grooves on the CV joint housing, and then turn the hinge by hand to distribute the air under the cuff. The cuff should not be swollen or bent inwards.
8. Pull back the small diameter cuff, which is small from the nimble cuff, to release air and ensure pressure balance (see illustration).
11.8 Use a small screwdriver to pull the belt away from the small diameter cuff to release air and balance the pressure
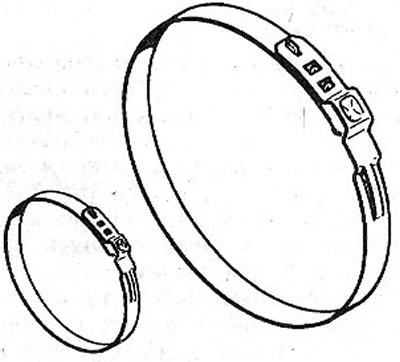
9. Fix the collar on the shaft with clamping or tightening collars (see illustration). It is recommended to use tightening clamps used to fasten hoses to nozzles.
11.9 Fix the seal on the shaft with clamping or tightening collars
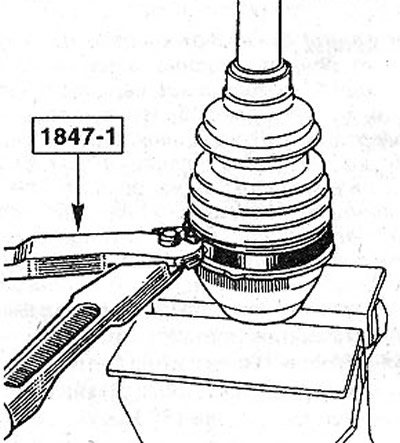
10. Clamp the clamping collar with pliers, eg HAZET 1847-1 or RENAULT T.Av. 1168, pursing it first on the thickening (see illustration). After that, the fit of the clamp is straightened and it is finally tightened. If these tools are not available, then you can use wire cutters.
11.10 Clamp the clamping collar with pliers, eg HAZET 1847-1 or RENAULTT.Av. 1168, pursing it first on the thickening
11. Install the drive shaft.
CV joint with ball bearing
Removing
12. Remove collars of fastening of a cuff, cut a cuff along, remove it and remove greasing from the hinge.
13. Remove the retaining ring 7 using needle nose pliers 5 for retaining rings, hitting the end side of the CV joint housing with a hammer (see illustration).
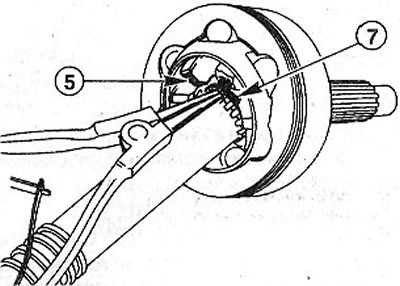
11.13 Remove the circlip 7 using needle-nosed pliers 5 for circlips, while hitting the end side of the CV joint housing with a hammer
14. Remove the CV joint from the shaft.
Installation
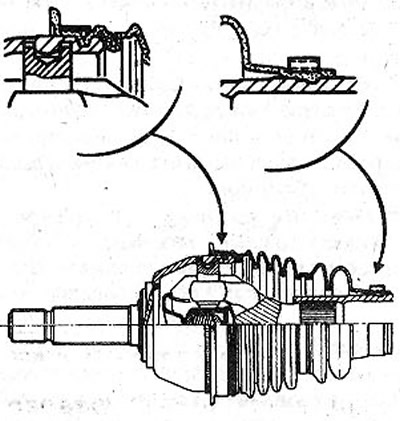
15. First put on the collar fastening the cuff along the small diameter, and then the cuff (see illustration).

11.15 First put on the collar fastening the cuff along the small diameter, and then the cuff
1 - CV joint housing; 2 - balls; 3 - separator; 4 - retaining ring; 5 - shaft; 6 - cuff; 7 - clip; A - ABS pulse sensor ring (if available)
16. Put the CV joint together with a new retaining ring on the shaft until the retaining ring is fixed.
17. Rinse the CV joint if dirt gets into it and fill it with new grease. Lubricant (140 g MOBIL CVJ825 or MOBIL EXF 57C) included in the repair kit. This amount of grease should be stuffed into the cuff and CV joint.
18. Insert the ends of the cuff into the grooves on the CV joint housing and shaft, and then secure the cuff with clamps.