
Removing
1. Mark the position of the rear wheels on the hub with paint. This will allow the assembly to set the balanced wheel in its original position.
2. Loosen the wheel nuts. The vehicle must be on wheels during this operation.
3. Install the car on the goats and remove the rear wheels.
4. Disconnect the parking brake cable.
Vehicles with rear wheel drum brakes
5. Move the brake shoes away from the brake drum. To do this, insert a screwdriver into one of the holes for the wheel bolt and press the parking brake lever towards the center of the car.
This releases pin E and lever D can be pressed in the direction of travel (see illustration).
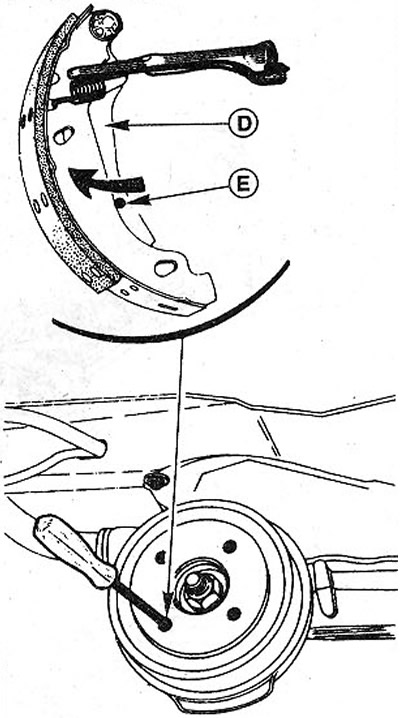
16.5 Pull the brake pads away from the brake drum. To do this, insert a screwdriver into one of the holes for the wheel bolt and press the parking brake lever towards the center of the car. This releases pin E and lever D can be pressed in the direction of travel
6. Press the block drive lever in the direction of vehicle movement, which ensures the removal of the blocks from the inner walls of the drum.
Vehicles with rear disc brakes
7. Remove brake shoes of back wheels, the corresponding chapter see.
8. Disconnect the parking brake cable from the caliper.
9. Loosen the brake hose on the caliper with an overhead wrench. Do not unscrew the hose completely.
10. Unscrew the two bolts A of the caliper fastening and remove them together with the washers (see illustration).

16.10 Unscrew the two bolts A of the caliper and remove them together with the washers
11. Disconnect the brake hose from the caliper.
Attention! In this case, a certain amount of brake fluid will flow out of the hose, which must be collected.
12. Remove a support.
13. Remove the hub nut cap using a suitable hammer-type puller (see illustration). If there is no puller, then carefully knock down the cap with a chisel and a rubber or plastic hammer, moving the chisel along the circumference of the cap. The cap must be replaced with a new one.
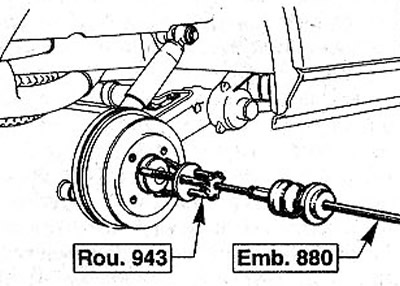
16.13 Remove the hub nut cap using a suitable hammer-type puller
14. Install the wheel and lower the vehicle.
15. Loosen the hub nut without completely unscrewing it.
Attention! The hub nut is tightened with a large tightening torque. When unscrewing the nut, the car must be on wheels with the gear engaged and the parking brake applied.
16. Unscrew a nut from a nave and remove it together with an adjusting washer.
17. Remove the brake drum or brake disc. If necessary, they can be removed using a puller, which is attached with wheel bolts and abuts against the shank.
Installation
18. Thoroughly clean the brake drum or brake disc. Inspect it for damage, wear, residual thickness compliance with allowable values.
19. Lubricate the hub mounting shank with a small amount of engine oil of specification S AE 80W so that the hub does not «grew». Then install the hub. If necessary, it can be stuffed into the seat with a rubber mallet.
20. Install the shim.
21. Screw on the new hub nut and tighten it to 180 Nm.
Attention! The tightening torque is very large, so put the wrench on the nut horizontally and press on it from above so that the car does not move and does not fall from the stand when tightening.
22. Stuff the hub nut cap with some hub bearing grease and tap the cap onto the nut with a rubber mallet.
Attention! Replace a damaged cap without fail. If the tightness of the nut is not ensured, then water will enter the hub and the hub bearing will be destroyed.
Vehicles with rear wheel disc brakes
23. Connect the brake hose to the caliper and tighten it by hand.
24. Before installing the caliper, clean the threads of the caliper mounting bolts, and then lubricate with LOCTITE FRENBLOC protective grease.
25. Reinstall the caliper and secure it with bolts and washers. The tightening torque of the bolts is 100 Nm.
26. Install brake pads, see relevant chapter.
27. Tighten the brake hose nut on the caliper with a force of 20 Nm.
28. Remove air from the wheel brake cylinder.
Attention! At the same time, make sure that there is a sufficient amount of liquid in the expansion tank. If the reservoir is empty, you will have to bleed the entire brake system.
29. Attach the parking brake cable to the caliper.
30. Put the removed rear wheel, guided by the marks made before dismantling.
31. Lower the vehicle onto the wheels and tighten the wheel bolts in a criss-cross pattern to 90 Nm.
32. Depress the brake pedal several times to allow the brake pads to self-adjust.
33. Adjust the parking brake, see relevant chapter.