
- deactivate the pretensioning system;
- remove the center console;
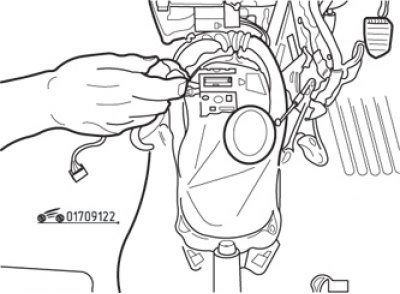
Pic. 9.122. Removing the screws securing the air ducts to the computer bracket
- unscrew the fastening screws and move the two air ducts to the side (pic. 9.122);
- remove the mat to gain access to the computer. To facilitate the work, the mat can be cut;
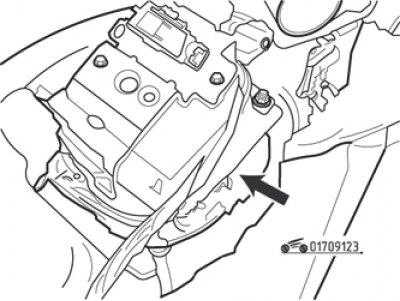
Pic. 9.123. Releasing the wiring retainer and disconnecting the ECU connectors
- disconnect the computer connectors (pic. 9.123);
- unscrew the nuts securing the computer;
- lift the computer and remove it from the floor along with the diagnostic connector bracket.
Installation order:
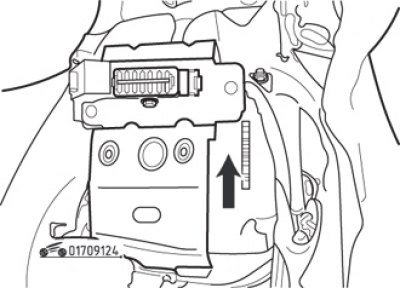
Pic. 9.124. The arrow on the ECU case is directed in the direction of the car
- install the computer in place so that the arrow on its body points in the direction of the car (pic. 9.124);
- Install the ECU mounting nuts and tighten them securely. Do not connect the connectors before tightening the nuts;
- connect the ECU connectors;
- install the air ducts by screwing in the screws of their fastening;
- reinstall the center console;
- activate the pretensioning system.