
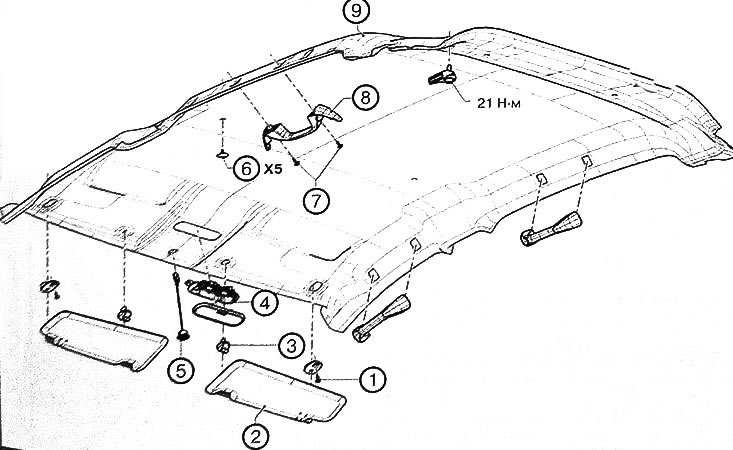
1. Sun visor bolt. 2. Sun visor. 3. Sun visor hook. 4. Ceiling lamp. 5. Headset microphone "Hands-free". 6. Ceiling trim clip. 7. Ceiling handle bolt. 8. Ceiling handle. 9. Ceiling lining.
Removal and installation of ceiling lining
Removing the ceiling trim
And1. Disconnect the negative battery terminal.
2. Remove the ceiling lamps for interior lighting.
3. Remove sun visors.
4. Remove ceiling rails.
5. To remove facings of racks of a windscreen.
6. Remove the upper facings of the B-pillars.
7. Remove the lower facings of the C-pillars.
Station wagon versions
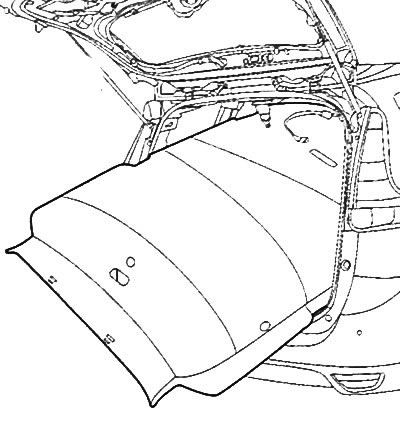
8. Remove the rear shelf.
9. To remove a covering of a back shelf.
10. To remove facings of back racks.
11. Remove the upper facings of the C-pillars.
Sedan versions
12. Remove the lining of the rear window windows.
Continuation for all versions
13. Tilt the backs of the front seats forward.
14. Remove the rear sofa cushion.
Station wagon versions
15. Remove the seat belt guide (3).
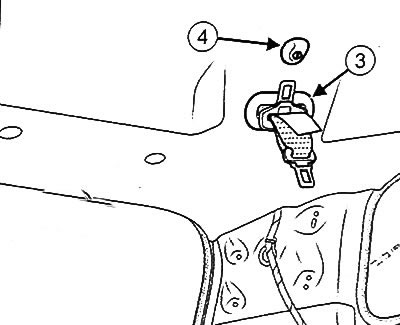
16. Remove decorative seat belt holder (4).
Continuation for all versions
17. Use a suitable tool to remove the clips.
18. Disconnect connector (1) ceiling wiring harness.
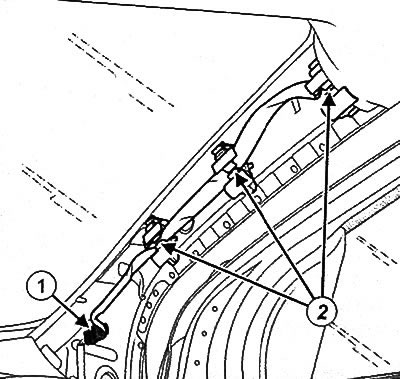
19. Unhook the ceiling wiring harness from the holders (2).
Sedan versions
20. Remove headlining from passenger compartment (this will require two people).

Station wagon versions
21. Remove the headliner from the passenger compartment (this will require two people).
In case of replacement
22.Delete "Velcro" (5).
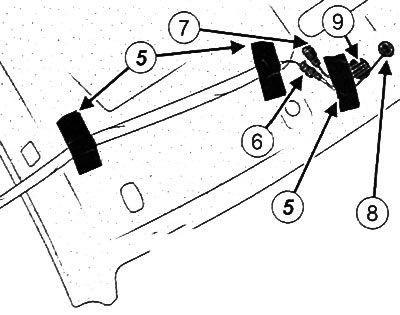
23. Disconnect connector (6) headset microphone "hands-free".
24.Disconnect connector (7) interior temperature sensor (if equipped).
25. Unhook the headset microphone "hands-free" (8).
26. Unhook the temperature sensor in the cabin (9) (if equipped).
27. Remove headset microphone "handsfree".
28. Remove the temperature sensor in the cabin (if equipped).
29. Remove the ceiling wiring harness.
Ceiling cladding installation
Installation is made in an order, the return to removal.