
Tightening torques, Nm
- Nut of fastening of a support of a beam of the bridge 11.
- Bolt of fastening of a support of the stabilizer 55.
- Wheel bolt 90.
- Bolt of fastening of the bottom support of the shock-absorber 85.
Removing
1. Place the vehicle on a two post lift.
2. Remove the stabilizer.
3. Remove the lower shock absorber support.
4. Remove the rear brake cable by unhooking it at the adjuster under the vehicle.
5. Remove the brake pipe.
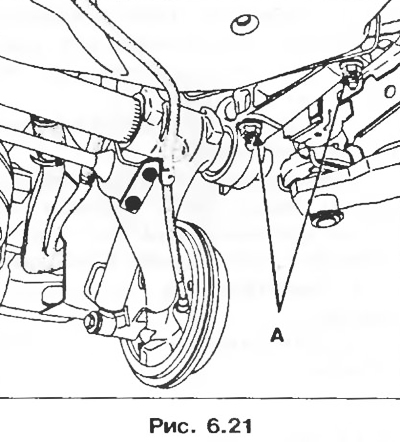
6. Remove two nuts And fastenings of a support.
7. Loosen the two nuts A on the other support just enough so that the beam bar can be removed from the support.
8. Remove the beam rod, separating it from the other rod.
Installation
1. Make sure the bearing rings or needle bearings are in good condition, otherwise replace them. Needle bearings are filled with lifetime grease and do not require any further lubrication.
Note: new beam rods are supplied as spare parts with bearing rings or needle bearings installed (depending on installation side).
2. Pull both bridge beam rods together until dimension B is obtained.
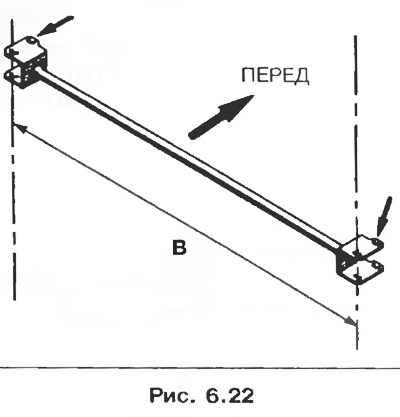
Note: Dimension B corresponds to the distance between the stabilizer mounting points on the suspension arms. Therefore, this size can be achieved by installing the stabilizer in its place. When inserting the mounting bolts, you need to check the possibility of their installation without distortion. Ensure that the direction of installation is respected.
3. Installation is carried out in the reverse order of removal.
Note. If the axle beam bar is being replaced, fix the brake shield mounting bolts with Loctite FRENBLOC adhesive.
4. Remove air from the brake circuit.
5. Adjust the parking brake.