



Special tool required
- Mot. 1040-01 Trolley for removing and installing the power unit.
- T.Av. 476 Ball joint puller.
Tightening torques, Nm
- Wheel mounting bolts 90.
- Steering joint pin fastening nut 37.
- Steering shaft cardan joint fork mounting bolt 25.
- Front subframe mounting bolt, diameter 10 mm - 60.
- Rear subframe mounting bolt, diameter 12 mm - 105.
- Nut for fastening the subframe reaction rod to the side member 30.
- Nut of the clamping bolt of the ball joint pin with the steering knuckle 55.
- Engine support thrust mounting bolt 65.
- Steering gear mounting bolt 50.
Removal
1. Disconnect the wires from the battery terminals.
2. Place the vehicle on a two-post lift.
3. Remove the wheels.
4. Disconnect the steering joints using the T.Av. 476 puller.
5. Loosen the nut of the clamp bolt of the terminal connection of the ball joint pin with the steering knuckle.
6. Partially detach, without removing, the mudguards to gain access to the upper bolt securing the subframe torque rod to the side member, and unscrew it.
7. Remove the exhaust pipe and attach the neutralizer to the underbody parts.
8. Remove the engine mount torque rod mounting bolt (from the engine side).
9. Remove the heat shield over the neutralizer and the gear shift lever boot.
10. Remove the gearbox control mechanism by unscrewing two bolts from each end of the mechanism housing.
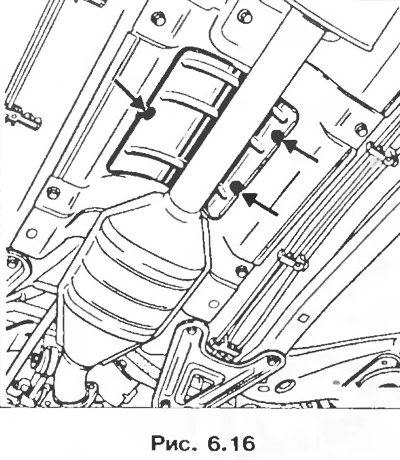
11. Remove the two nuts securing the steering gear heat shield.
12. Unscrew the steering gear mounting nuts and attach it to the exhaust manifold.
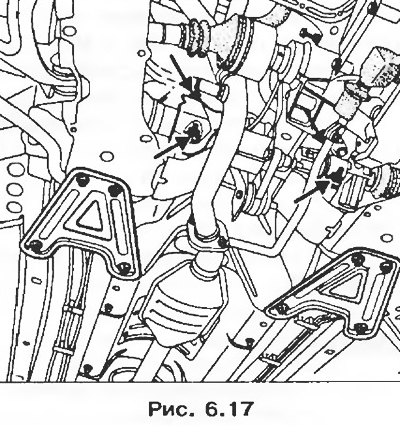
13. Install the Mot. 1040-01 trolley underneath the subframe.
14. Lower the lift until the trolley wheels touch the floor.
15. Unscrew the subframe mounting bolts.
16. Carefully raise the lift.
Installation
Note: Replace the subframe mounting bolts periodically and maintain their tightening to the specified torques.
1. Installation is carried out in the reverse order of removal.
2. Install two rods in place of the front mounting bolts.
3. Bring the subframe close to the body.
4. Tighten, but not completely, the rear mounting bolts (start with the longest right bolt).
5. Replace the inserted mounting bolt rods at the front of the subframe.
6. Tighten the four mounting bolts to the specified torque, starting from the rear.
7. Ensure that heat shields are installed correctly.
Rear suspension. Technical data
