
English Русский
Български
Беларускі
Український
Српски
Hrvatski
Română
Polski
Slovenský
Magyar
Bookmark Contacts Articles Sitemap
Company vehicles Peugeot Company vehicles Opel Company vehicles Skoda Company vehicles Land Rover Company vehicles Mitsubishi Company vehicles Volkswagen Company vehicles Honda
RenaultBook.ru


Duster   Fluence   Kangoo   Laguna   Logan   Megane   Sandero   Scenic   Symbol   Clio   Other
Fluence 1 (2009-2020, petrol)

Rigid Brake Line Repair (Renault Fluence 1)

  • Main
  • Fluence
  • Fluence 1 (2009-2020, petrol)
  • Chassis, running gear
  • Brake system
  • Rigid Brake Line Repair
0
Contents: Manufacturing of rivets 🠛 Preparing the pipeline before bending 🠛 Bending test 🠛
Note: This method is used for copper pipes with a diameter of 4.7 mm.
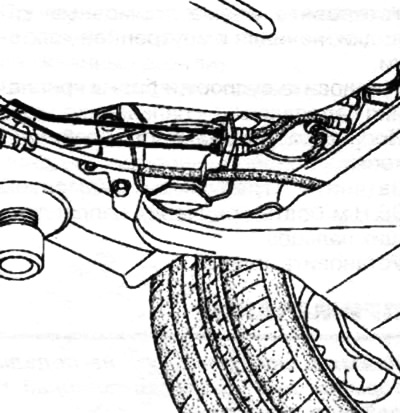

Note: This method is used for copper pipes with a diameter of 4.7 mm.


This method is not applicable:
  • for hybrid pipelines (rigid tube + hose);
  • for pipelines with diameters of 6 mm and 8 mm.

Using a pipe cutter, cut the tubing to the recommended length.

Install nuts or bolts onto the pipe before forming rivets.
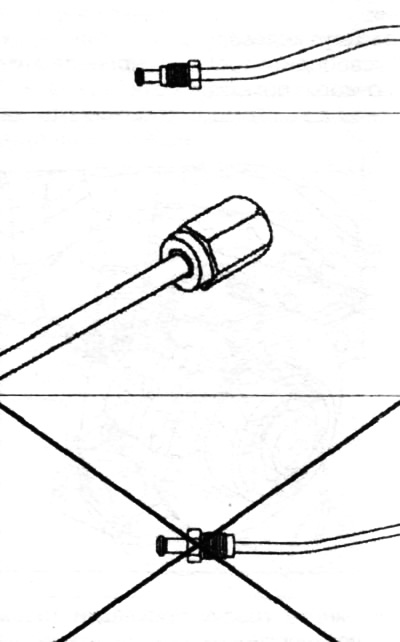
Install nuts or bolts onto the pipe before forming rivets.


Manufacturing of rivets


To make a rivet, place the rivet press in a vice.

Place the pipeline in the rivet press.

Adjust the length of the pipe to achieve the desired shape.

Tighten the press tip to the required torque (40 Nm).

Visually check:
  • uniformity of rivet diameters;
  • centering of rivets relative to the pipeline axis.
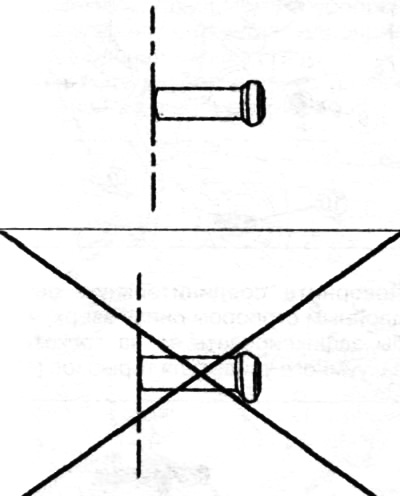
centering of rivets relative to the pipeline axis.


Visually check that the internal diameter of the pipeline has not become oval.



Visually check that the internal diameter of the pipeline has not become oval.


Use a caliper to ensure that the back panel diameter is not oval.

Normalize the diameter if (X ₁) = (X ₂).
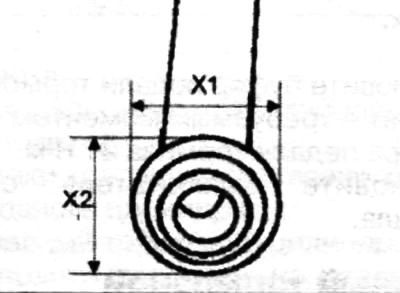
Normalize the diameter if (X ₁) = (X ₂).


Preparing the pipeline before bending


Blow out the pipeline in both directions using an air-powered spray gun.

Install plugs on the bolts or nuts at the ends of the pipe.

Install the standard pipeline on a flat support plate, the length of which is equal to the length of the pipeline.

Measure the dimensions (XZ) in mm of all bends, between the "centers of the radii of all bends" (1) of the old pipeline.
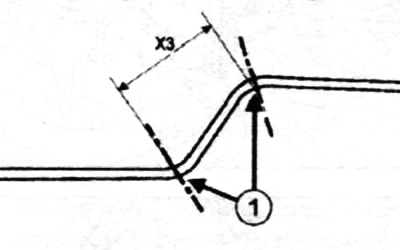
Measure the dimensions (XZ) in mm of all bends, between the «centers of the radii of all bends» (1)…


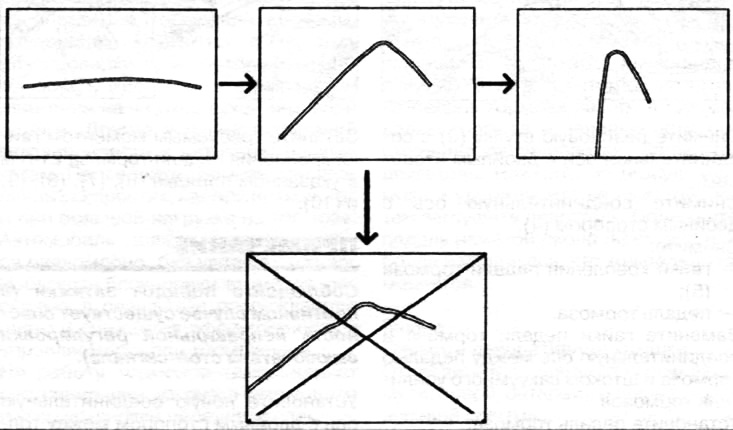
Note: To avoid weakening the pipe, either bend it once or bend it gradually increasing the bend (i.e. reducing the bending radius). Do not install rigid tubing on a vehicle that may have been bent and then straightened back out to achieve the correct bend radius.


Note: During the bending operation, it is necessary to slightly exceed the required angle to compensate for the elasticity of the material.


Give the pipeline the required shape using a bending device, one bend after another, maintaining the original shape of the pipeline.

Bending test


Check the deviation from the circle shape of the outer diameter at the center of the bending radius (2) using a caliper (the deviation of the outer diameter from the circle shape is normal if it is flattened by less than 10%):
  • nominal pipeline diameter: 4.75 mm;
  • minimum diameter after bending: 4.30 mm.
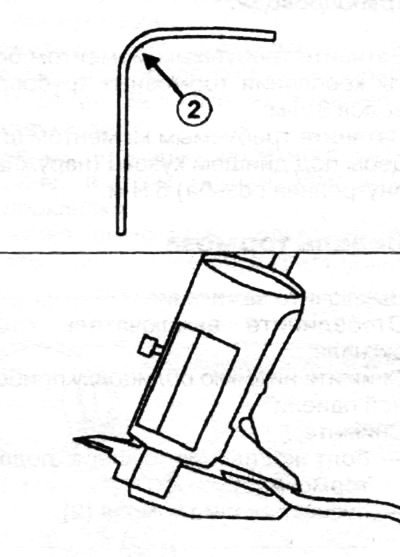
minimum diameter after bending: 4.30 mm.


Note: When installing a rigid brake line:
  • keep to the original layout as much as possible;
  • adjust the pipeline routing by hand when installing it into the clamps.

adjust the pipeline routing by hand when installing it into the clamps.


Caution: Contact points between the rigid brake line and surrounding elements may cause damage to the line. To avoid this contact, manually adjust the line routing.


Tighten the brake pipe mounting bolts to the specified torque of 8 Nm.

Tighten the fittings under the body bottom to the required torque (external/internal thread) 6 Nm.
This article is available on: russian, bulgarian, belarusian, ukrainian, serbian, croatian, romanian, polish, slovak, hungarian
Article has been reviewed by editor: Podkrepilov Maxim
Share with friends:
Previous
Fluence 1: Brake system
Next

Rigid brake line
Rear brake disc
Rear brake shoe guide
Rear brake caliper
Replacing rear brake pads
Brake pedal
Master brake cylinder
Vacuum brake booster
Brake booster — removal
Checking the operation of the brake booster check valve
Other articles on other Renault models

➽ Rigid brake line Renault Duster 1 (2009-2017)
➽ Removal and installation a rigid brake line Renault Megan 2 (2002-2009, petrol)
➽ Repair of brake pipes Renault Logan 2 (2012-2020)
➽ Removal, installation and repair of the front brake caliper Renault Symbol 1 (1999-2008, petrol)
➽ Rear Disc Brake Calipers — Repair Renault Espace I and II (1984-1996)
Link to this article in different formats
Reviews and comments of visitors
No comments yet


Add two numbers 24 + 20


Fluence 1 (2009-2020, petrol) 
  • General information
  • Maintenance
  • Governing bodies
  • Car driving
  • Power unit
  • Engine repair
  • Cooling and lubrication system
  • Fuel system
  • Fuel injection
  • Transmission
  • Clutch and drive shafts
  • Mechanical gearbox
  • Automatic gearbox
  • Chassis, running gear
  • Front suspension
  • Rear suspension
  • Steering
  • Brake system
  • Body and interior
  • Exterior (external elements)
  • Interior (internal elements)
  • Doors, locks and windows
  • Air conditioning
  • Electrical equipment
  • Power devices
  • Fuses and relays
  • Headlights and lighting
  • Equipment and devices
  • Safety system
  • Electrical circuits
RenaultBook.ru © 2018–2026 | Mobile version | News and articles | Sitemap: EN BG BY UA RS HR RO PL SK HU | Administration | Site search | Bookmark
Duster 1 (2009-2017) | Fluence 1 (2009-2020, petrol) | Kangoo 1 (1997-2007) | Laguna 2 (2001-2007) | Logan 1 (2004-2012, petrol) | Logan 2 (2012-2020) | Megane 1 (1995-2002) | Megan 2 (2002-2009, petrol) | Sandero 1 (2007-2012, petrol) | Scenic 1 (1996-2003) | Symbol 1 (1999-2008, petrol) | Symbol 2 (2008-2013, petrol) | Renault 19 (1988-1996) | Espace I and II (1984-1996) | Espace III (1996-2002) | Clio 1 (1990-1998) |
We want your visit to be comfortable 😌 and use cookies 🍪 to do so.