
English Русский
Български
Беларускі
Український
Српски
Hrvatski
Română
Polski
Slovenský
Magyar
Bookmark Contacts Articles Sitemap
Company vehicles Peugeot Company vehicles Opel Company vehicles Skoda Company vehicles Land Rover Company vehicles Mitsubishi Company vehicles Volkswagen Company vehicles Honda
RenaultBook.ru


Duster   Fluence   Kangoo   Laguna   Logan   Megane   Sandero   Scenic   Symbol   Clio   Other
Sandero 1 (2007-2012, petrol)

Removal, defect detection and installation of the flywheel (Renault Sandero 1)

  • Main
  • Sandero
  • Sandero 1 (2007-2012, petrol)
  • Power unit
  • Engine repair
  • Removal, defect detection and installation of the flywheel
0
The flywheel is removed for replacement if the toothed rim used to start the engine is damaged, for replacement of the rear crankshaft seal, and for grinding the surface under the driven clutch disc.

You will need: tools necessary for removing the gearbox and clutch, as well as a 17 mm socket head and a screwdriver.

1. Remove the gearbox (see "Removal and installation of a manual gearbox") and clutch (see "Removal and installation the clutch").

Note. The process of removing, inspecting and installing the flywheel is shown using the K7J and K7M engines as an example. Perform the same procedure for removing, inspecting and installing the K4M engine flywheel.
Note. The process of removing, inspecting and installing the flywheel is shown using the K7J and…


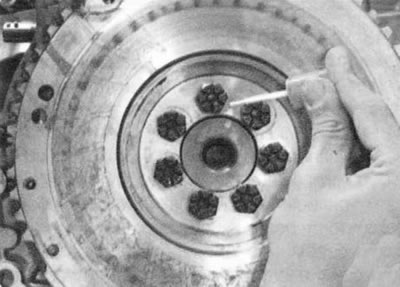
2. Mark the relative positions of the flywheel and crankshaft in any way.

Note: The flywheel can only be installed on the crankshaft in one position, as one of the holes in the flywheel (and crankshaft) located asymmetrically (has an angular offset), however, to facilitate installation of the flywheel, we recommend marking the relative positions of the parts.

Note: The flywheel can only be installed on the crankshaft in one position, as one of the holes in…


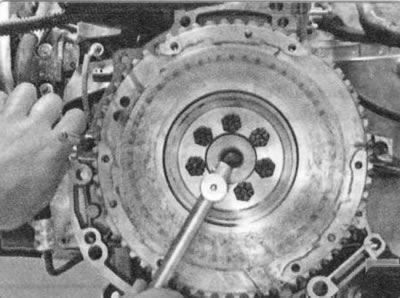
3. Remove the seven flywheel mounting bolts, using a screwdriver to hold the flywheel from turning.


3. Remove the seven flywheel mounting bolts, using a screwdriver to hold the flywheel from turning.


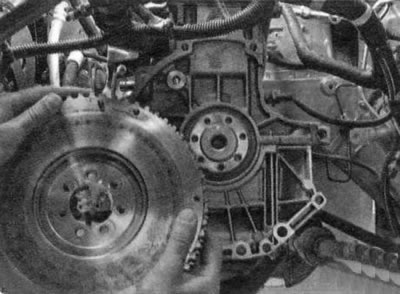
4. Remove the flywheel.
4. Remove the flywheel.


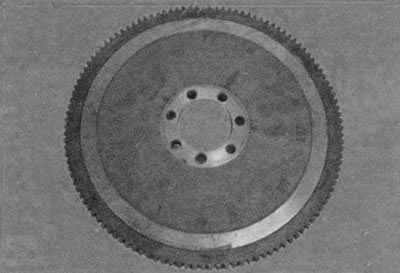
5. Check the condition of the flywheel rim teeth and, if damaged, replace the flywheel.

6. Replace or repair the flywheel if there are scratches or scoring marks on the mating surfaces of the clutch driven disk or crankshaft flange.

7. The flywheel can be checked and repaired in a workshop with special equipment. The flywheel runout, measured along the toothed rim, should not exceed 0.5 mm. To remove deep scratches and burrs, the mating surface of the driven disk can be ground, but the layer of metal removed should not be more than 0.3 mm.

8. Install the flywheel in accordance with the marks applied and all removed units in the reverse order of removal. Lubricate the threads of the flywheel mounting bolts with engine oil. Tighten the bolts evenly crosswise to a torque of 65 N·m (6.5 kgf·m).

Warning: Always replace the flywheel mounting bolts with new ones. They cannot be reused.
This article is available on: russian, bulgarian, belarusian, ukrainian, serbian, croatian, romanian, polish, slovak, hungarian
Article has been reviewed by editor: Podkrepilov Maxim
Share with friends:
Previous
Sandero 1: Engine repair
Next

Checking, flushing and replacing hydraulic compensators for…
Adjusting valve clearances
Replacement and adjustment of belt tension, replacement of the timing…
Setting the piston of the first cylinder to the TDC position of the…
Cleaning the crankcase ventilation system
Replacing the cylinder head cover gasket
Replacing valve stem seals
Replacing the cylinder head gasket
Replacing the camshaft seal
Replacing crankshaft seals
Other articles on other Renault models

➽ Removal and installation the flywheel Renault Duster 1 (2009-2017)
➽ Flywheel — General Information Renault Fluence 1 (2009-2020, petrol)
➽ Flywheel — General Information Renault Kangoo 1 (1997-2007)
➽ Removal and installation the clutch flywheel Renault Laguna 2 (2001-2007)
➽ Removal, installation and inspection of the flywheel Renault Logan 1 (2004-2012, petrol)
Link to this article in different formats
Reviews and comments of visitors
No comments yet


Add two numbers 16 + 29


Sandero 1 (2007-2012, petrol) 
  • General information
  • Structure of car
  • User manual
  • Troubleshooting
  • Maintenance
  • Practical advice
  • Power unit
  • Engine repair
  • Lubrication system
  • Cooling system
  • Fuel and exhaust system
  • Transmission
  • Clutch
  • Manual gearbox
  • Automatic gearbox
  • Drive shafts
  • Chassis, running gear
  • Front suspension
  • Rear suspension
  • Steering
  • Brake system
  • Wheels and tires
  • Body and interior
  • Exterior (external elements)
  • Interior (internal elements)
  • Doors, locks and windows
  • Car body care
  • Heater and air conditioner
  • Security system
  • Electrical equipment
  • Equipment and devices
  • Headlights and lighting
  • Power devices
  • Ignition system
  • Electrical diagrams
RenaultBook.ru © 2018–2026 | Mobile version | News and articles | Sitemap: EN BG BY UA RS HR RO PL SK HU | Administration | Site search | Bookmark
Duster 1 (2009-2017) | Fluence 1 (2009-2020, petrol) | Kangoo 1 (1997-2007) | Laguna 2 (2001-2007) | Logan 1 (2004-2012, petrol) | Logan 2 (2012-2020) | Megane 1 (1995-2002) | Megan 2 (2002-2009, petrol) | Sandero 1 (2007-2012, petrol) | Scenic 1 (1996-2003) | Symbol 1 (1999-2008, petrol) | Symbol 2 (2008-2013, petrol) | Renault 19 (1988-1996) | Espace I and II (1984-1996) | Espace III (1996-2002) | Clio 1 (1990-1998) |
We want your visit to be comfortable 😌 and use cookies 🍪 to do so.