
English Русский
Български
Беларускі
Український
Српски
Hrvatski
Română
Polski
Slovenský
Magyar
Bookmark Contacts Articles Sitemap
Company vehicles Peugeot Company vehicles Opel Company vehicles Skoda Company vehicles Land Rover Company vehicles Mitsubishi Company vehicles Volkswagen Company vehicles Honda
RenaultBook.ru


Duster   Fluence   Kangoo   Laguna   Logan   Megane   Sandero   Scenic   Symbol   Clio   Other
Sandero 1 (2007-2012, petrol)

Replacing the cylinder head cover gasket (Renault Sandero 1)

  • Main
  • Sandero
  • Sandero 1 (2007-2012, petrol)
  • Power unit
  • Engine repair
  • Replacing the cylinder head cover gasket
0
If the oil leak from under the cylinder head cover cannot be eliminated by tightening the cover mounting bolts, replace its gasket.

Note: The K4M engine does not have a cylinder head cover gasket. Its role is performed by an oil-resistant sealant gasket.


To replace the cylinder head cover gasket for K7J and K7M engines, do the following.

You will need: tools necessary for removing the air filter, ignition module, and a TORX T50 key.

1. Disconnect the wire from the negative terminal of the battery.
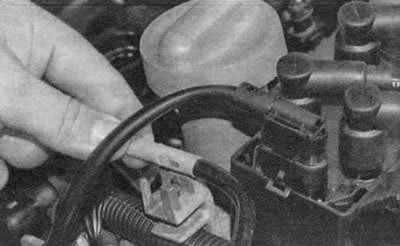
1. Disconnect the wire from the negative terminal of the battery.


2. Remove the purge hose from the holder on the cylinder head cover.
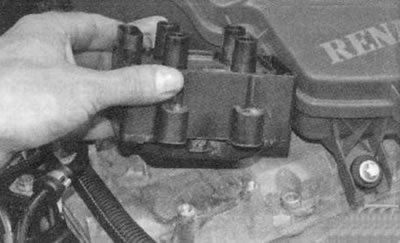
2. Remove the purge hose from the holder on the cylinder head cover.


3. Remove the ignition module (see "Checking, removing and installing the ignition module of K7J and K7M engines").

4. Remove the air filter (see "Removal and installation the air filter").
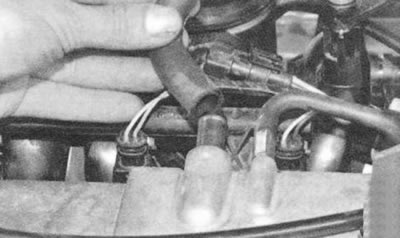


4. Remove the air filter (see «Removal and installation the air filter»).


5. Disconnect the large... hoses from the cylinder head cover fittings.
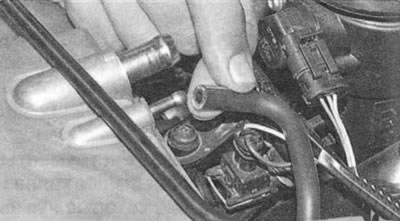
5. Disconnect the large... hoses from the cylinder head cover fittings.


6. ...and a small branch of the crankcase ventilation system.
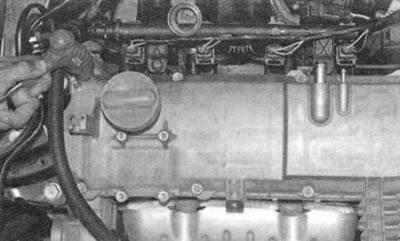
6. ...and a small branch of the crankcase ventilation system.


7. Remove the eight screws securing the cylinder head cover.
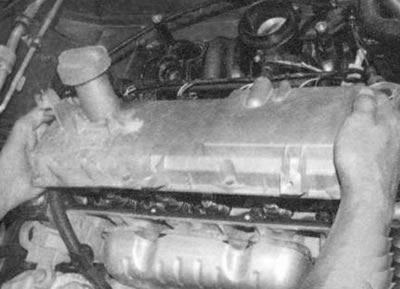
7. Remove the eight screws securing the cylinder head cover.


8. Remove the cover...
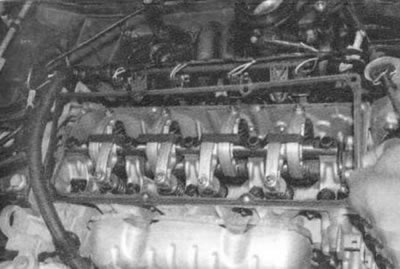


8. Remove the cover...


9. ...and the gasket installed underneath it.

10. Clean the cover grooves and the cylinder head surface from the remains of the old gasket.
10. Clean the cover grooves and the cylinder head surface from the remains of the old gasket.


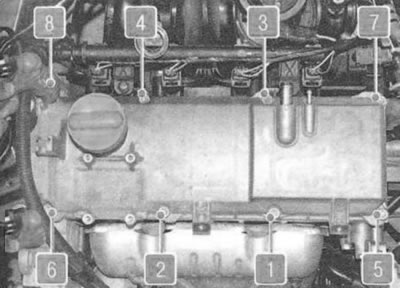
11. Install the cylinder head cover and all removed parts in the reverse order of removal. Tighten the cover mounting bolts in the order shown in the photo, in two stages:
  • Stage I - preliminary tightening with a torque of 2 Nm (0.2 kgf·m);
  • Stage II – final tightening with a torque of 10 Nm (1 kgf·m).

To restore the cylinder head cover seal of the K4M engine, do the following.

You will need: the tools needed to remove the air filter (see "Removal and installation the air filter"), ignition coils (see "Removal and installation of ignition coils of the K4M engine"), as well as a 10 mm socket head, a flat-blade screwdriver, a knife, a mounting blade, and a torque wrench.


1. Disconnect the wire from the negative terminal of the battery.

2. Remove the air filter (see "Removal and installation the air filter").

3. Disconnect the wiring harness connector from the Intake Air Temperature Sensor on the receiver.

4. Remove the ignition coils (see "Checking, removing and installing ignition coils of the K4M engine").

5. Remove the receiver (see "Replacing the cylinder head gasket").

6. Remove the oil separator (see "Cleaning the crankcase ventilation system").

7. Remove the right powertrain suspension support (see "Replacing the right powertrain suspension support").

8. Remove the upper timing belt cover (see "Setting the piston of the first cylinder to the TDC position of the compression stroke").
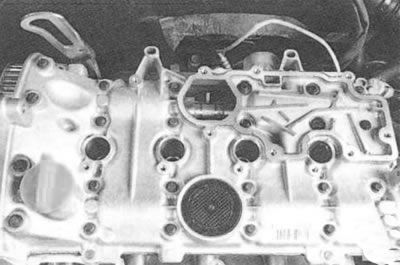
8. Remove the upper timing belt cover (see «Setting the piston of the first cylinder to the TDC…


9. Unscrew the twenty-four cylinder head cover mounting bolts in the reverse order to that shown in Fig. 5.8...
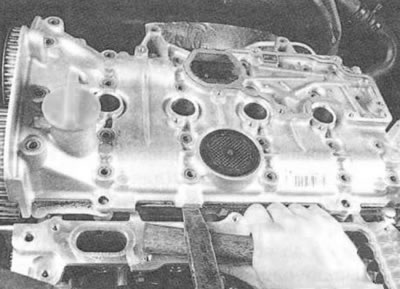
9. Unscrew the twenty-four cylinder head cover mounting bolts in the reverse order to that shown in…


10. ...and, prying it with a mounting blade...
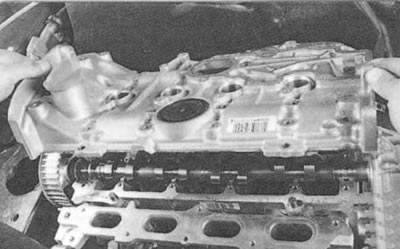


10. ...and, prying it with a mounting blade...


11. ...remove the cylinder head cover.

12. Clean the mating surfaces of the cover and cylinder head from old sealant.

13. Apply sealant gasket to the mating surface of the cylinder head.

Note.

Note.


This is what the gasket sealant applied to the mating surface of the cylinder head looks like. For clarity, it is shown on the cylinder head with the camshafts removed.
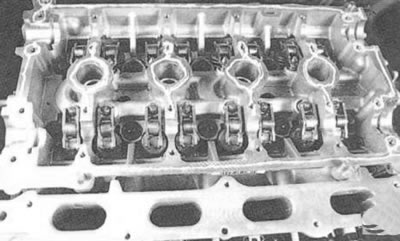

14. Install the cover on the cylinder head.

15. Tighten the cylinder head cover bolts in four stages (the tightening sequence is shown in Fig. 5.8):
  • Stage I - tighten bolts 22, 23, 20, 13 to 8 Nm;
  • Stage II - tighten bolts 1 to 12, 14 to 19, 21 to 24 to 12 Nm;
  • Stage III - loosen bolts 22, 23, 20, 13;
  • Stage IV - tighten bolts 22, 23, 20, 13 to a torque of 12 Nm.

16. Install the remaining parts in the reverse order of removal.
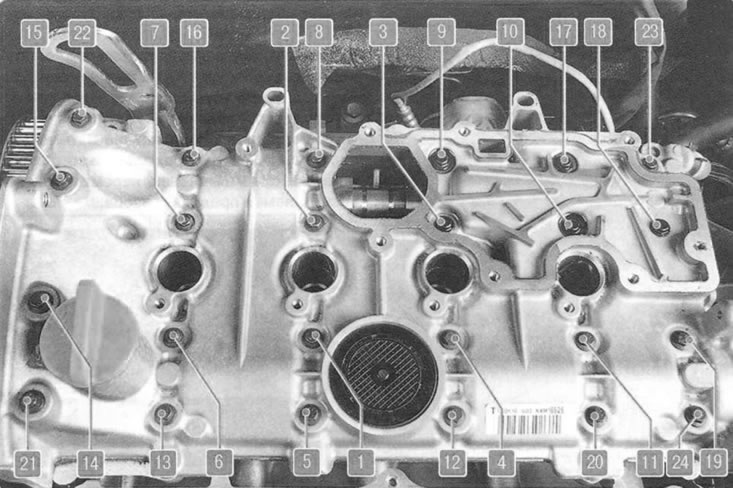


Fig. 5.8. The order of tightening the cylinder head cover bolts.

Fig. 5.8. The order of tightening the cylinder head cover bolts.
This article is available on: russian, bulgarian, belarusian, ukrainian, serbian, croatian, romanian, polish, slovak, hungarian
Article has been reviewed by editor: Podkrepilov Maxim
Share with friends:
Previous
Sandero 1: Engine repair
Next

Removal, defect detection and installation of the flywheel
Checking, flushing and replacing hydraulic compensators for…
Adjusting valve clearances
Replacement and adjustment of belt tension, replacement of the timing…
Setting the piston of the first cylinder to the TDC position of the…
Replacing valve stem seals
Replacing the cylinder head gasket
Replacing the camshaft seal
Replacing crankshaft seals
Replacing the oil pan gasket
Other articles on other Renault models

➽ Replacing the cylinder head cover gasket Renault Logan 1 (2004-2012, petrol)
➽ Cylinder head cover Renault Duster 1 (2009-2017)
➽ Cylinder head gasket for K4M engine Renault Fluence 1 (2009-2020, petrol)
➽ Cylinder head gasket Renault Kangoo 1 (1997-2007)
➽ Removal the cylinder head gasket (K4M engines) Renault Laguna 2 (2001-2007)
Link to this article in different formats
Reviews and comments of visitors
No comments yet


Add two numbers 25 + 28


Sandero 1 (2007-2012, petrol) 
  • General information
  • Structure of car
  • User manual
  • Troubleshooting
  • Maintenance
  • Practical advice
  • Power unit
  • Engine repair
  • Lubrication system
  • Cooling system
  • Fuel and exhaust system
  • Transmission
  • Clutch
  • Manual gearbox
  • Automatic gearbox
  • Drive shafts
  • Chassis, running gear
  • Front suspension
  • Rear suspension
  • Steering
  • Brake system
  • Wheels and tires
  • Body and interior
  • Exterior (external elements)
  • Interior (internal elements)
  • Doors, locks and windows
  • Car body care
  • Heater and air conditioner
  • Security system
  • Electrical equipment
  • Equipment and devices
  • Headlights and lighting
  • Power devices
  • Ignition system
  • Electrical diagrams
RenaultBook.ru © 2018–2026 | Mobile version | News and articles | Sitemap: EN BG BY UA RS HR RO PL SK HU | Administration | Site search | Bookmark
Duster 1 (2009-2017) | Fluence 1 (2009-2020, petrol) | Kangoo 1 (1997-2007) | Laguna 2 (2001-2007) | Logan 1 (2004-2012, petrol) | Logan 2 (2012-2020) | Megane 1 (1995-2002) | Megan 2 (2002-2009, petrol) | Sandero 1 (2007-2012, petrol) | Scenic 1 (1996-2003) | Symbol 1 (1999-2008, petrol) | Symbol 2 (2008-2013, petrol) | Renault 19 (1988-1996) | Espace I and II (1984-1996) | Espace III (1996-2002) | Clio 1 (1990-1998) |
We want your visit to be comfortable 😌 and use cookies 🍪 to do so.