



Helpful Hint: Clean the crankcase ventilation system before each oil change.
To clean the crankcase ventilation system of K7J and K7M engines, do the following.
You will need: a 5 mm Allen key, a flat-blade screwdriver, and pliers.
1. Remove the air filter (see "Removal and installation the air filter").
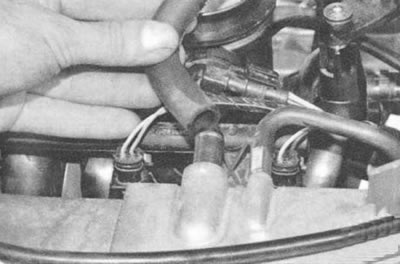
2. Disconnect the outlet hose of the large branch of the crankcase ventilation system from the cylinder head cover pipe and remove it.
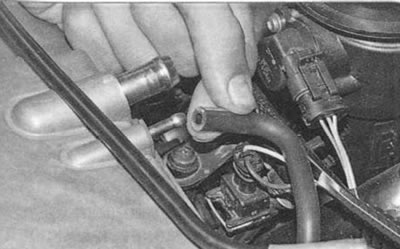
3. Remove the small branch hose of the crankcase ventilation system from the second branch pipe of the cylinder head cover.
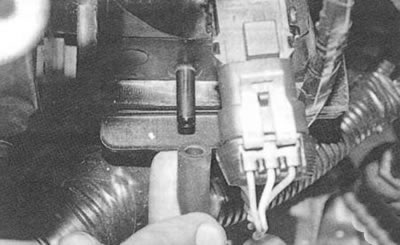
4. Disconnect the hose from the inlet pipe...
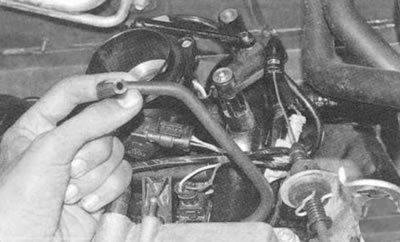
5. ...and take it off.
6. Remove the cylinder head cover (see "Replacing the cylinder head cover gasket").
Helpful Hint: Replace the cylinder head cover gasket with a new one every time you remove it.
7. Wash the system hoses and the inner cavity of the cylinder head cover from deposits with gasoline or kerosene. Since the cylinder head cover is non-separable (the oil deflector is riveted to the cover), pour the flushing liquid into the cavity between the oil deflector and the cover, shake it in the cavity and drain. Repeat the operation several times until the drained liquid becomes clear.
8. Clean the holes in the hose connections.
9. Blow out all system components with compressed air and dry them.
10. Install the cylinder head cover and system hoses in the reverse order of removal.
11. Install the air filter.
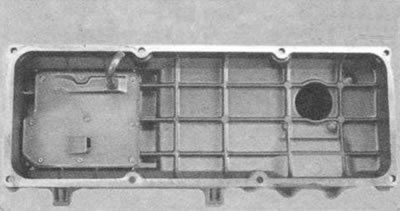
To clean the crankcase ventilation system of the K4M engine, do the following.
You will need: an 8 mm socket, a flat-blade screwdriver, a torque wrench, and a knife.
1. Remove the receiver (see "Replacing the cylinder head gasket").
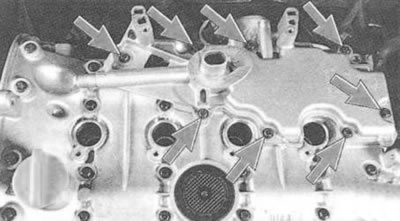
2. Remove the eight bolts securing the oil separator to the cylinder head cover...
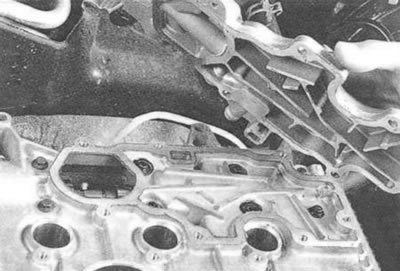
3. ...and remove the oil separator.
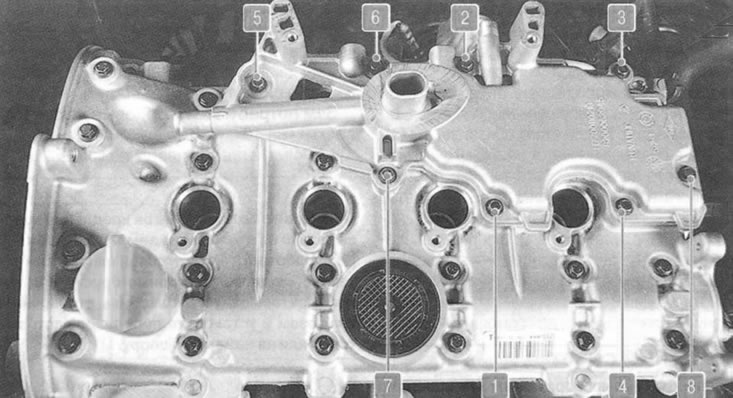
Fig. 5.5. Sequence of tightening the oil separator mounting bolts
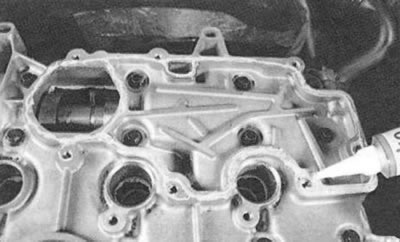
4. Clean the oil separator from deposits from crankcase gases (wash with gasoline or kerosene). Remove any remaining old sealant from the mating surfaces.
5. Apply high temperature gasket sealant to the mating surfaces of the cylinder head cover and oil separator.
6. Install the parts in the reverse order of removal.
Note: Tighten the oil separator mounting bolts to 13 N·m in the sequence shown in Fig. 5.5.