
Attention! Before working on the safety components, the airbag computer must be locked using the diagnostic tool. In this case, all ignition circuits are blocked, and the airbag warning light on the instrument panel lights up with a constant light (with the ignition on).
Attention! It is forbidden to carry out any work on pyrotechnic systems (airbags and seat belt pretensioners) near and away from a heat source or open flame to prevent them from triggering.
Removing
Protect the front sill trim and carpet.
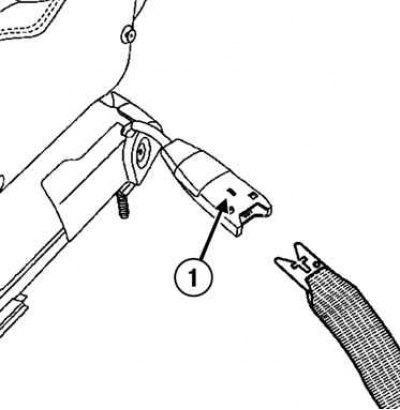
Pic. 8.107. Removing the seat belt: 1 - latch
Detach the seat belt by pressing the release (pic. 8.107).
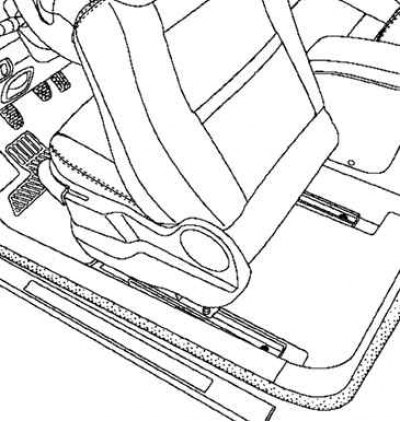
Pic. 8.108. Sliding the seat forward
Move the seat forward (pic. 8.108).
Loosen the rear mounting bolts.
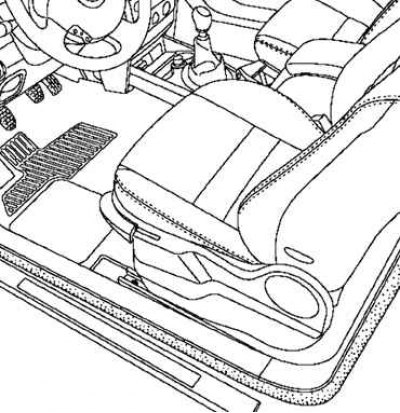
Pic. 8.109. Sliding the seat back
Slide the seat back (pic. 8.109).
Loosen the front mounting bolts.
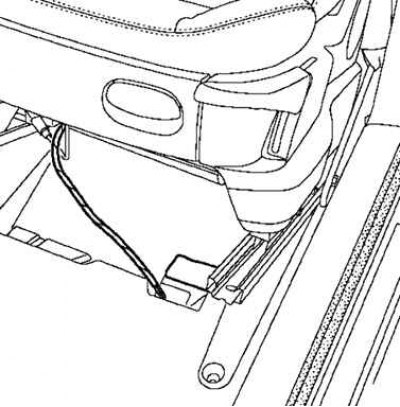
Pic. 8.110. Disconnecting the Seat Power Connector
Disconnect the connector under the seat (pic. 8.110).
Remove the seat (this operation is performed by two people with an assistant).
Installation
Before installing the seat, set and lock the skid in the forwardmost position.
Installation is made in an order, the return to removal.
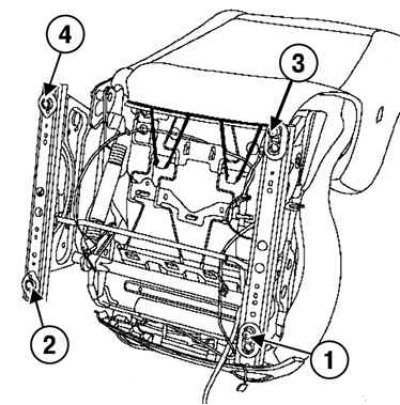
Pic. 8.111. Seat bolt tightening procedure
Follow the tightening sequence for the seat bolts (pic. 8.111).
Pre-tighten the two front bolts:
- bolt 1 towards the inside of the car;
- bolt 2 away from the vehicle.
Slide the seat forward and check the symmetry of the location of the locking teeth on the slide.
Torque tighten the seat mounting bolts to 35 Nm.
- bolt 3 towards the inside of the car;
- bolt 4 away from the vehicle.
Move the seat forward.
Torque tighten the two front bolts 1 and 2.