
English Русский
Български
Беларускі
Український
Српски
Hrvatski
Română
Polski
Slovenský
Magyar
Bookmark Contacts Articles Sitemap
Company vehicles Peugeot Company vehicles Opel Company vehicles Skoda Company vehicles Land Rover Company vehicles Mitsubishi Company vehicles Volkswagen Company vehicles Honda
RenaultBook.ru


Duster   Fluence   Kangoo   Laguna   Logan   Megane   Sandero   Scenic   Symbol   Clio   Other
Clio 1 (1990-1998)

Speedometer Drive — removal and installation (Renault Clio 1)

  • Main
  • Clio
  • Clio 1 (1990-1998)
  • Transmission
  • Manual gearbox
  • Speedometer Drive — removal and installation
0
Contents: Removal 🠛 Installation 🠛
Note: On some later models, the speedometer drive is located on the right side of the transmission, just above the drive shaft. On such transmission modifications it is impossible to remove the drive. These models can be identified by the plastic cable mounts to the gearbox, which replace the previously used bracket (see illustration).


4.0. Plastic mount for the speedometer drive (marked with an arrow) on later models.

4.0. Plastic mount for the speedometer drive (marked with an arrow) on later models.


Removal


1. Separate the left drive shaft from the gearbox (see Section 8). There is no need to detach the outer end of the drive shaft - the shaft and wheel hub can be removed as an assembly (see Section 2E).

2. Remove the snap ring and thrust washer, then remove the left side gear from the differential. The axle gear also serves as a housing for the drive shaft spider.

3. Turn the differential so that the satellites are located in a vertical plane and the speedometer drive becomes visible (see illustration).

4.3. Speedometer drive (marked with an arrow) - differential axle gear removed.

4.3. Speedometer drive (marked with an arrow) - differential axle gear removed.


4. Pull out the clamp and disconnect the speedometer drive cable.

5. Using long-nose pliers, remove the speedometer drive shaft.

6. Using the same pliers, remove the speedometer drive from the differential housing, being careful not to drop it.

7. Inspect the drive teeth for damage and signs of wear. Replace it if necessary. Please note that if the drive teeth in the differential are worn or damaged, the gearbox will need to be dismantled - this work should be carried out by a Renault dealer.

Installation


8. Using long-nose pliers, insert the speedometer drive into the working position.

9. Install the drive shaft. Make sure it fits into the drive gear mounting slots (see illustration).
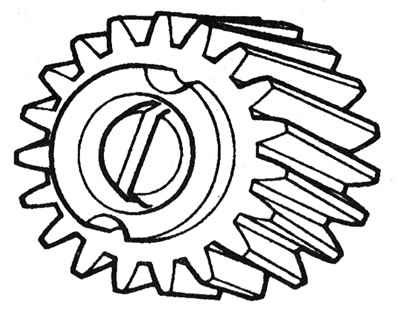
4.9. The speedometer drive slots must align with the shaft.

4.9. The speedometer drive slots must align with the shaft.


10. Install the speedometer drive cable and secure it with a bracket.

11. Insert the differential axle gear, then install the thrust washer and snap ring.

12. Insert the left drive shaft into the transmission (see Section 8).
This article is available on: russian, bulgarian, belarusian, ukrainian, serbian, croatian, romanian, polish, slovak, hungarian
Article has been reviewed by editor: Fedoseev Denis
Share with friends:
Previous
Clio 1: Manual gearbox
Next

Shift Rod/Mechanism — removal and installation
Gearshift linkage/mechanism adjustment
General description of a mechanical transmission
Manual transmission specifications
Differential Drive Shaft Seal (Right Side) — replacement
Reverse Light Switch — removal and installation
Manual transmission (C, D and E series engines) — removal and…
Manual Transmission (F Series Engine) — removal and installation
Overhauling a Manual Transmission — general description
Other articles on other Renault models

➽ Removal and installation the speedometer drive Renault Megane 1 (1995-2002)
➽ Transmission — 4 wheel drive (4WD) Renault Duster 1 (2009-2017)
➽ Auxiliary equipment drive belt (K4M engine) Renault Fluence 1 (2009-2020, petrol)
➽ Auxiliary Drive Belt Tension Renault Kangoo 1 (1997-2007)
➽ Auxiliary Drive Belt Tension Renault Laguna 2 (2001-2007)
Link to this article in different formats
Reviews and comments of visitors
No comments yet


Add two numbers 40 + 22


Clio 1 (1990-1998) 
  • General information
  • Maintenance
  • Troubleshooting
  • Power unit
  • Petrol engines 1.1 l (C)
  • Petrol engines 1.2 l (D)
  • Petrol engines 1.2/1.4 l (E)
  • Petrol engines 1.8 l (F)
  • Diesel engines
  • Overhaul of engines
  • Cooling and heating
  • Fuel system (carburetor)
  • Central fuel injection
  • Distributed fuel injection
  • Fuel system (diesel)
  • Starting and charging system
  • Ignition system (transistor)
  • Ignition system (electronic)
  • Pre-heating of diesel engines
  • Transmission
  • Clutch
  • Manual gearbox
  • Automatic gearbox
  • Drive shafts
  • Chassis, running gear
  • Brake system
  • Car suspension
  • Steering system
  • Body and interior
  • Exterior (external elements)
  • Doors, locks and windows
  • Electrical equipment
  • Equipment and devices
  • Electrical circuits
RenaultBook.ru © 2018–2026 | Mobile version | News and articles | Sitemap: EN BG BY UA RS HR RO PL SK HU | Administration | Site search | Bookmark
Duster 1 (2009-2017) | Fluence 1 (2009-2020, petrol) | Kangoo 1 (1997-2007) | Laguna 2 (2001-2007) | Logan 1 (2004-2012, petrol) | Logan 2 (2012-2020) | Megane 1 (1995-2002) | Megan 2 (2002-2009, petrol) | Sandero 1 (2007-2012, petrol) | Scenic 1 (1996-2003) | Symbol 1 (1999-2008, petrol) | Symbol 2 (2008-2013, petrol) | Renault 19 (1988-1996) | Espace I and II (1984-1996) | Espace III (1996-2002) | Clio 1 (1990-1998) |
We want your visit to be comfortable 😌 and use cookies 🍪 to do so.