



2. Unfasten and remove the mudguard from under the transmission.
3. Select 1st gear on the transmission by moving its operating lever to the appropriate position (see illustrations) and lock the lever securely. Renault technicians use a special tool for this purpose; make a suitable replacement from a metal or wooden strip.
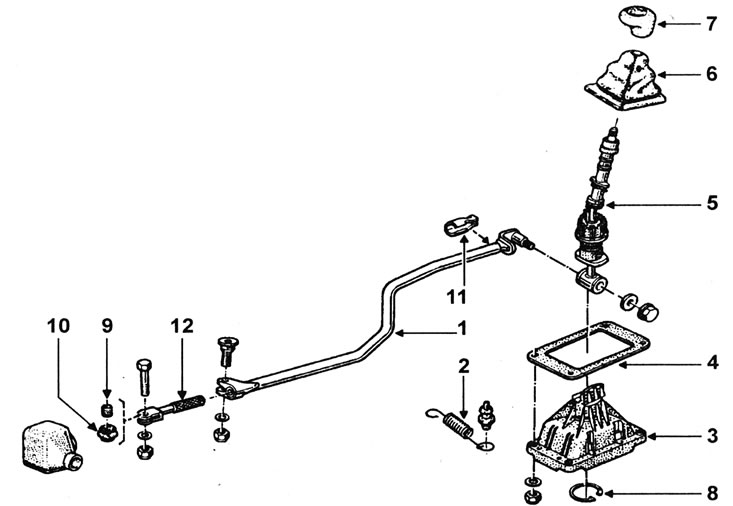
2.3a Gearshift Mechanism Components: 1 - Rod; 2 - Spring; 3 - Lever pivot housing; 4 - Gasket; 5 - Assembling the gear shift lever; 6 - Gear shift lever cover; 7 - Handle; 8 - Retaining ring; 9 - Bushing; 10 - Coupling; 11 - Facing; 12 - Forked tip.
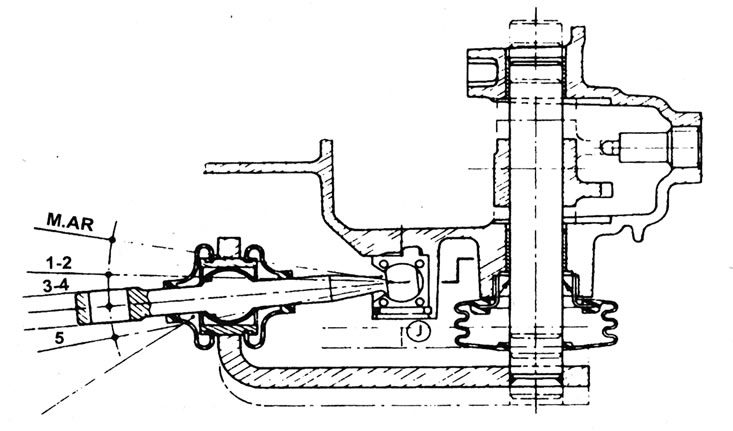
2.3b. Positions of the transmission operating lever.
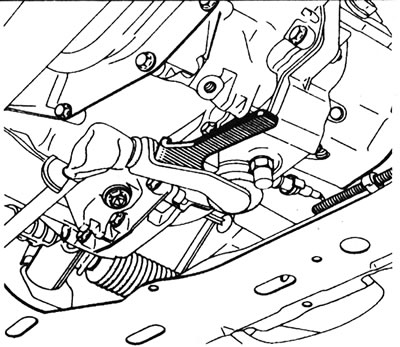
2.3s. Special Renault tool designed to lock the lever.
4. Using a feeler gauge, check that the gap between the reverse gear lock ring on the gear shift lever and the inclined surface on the right side of the gear shift lever housing is 4.5 - 7.5 mm (see illustration).
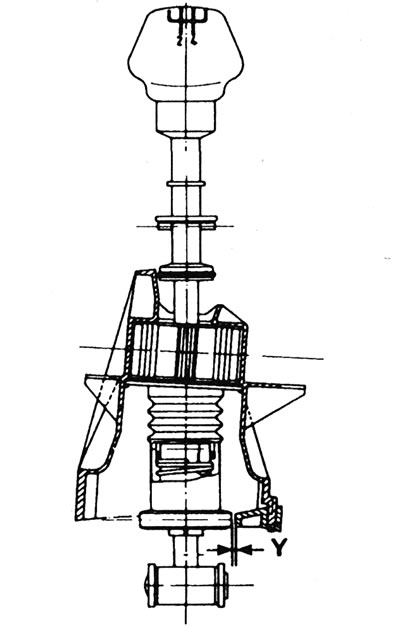
2.4. The gap (Y) should be 4.5 - 7.5 mm.
5. If adjustment is necessary, unhook the return spring from the end of the rod facing the shift lever, then loosen the pinch bolt on the end of the rod near the transmission so that the rod can move along its forked end.
6. Move the gear shift lever so that the reverse gear lock ring is positioned against the inclined plane of the casing, then insert a suitable feeler gauge between the ring and the plane (see illustration).
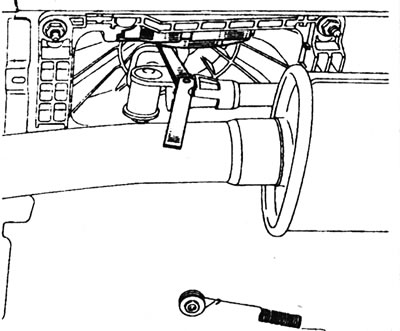
2.6. Adjust the position of the gear shift lever using a feeler gauge.
Lock the lever in this position, then tighten the clamp bolt.
7. Remove the locking tool and attach the return spring.
8. Check the gap size again (see point 4).
9. Make sure the gear shift lever moves easily into each position, then install the mudguard and tighten the bolts. Lower the car to the ground.