



Contents: Overpressure-vacuum relief valve 🠛 Limiting valve 🠛 Tank overflow prevention valve and…🠛 Filler neck 🠛 Removal the fuel tank (all engines) 🠛
Overpressure-vacuum relief valve
In case of blocking of the petrol vapour recirculation circuit, this valve prevents the creation of excess pressure in the tank (tank swelling) or rarefaction (due to fuel consumption the tank is crushed).
Limiting valve
This valve prevents the nozzle of the filler nozzle for leaded petrol or diesel fuel from being inserted into the filler neck.
Tank overflow prevention valve and fuel leak prevention valve when the vehicle rolls over
The working element of the overflow prevention valve is a ball.
When the car is stationary during refueling, the ball rests on the seat, thereby blocking a certain volume of air in the tank.
When the car is moving, the ball moves away from the seat, opening communication between the tank and the adsorber.
A tank filled with fuel must contain a certain amount of air. This allows the fuel to expand without causing the tank to bulge.
The valve preventing fuel leakage when the vehicle overturns prevents the tank from emptying through the channel leading to the adsorber.
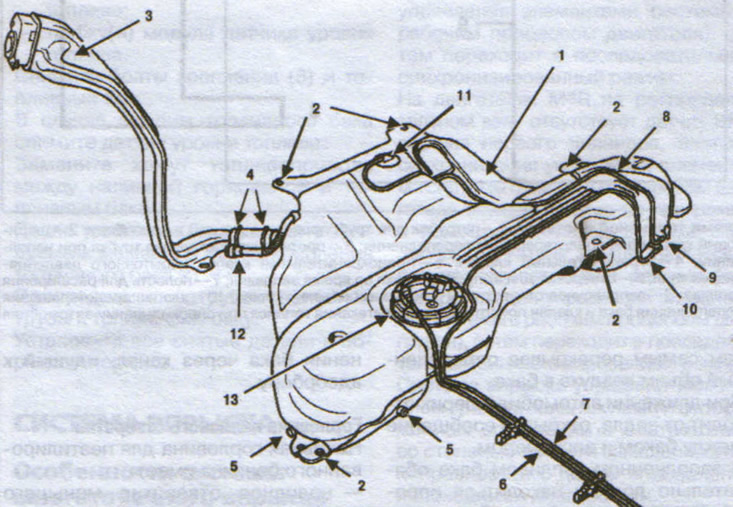
Fuel tank:
1 - fuel tank;
2 - mounting holes;
3 — filler neck;
4 - Filler neck fastening clamp;
5 — Brake pipe mounting brackets;
6 — fuel supply pipeline;
7 — gasoline vapor supply pipeline;
8 — pipeline for removing gasoline vapors to the adsorber (coming from the fuel tank);
9 - communication with the atmosphere;
10 — adsorber;
11 — valve to prevent tank overflow and valve to prevent fuel leakage when the vehicle overturns;
12 - anti-pressure tube (degassing during filling);
13 — fuel pump with level sensor assembly.
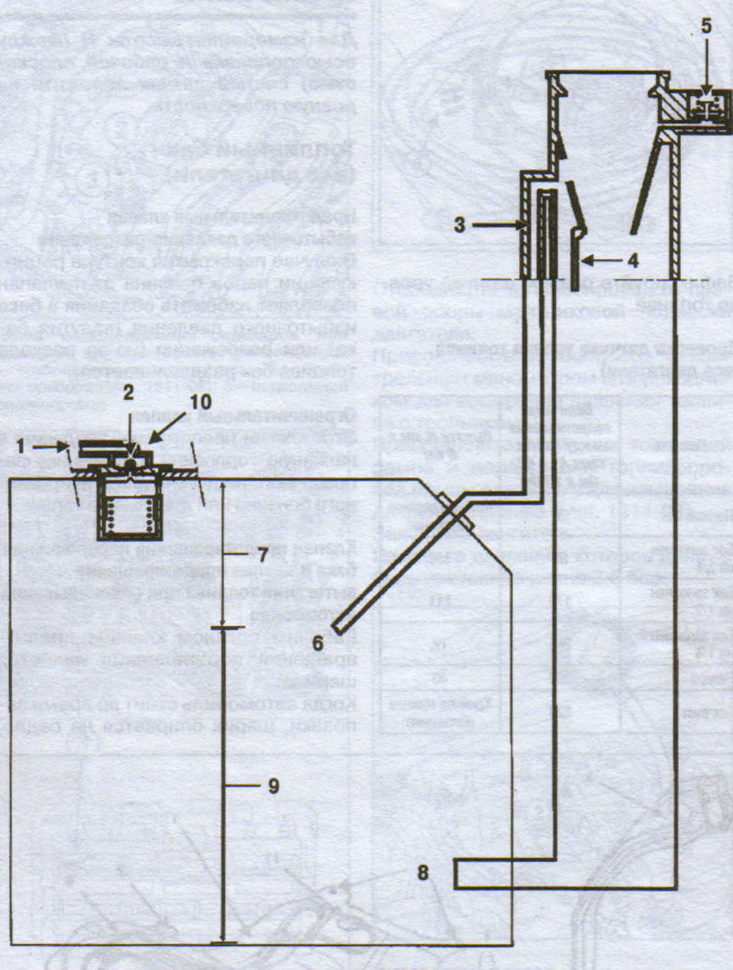
Fuel system diagram:
1 - branch pipe for the pipeline going to the adsorber;
2 - Ball valve to prevent overflow;
3 - anti-pressure tube during filling;
4 - limiting valve;
5 - excess pressure-vacuum safety valve;
6 - hole for releasing air during refueling;
7 - cavity for fuel expansion;
8 - filling hole;
9 — useful volume of fuel;
10 — valve to prevent tank overflow and valve to prevent fuel leakage when the vehicle overturns.
Filler neck
The filler neck for unleaded petrol has:
- the filling hole is smaller in diameter than a conventional filling nozzle (limiting valve). The use of leaded gasoline leads to damage to the exhaust gas toxicity reduction system - the oxygen sensor and the catalytic converter;
- a valve that closes the filling hole to prevent the escape of gasoline vapor;
- hermetic plug.
Removal the fuel tank (all engines)
Text of the original source on this website www.Renaultbook.ru
Place the car on a lift.
Disconnect the battery. Drain the fuel from the fuel tank. Remove the main muffler and intermediate pipe.
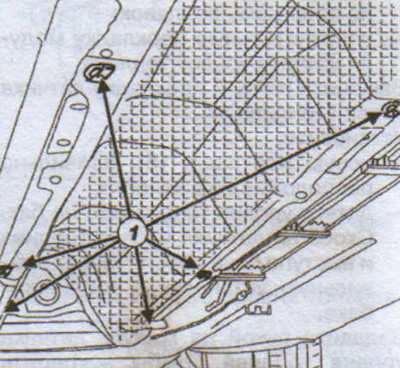
Remove:
- central Heat Shield Holders (1);
- central heat shield.
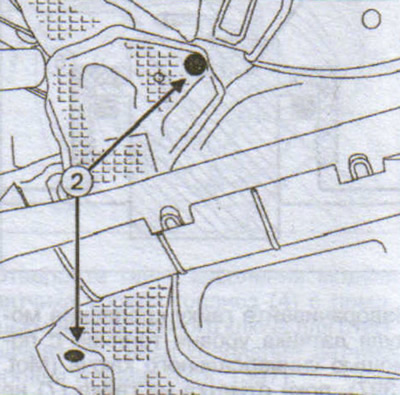
Remove:
- rear heat shield mounting bolts (2);
- rear heat shield.
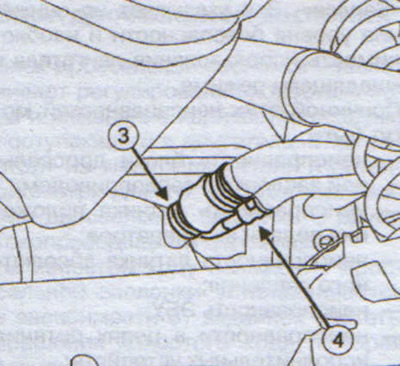
Remove the clamp (3) of the filler pipe connection to the fuel tank from the fuel tank side.
Disconnect the discharge tube fitting (4).
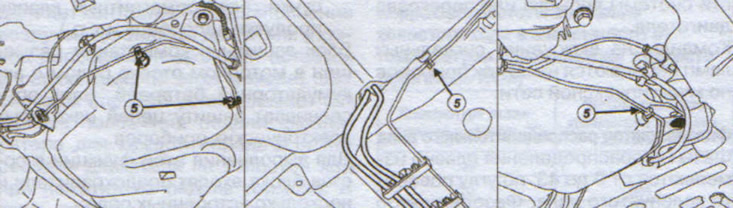
Disconnect the rigid brake lines (5) and move them slightly to the side.
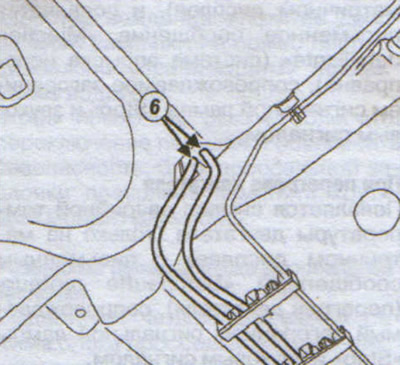
Disconnect the fuel lines (6) from the fuel tank and move them to the side.
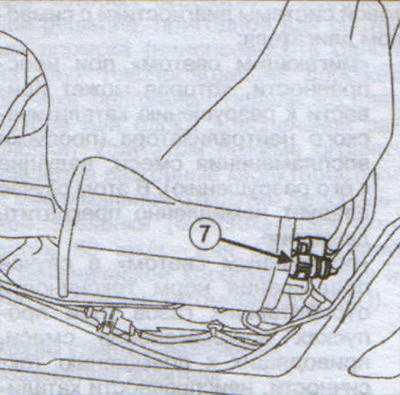
Disconnect the nipple of the adsorber outlet pipe (7) and move them to the side.
Disconnect the filler neck pipe from the fuel tank side. Place a hydraulic jack under the fuel tank.
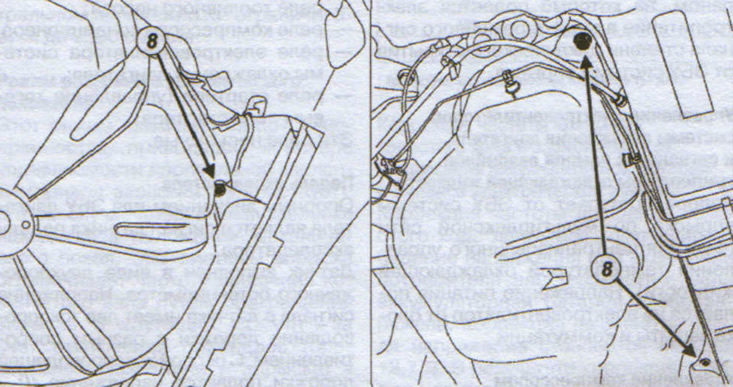
Loosen the bolts (8) securing the fuel tank.
Lower the fuel tank slightly.
Disconnect:
- fuel level sensor module connector;
- fuel level sensor module tube.
Remove the mounting bolts (8) and the fuel tank.
If replacing the fuel tank, remove the fuel level sensor.
Replace the fuel line clamp between the filler neck and the fuel tank.
After installing the tank, tighten the fuel tank mounting bolts to the required torque of 21 Nm.
Connect the filler pipe to the fuel tank.
Install all removed parts in reverse order.