
English Русский
Български
Беларускі
Український
Српски
Hrvatski
Română
Polski
Slovenský
Magyar
Bookmark Contacts Articles Sitemap
Company vehicles Peugeot Company vehicles Opel Company vehicles Skoda Company vehicles Land Rover Company vehicles Mitsubishi Company vehicles Volkswagen Company vehicles Honda
RenaultBook.ru


Duster   Fluence   Kangoo   Laguna   Logan   Megane   Sandero   Scenic   Symbol   Clio   Other
Clio 1 (1990-1998)

Auxiliary Fuel Tank and Pump (16-Valve Engines) — description, removal, and installation (Renault Clio 1)

  • Main
  • Clio
  • Clio 1 (1990-1998)
  • Power unit
  • Distributed fuel injection
  • Auxiliary Fuel Tank and Pump (16-Valve Engines) — description, removal, and installation
0
Contents: Description 🠛 Removal 🠛 Installation 🠛

Description


1. On models with F7P engine (with 16 valves) two fuel tanks are installed: main and additional (see illustration).
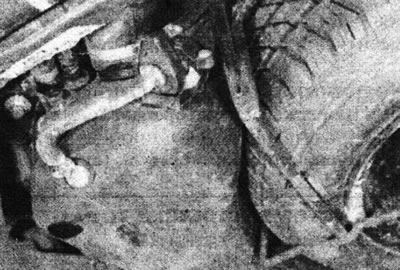
12.1 Additional fuel tank and pump on models with F7P engine (with 16 valves).

12.1 Additional fuel tank and pump on models with F7P engine (with 16 valves).


The additional tank is located below the main one. When filling, fuel flows down the filler pipe into the additional tank, and then through the connecting pipe into the main one. A valve at the end of the connecting pipe prevents fuel from leaking out of the main tank.

2. In operating mode, fuel is pumped from the main tank by the main fuel pump. When the level in the main tank drops to a certain value, the auxiliary pump starts working for 40 seconds, pumping fuel from the auxiliary tank to the main one. At the same time, the "low fuel" indicator light comes on for 5 seconds. The auxiliary pump only operates when the engine is running or the starter is engaged.

3. If both tanks are empty, at least 10 liters of fuel will need to be poured through the filler until it reaches the main tank. If there is not enough fuel, you need to crank the engine with the starter for about 60 seconds until the auxiliary pump pumps the fuel. (This problem can be avoided by pouring a few liters of fuel through the fuel level indicator sensor hole).


Removal


4. Depressurize the fuel system as described in Chapter 7, then disconnect the fuel supply pipe from the injector line. Attach a piece of flexible hose to the supply pipe and submerge the other end of the hose in a suitable container.

5. Activate the fuel pumps by short-circuiting terminals 3 and 5 on the relay: fuel will be pumped into the tank. After all the fuel has been transferred, remove the jumper.

Warning: Do not allow the main pump to run dry for more than a few seconds.


6. Disconnect the negative cable from the battery. Connect the fuel supply line to the injector line.

7. Jack up the vehicle and place it on axle stands. Remove the spare and both rear wheels.

8. Unscrew the two bolts securing the auxiliary fuel pump. Disconnect the power supply wiring and hoses from the auxiliary pump (see illustration).
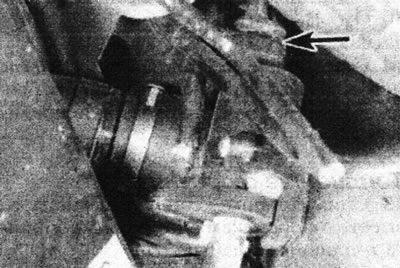
12.8. Additional pump electrical connector (marked with an arrow) - models with F7P engine (with 16…

12.8. Additional pump electrical connector (marked with an arrow) - models with F7P engine (with 16 valves).


Caution: If the auxiliary pump has not been running, the auxiliary tank may still be filled with fuel.


9. Disconnect the pipe from the main tank that goes to the additional one. Also disconnect the filler and breather tubes.


10. Loosen the mounting bolts, lower the additional tank and remove it from under the vehicle (see illustration).
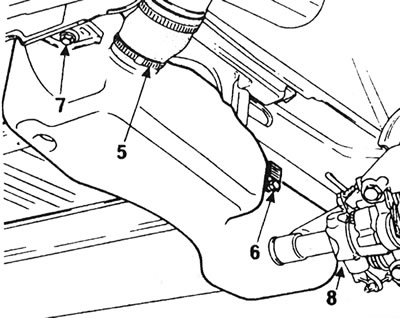
12.10 Auxiliary Fuel Tank Fasteners - F7P Engine Models (with 16 valves): 5 - Filling pipe; 6 -…

12.10 Auxiliary Fuel Tank Fasteners - F7P Engine Models (with 16 valves): 5 - Filling pipe; 6 - Mounting bolt; 7 - Mounting bolt; 8 - Mounting bolt;


(Original version on our portal: renaultbook.ru)

Installation


11. Install in reverse order, using new clamps if necessary.

12. Flush the main fuel tank with fuel by pouring it through the fuel level sensor hole.
This article is available on: russian, bulgarian, belarusian, ukrainian, serbian, croatian, romanian, polish, slovak, hungarian
Article has been reviewed by editor: Fedoseev Denis
Share with friends:
Previous
Clio 1: Distributed fuel injection
Next

Fuel tank — removal and installation
Fuel pump — inspection, removal and installation
Fuel system — pressure check
Fuel Injection System — general description and troubleshooting
Unleaded gasoline — general description
Fuel tank filler pipe — removal and installation
Fuel injection system — checking the serviceability of components
Fuel injection system — removal and installation of components
Underhood cooling system (1764 cc/F7P engine only) — general…
Intake manifold — removal and installation
Other articles on other Renault models

➽ Checking the electric fuel pump (all engines) Renault Fluence 1 (2009-2020, petrol)
➽ Checking fuel pump performance (all engines) Renault Laguna 2 (2001-2007)
➽ In case of complete depletion of fuel in the tank (only versions… Renault Logan 2 (2012-2020)
➽ Checking the electric fuel pump (all engines) Renault Megan 2 (2002-2009, petrol)
➽ Checking the fuel pump relief valve Renault Espace III (1996-2002)
Link to this article in different formats
Reviews and comments of visitors
No comments yet


Add two numbers 36 + 46


Clio 1 (1990-1998) 
  • General information
  • Maintenance
  • Troubleshooting
  • Power unit
  • Petrol engines 1.1 l (C)
  • Petrol engines 1.2 l (D)
  • Petrol engines 1.2/1.4 l (E)
  • Petrol engines 1.8 l (F)
  • Diesel engines
  • Overhaul of engines
  • Cooling and heating
  • Fuel system (carburetor)
  • Central fuel injection
  • Distributed fuel injection
  • Fuel system (diesel)
  • Starting and charging system
  • Ignition system (transistor)
  • Ignition system (electronic)
  • Pre-heating of diesel engines
  • Transmission
  • Clutch
  • Manual gearbox
  • Automatic gearbox
  • Drive shafts
  • Chassis, running gear
  • Brake system
  • Car suspension
  • Steering system
  • Body and interior
  • Exterior (external elements)
  • Doors, locks and windows
  • Electrical equipment
  • Equipment and devices
  • Electrical circuits
RenaultBook.ru © 2018–2026 | Mobile version | News and articles | Sitemap: EN BG BY UA RS HR RO PL SK HU | Administration | Site search | Bookmark
Duster 1 (2009-2017) | Fluence 1 (2009-2020, petrol) | Kangoo 1 (1997-2007) | Laguna 2 (2001-2007) | Logan 1 (2004-2012, petrol) | Logan 2 (2012-2020) | Megane 1 (1995-2002) | Megan 2 (2002-2009, petrol) | Sandero 1 (2007-2012, petrol) | Scenic 1 (1996-2003) | Symbol 1 (1999-2008, petrol) | Symbol 2 (2008-2013, petrol) | Renault 19 (1988-1996) | Espace I and II (1984-1996) | Espace III (1996-2002) | Clio 1 (1990-1998) |
We want your visit to be comfortable 😌 and use cookies 🍪 to do so.