
Attention! Depending on the configuration, the vehicle may be equipped with a heater with or without air circulation mode in the passenger compartment. A heater with recirculation mode can be recognized by the presence of a switch with the corresponding icon on the panel. This mode, for example, can be turned on when driving through a tunnel or when driving through an area with an unpleasant odor. In this case, the air blown into the passenger compartment by the fan will be taken from the passenger compartment, and not from the outside. The procedure for dismantling the fan motor depends on the type of heater.
Removing
1. Heater with air recirculation mode in the cabin. Turn on the heater to the mode of air intake from the outside. The fresh air intake cover must not be closed,
2. Remove fairing cover, see relevant chapter.
3. Remove the air intake.
4. Disconnect the wire terminal «masses» (-) from the battery.
Attention! This deletes data from the memory devices, for example, the security code of the radio. Before disconnecting the battery, please read the chapter «Battery - removal and installation».
Heater without interior air recirculation mode
5. Disconnect the multi-pin plug A in the drain box (see illustration).
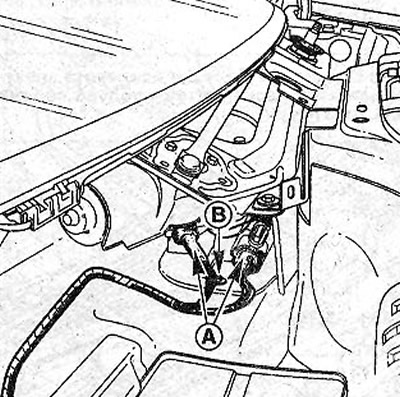
12.5 Disconnect the multi-pin plug A in the drain box
6. Remove bolt B (see illustration 12.5).
7. Remove drain cover C (see illustration).
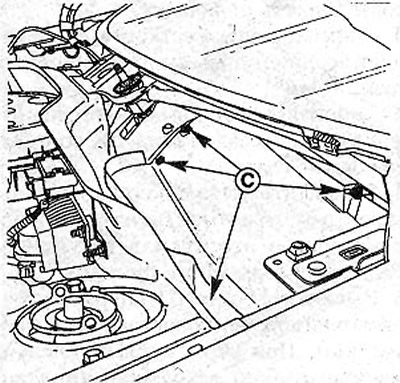
12.7 Remove drain cover C
8. Unscrew the bolt E and remove the interior blower fan motor (see arrow in illustration).
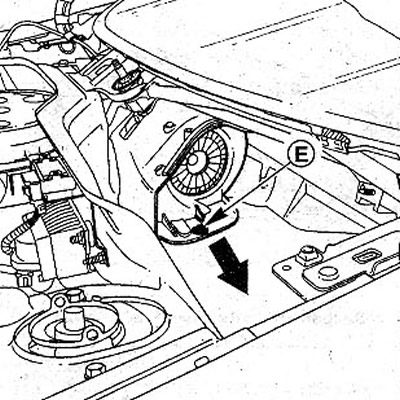
12.8 Unscrew bolt E and remove the interior blower motor (see arrow)
9. Disconnect the motor power plug and disconnect the motor from the fan housing.
Heater with recirculation mode
10. Vehicles with diesel engine and air conditioning. Remove the battery, see relevant chapter.
11. Disconnect the multi-pin plug A (see illustration).
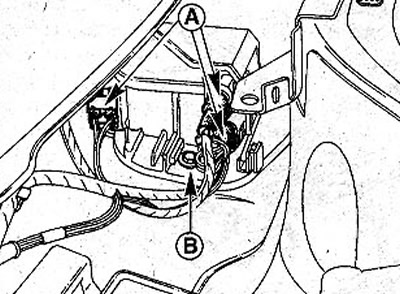
12.11 Disconnect multi-pin plug A
12. Lift the leash on the body to remove the gasket.
13. Remove the stiffening lever that connects the upper shock strut mounts.
14. Remove the high voltage ignition system, see the relevant chapter.
15. Unscrew the four bolts securing the heat-reflecting shield on the bulkhead of the engine compartment, above the vacuum brake booster.
16. Unscrew bolts C from the intermediate wall of the drain box (see illustration). In this case, the bolt under the heat-reflecting shield should be unscrewed first.
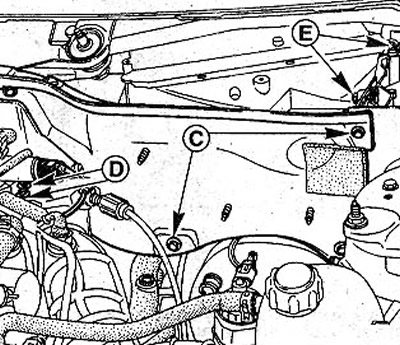
12.16 Unscrew bolts C from the intermediate wall of the drain box
17. Remove the intermediate wall of the drain box. To do this, depending on the type of engine, the following parts must be dismantled:
- vehicles with a 1.4 liter engine. Remove the air filter box, see relevant chapter;
- vehicles with a 1.6 liter engine. Remove the air filter and disconnect the throttle from the intake manifold by unscrewing the four mounting bolts and disconnecting the plugs, see the relevant chapter;
- vehicles with a 2.0 liter engine. Disconnect the accelerator cable holder by unscrewing the bolts D, see illustration 12.16, and disconnecting the plug;
- vehicles with a diesel engine. Remove the breather hose holder on the baffle and remove the engine preheat control unit bracket.
18. Unscrew the bolts F and remove the drain box (see illustration).
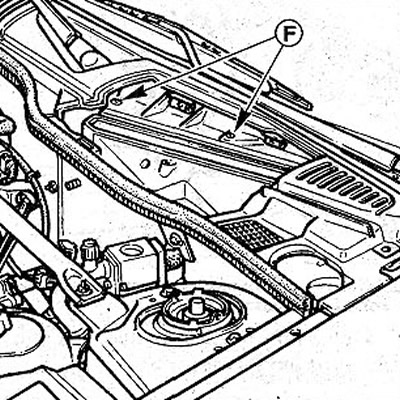
12.18 Unscrew bolts F and remove the gutter box
19. Unscrew the two bolts E from the intermediate wall, see illustration 12.16 and disconnect it.
20. Unscrew the bolts G and remove the fan motor (see illustration). Disconnect the wires from the electric motor.
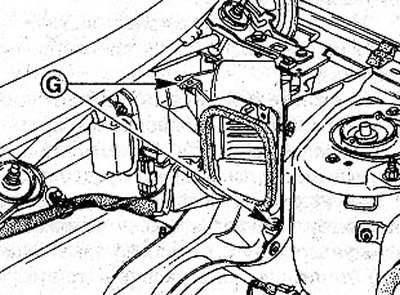
12.20 Remove screws G and remove the fan motor
21. Unscrew, if necessary, the fresh air damper motor by unscrewing bolts B (see illustration).
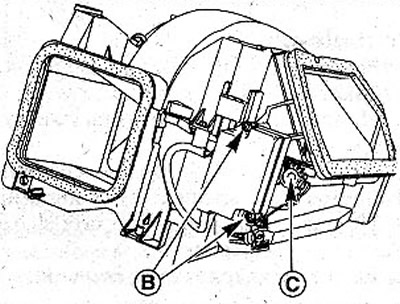
12.21 Unscrew, if necessary, the fresh air damper motor by unscrewing bolts B
Attention! When installing the motor, notch C on the damper gear must fit into the groove on the motor gear.
Installation
22. Heater with recirculation mode. Install the motor on the rail Nor fix it with bolts (see illustration).
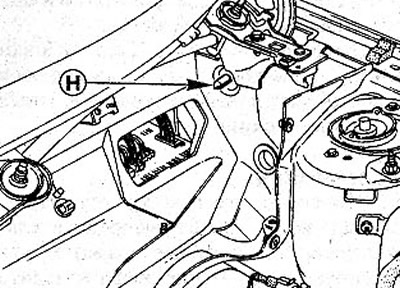
12.22 Mount the motor on the guide H and fix it with bolts
23. Put a new gasket on the drain box.
Attention! The gasket must not be defective. Otherwise, water will enter the cabin.
Further installation is carried out in the reverse order of removal.
24. Connect the wire terminal to the negative pole of the battery «masses» (-).
25. Set the clock and radio.
SCENIC cars
26. Disconnect the wire terminal «masses» (-) from the battery.
Attention/ This deletes data from the memory devices, such as the radio's security code. Before disconnecting the battery, please read the chapter «Battery - removal and installation».
27. Remove on the passenger party consolidation of the lower part of a door.
28. Remove trim B from the inside of the door sill (see illustration).
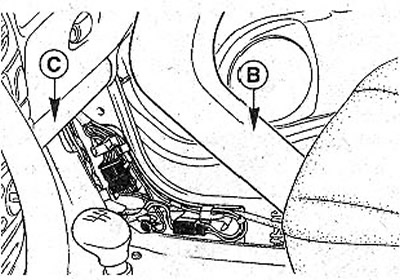
12.28 Remove trim B from the inside of the door sill
29. Release the wire C located on the outside under the instrument panel (see illustration 12.28). Cut the clamp if necessary.
30. Remove the foam pad from under the heater fan.
31. Disconnect the fan motor power plug.
32. Unscrew three bolts of fastening of the electric motor and remove it, having turned on 90°.
Installation of the electric motor is carried out in the reverse order of removal.