
Removing
1. Disconnect the wire terminal «masses» (-) from the battery.
Attention! This deletes data from the memory devices, for example, the security code of the radio. Before disconnecting the battery, please read the chapter «Battery - removal and installation».
2. Remove fairing cover, see relevant chapter.
3. Disconnect the air intake box.
4. Disconnect the multi-pin plug A (see illustration).
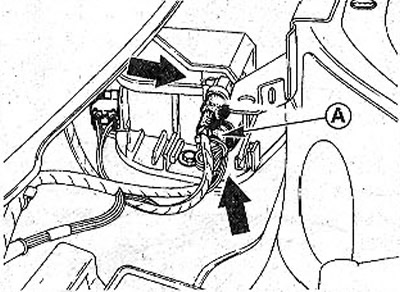
13.4 Disconnect the multi-pin plug A
5. Unscrew the two screws securing the backplane.
6. Remove the electric motor together with the connection board containing the resistors (see illustration).
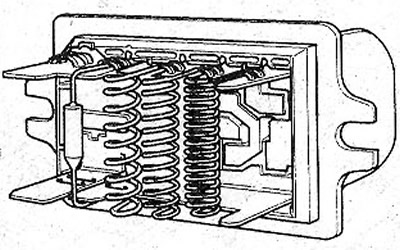
13.6 Remove the electric motor together with the connection board containing the resistors
Installation
7. Check the fan motor for ease of movement before installing.
8. Put the electric motor in place and secure with bolts.
9. Connect the multi-pin plug.
10. Connect the air box.
11. Replace the fairing cover, see the relevant chapter.
12. Connect to the negative pole of the battery wire terminal «masses» (-), set the clock and radio.
SCENIC cars
Additional resistances are fixed with screws on the heater fan housing under the instrument panel.
It is not necessary to dismantle the instrument panel to remove and install additional resistances
13. Disconnect the wire terminal «masses» (-) from the battery.
Attention! This deletes data from the memory devices, for example, the security code of the radio. Before disconnecting the battery, please read the chapter «Battery - removal and installation».
14. Disconnect the power plug from the resistance board by putting your hand under the instrument panel.
15. Unscrew the bottom bolt of fastening of a payment of resistances.
16. Loosen the top bolt securing the resistance board. Do not unscrew the bolt completely.
17. Feed the card back and remove it. The board is installed in the reverse order of removal.