
English Русский
Български
Беларускі
Український
Српски
Hrvatski
Română
Polski
Slovenský
Magyar
Bookmark Contacts Articles Sitemap
Company vehicles Peugeot Company vehicles Opel Company vehicles Skoda Company vehicles Land Rover Company vehicles Mitsubishi Company vehicles Volkswagen Company vehicles Honda
RenaultBook.ru


Duster   Fluence   Kangoo   Laguna   Logan   Megane   Sandero   Scenic   Symbol   Clio   Other
Clio 1 (1990-1998)

Pallet — removal and installation (Renault Clio 1)

  • Main
  • Clio
  • Clio 1 (1990-1998)
  • Power unit
  • Petrol engines 1.2/1.4 l (E)
  • Pallet — removal and installation
0
Contents: Removal 🠛 Installation 🠛
Note; To perform this procedure, you will need a winch of suitable lifting capacity. And when installing the pan, a new gasket will be required.


Removal


1. Disconnect the wiring from the battery (start with the negative).

2. Drain the engine oil as described in Section 1, then install and tighten the drain plug using a new washer.

3. Jack up the front of the vehicle and place it on axle stands. Remove the right front wheel.

4. Remove the plastic cover from the inside of the wheel arch to gain access to the engine.

5. Remove the hood as described in Section 11.

6. If necessary, remove the air filter as described in Section 4B.

7. When working under the vehicle, loosen (but don't take it off) the last bolt on the rear engine mount support fork. Loosen and remove the front bolt and move the bracket down.

8. Remove the exhaust outlet pipe as described in Section 4B.

9. Remove the bolts securing the clutch and cover assembly to the clutch housing and engine block and lower it (see illustrations).
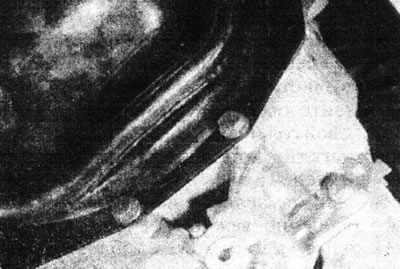
10.9a. Unscrew the mounting bolts...
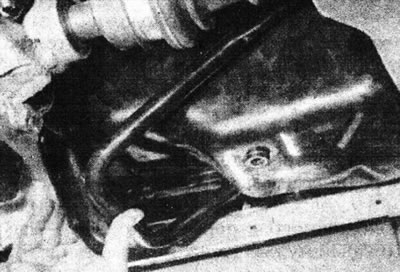
10.9a. Unscrew the mounting bolts...


10.9b....and remove the coupler and cover assembly.

10.9b....and remove the coupler and cover assembly.


10. Remove the bolts securing the oil pan to the cylinder block, but leave two bolts.

11. Now the engine needs to be raised approximately 75-100 mm to allow the sump to be removed. To do this, first unscrew the right engine mount nut from under the car and remove the bracket plate. Attach a winch to the engine mounting eye, near the drive cover, and lift the engine.

12. Remove the two remaining bolts, then separate the oil pan from the cylinder block by hitting it with your palm. Lower and remove the tray (see illustration).
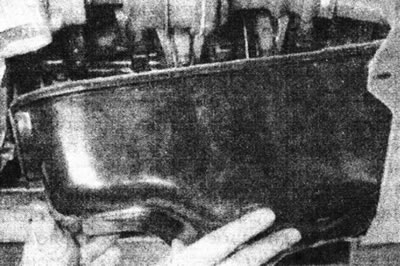
10.12. Separate the oil pan from the engine.

10.12. Separate the oil pan from the engine.


Installation


13. Clean the mating surfaces of the cylinder block and the oil pan from any gasket residue and wipe them dry.

14. Place the new gasket on the pan, ensuring it is correctly positioned in the curved areas (see illustration).
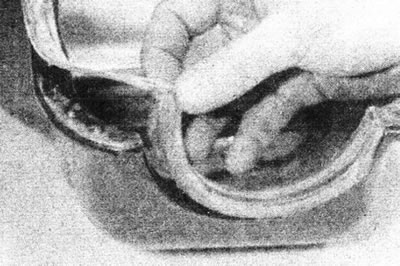
10.14 Place the new gasket on the pan.

10.14 Place the new gasket on the pan.


15. Place the pan against the cylinder block and insert the bolts. Tighten the bolts gradually in a diagonal sequence to the torque specified in the Specifications.

16. Lower the engine and install the right engine mount plate and nut. Disconnect the winch.

17. Install the coupler and cover assembly onto the clutch housing and engine block.

18. Install the exhaust outlet pipe and tighten the bolts. See if necessary. Section 4B.

19. Install the rear engine mount support fork and tighten the bolts.

20. If necessary, install the air filter as described in Section 4B.

21. Install the hood as described in Section 11.

22. Install the plastic cover inside the wheel arch.

This note was copied from the resource [www.RenaultBook.ru]

23. Install the wheel and lower the car to the ground.

24. Fill the engine with oil as described in Section 1.

25. Connect the battery wiring.
This article is available on: russian, bulgarian, belarusian, ukrainian, serbian, croatian, romanian, polish, slovak, hungarian
Article has been reviewed by editor: Fedoseev Denis
Share with friends:
Previous
Clio 1: Petrol engines 1.2/1.4 l (E)
Next

Cylinder head — removal, inspection and installation
Camshaft — removal, inspection and installation
Camshaft seal replacement
Sprockets and timing belt tensioner — removal, inspection and…
Toothed drive belt — removal, inspection and installation
Oil pump and sprockets — removal, inspection and installation
Crankshaft seals — replacement
Flywheel/Drive Disc — removal, inspection and installation
Engine/Transmission Mounts — inspection, replacement, and adjustment
Other articles on other Renault models

➽ Removal and installation the pallet — removing and installing Renault Megane 1 (1995-2002)
Link to this article in different formats
Reviews and comments of visitors
No comments yet


Add two numbers 45 + 23


Clio 1 (1990-1998) 
  • General information
  • Maintenance
  • Troubleshooting
  • Power unit
  • Petrol engines 1.1 l (C)
  • Petrol engines 1.2 l (D)
  • Petrol engines 1.2/1.4 l (E)
  • Petrol engines 1.8 l (F)
  • Diesel engines
  • Overhaul of engines
  • Cooling and heating
  • Fuel system (carburetor)
  • Central fuel injection
  • Distributed fuel injection
  • Fuel system (diesel)
  • Starting and charging system
  • Ignition system (transistor)
  • Ignition system (electronic)
  • Pre-heating of diesel engines
  • Transmission
  • Clutch
  • Manual gearbox
  • Automatic gearbox
  • Drive shafts
  • Chassis, running gear
  • Brake system
  • Car suspension
  • Steering system
  • Body and interior
  • Exterior (external elements)
  • Doors, locks and windows
  • Electrical equipment
  • Equipment and devices
  • Electrical circuits
RenaultBook.ru © 2018–2026 | Mobile version | News and articles | Sitemap: EN BG BY UA RS HR RO PL SK HU | Administration | Site search | Bookmark
Duster 1 (2009-2017) | Fluence 1 (2009-2020, petrol) | Kangoo 1 (1997-2007) | Laguna 2 (2001-2007) | Logan 1 (2004-2012, petrol) | Logan 2 (2012-2020) | Megane 1 (1995-2002) | Megan 2 (2002-2009, petrol) | Sandero 1 (2007-2012, petrol) | Scenic 1 (1996-2003) | Symbol 1 (1999-2008, petrol) | Symbol 2 (2008-2013, petrol) | Renault 19 (1988-1996) | Espace I and II (1984-1996) | Espace III (1996-2002) | Clio 1 (1990-1998) |
We want your visit to be comfortable 😌 and use cookies 🍪 to do so.