



Tightening torques, Nm
- Steering wheel mounting bolt 45.
- Steering shaft cardan joint fork mounting bolt 25.
- Steering column mounting nuts 20.
Removal
1. Disconnect the wires from the battery.
2. Set the steering wheels to move straight ahead.
3. Remove the steering wheel as follows.
4.1. Option without airbag:
- remove the plastic steering wheel cover;
- remove the steering wheel mounting bolt (the bolt must be replaced with a new one upon installation);
- remove the steering wheel after marking its position.
4.2. Option with airbag:
Attention! Work with pyrotechnic devices (airbags and seat belt pretensioners) do not place near heat sources or open flames as they may trigger a fire.
Caution! Each time the steering wheel is removed, the airbag connector D must be disconnected. The airbag is equipped with a connector that connects the circuit to ground to prevent accidental deployment of the airbag.
- disconnect the wires from the battery;
- remove the driver's airbag, secured from below the steering wheel with two Torx TZO bolts (tightening torque 5 Nm), and disconnect the D connector;
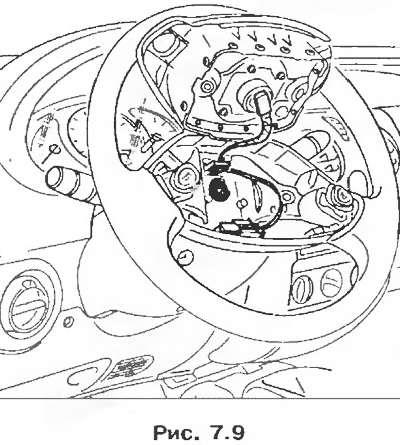
- remove the horn switch connector (if available);
- remove the steering wheel mounting bolt (the bolt must be replaced with a new one upon installation);
- set the steering wheels to the straight ahead position;
- remove the steering wheel.
5. Disconnect the spiral current-transmitting device connector.
6. Mark the position of the current-transmitting device:
- or by setting the steering wheels to the straight-ahead position so that the wire on the coil takes the middle position;
- or by blocking the coil of the current-transmitting device with electrical tape.
In case of replacement of the spiral current-transmitting device, the new device is supplied installed in the middle position, maintained by an adhesive sticker, which is torn off at the first turn of the steering wheel (installed with the wheels in a straight-ahead position).
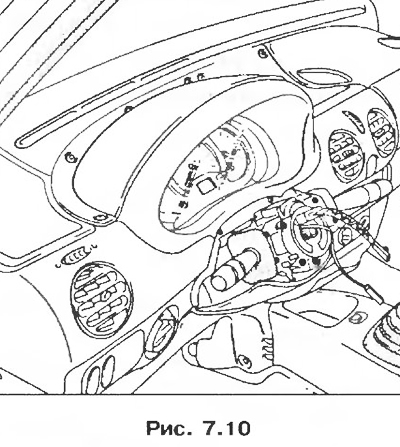
7. Remove both steering column covers (three mounting bolts).
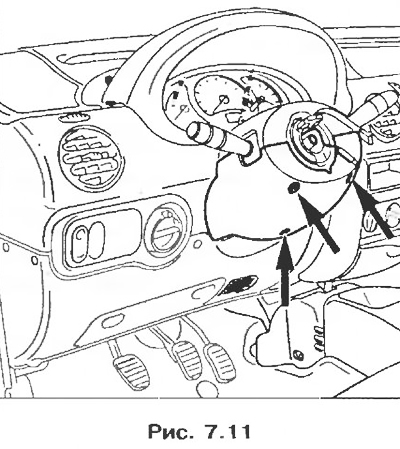
8. Remove the steering column switch (one mounting bolt).
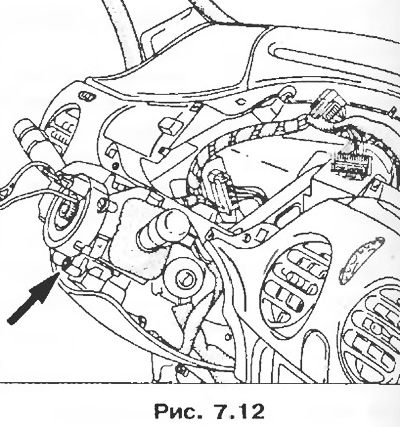
9. Disconnect the connectors.
10. Remove the instrument panel visor (six bolts).
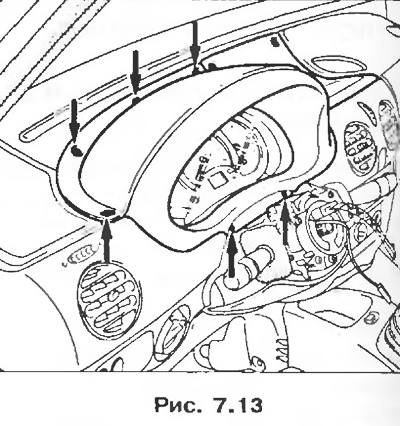
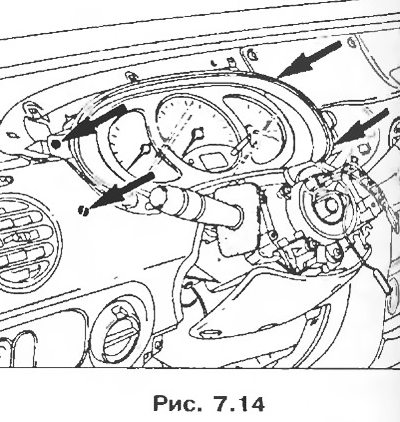
11. Remove the four instrument cluster mounting bolts and disconnect the connector.
 |
 |
12. Remove the lower decorative cover of the instrument panel hatch.
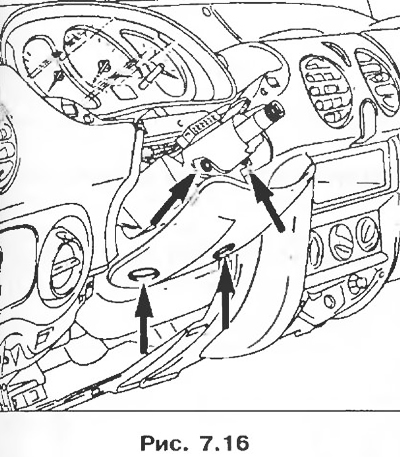
13. Unscrew the bolts securing the instrument panel to the steering column.
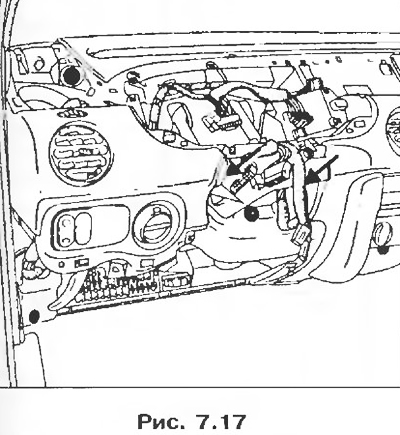
14. From underneath the vehicle, cut the clamp securing the rubber boot and push it back towards the front shield.
15. Loosen the steering shaft cardan joint fork mounting bolt.
16. Unscrew the two bolts and two nuts securing the steering column.
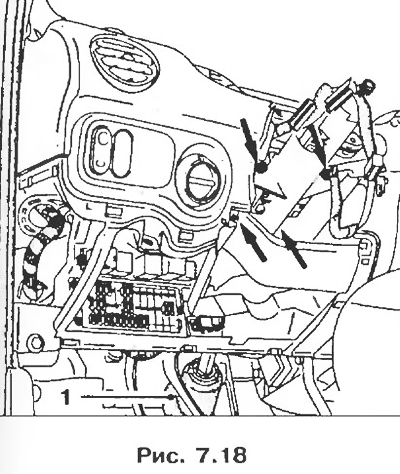
Remove:
- steering column after disconnecting the ignition switch;
- cover from the front shield 1 and remove it together with the steering column.
Installation
1. Install the steering column.
2. Install the cover on the front shield, tying the cover flaps and the cardan joint together with a cord.
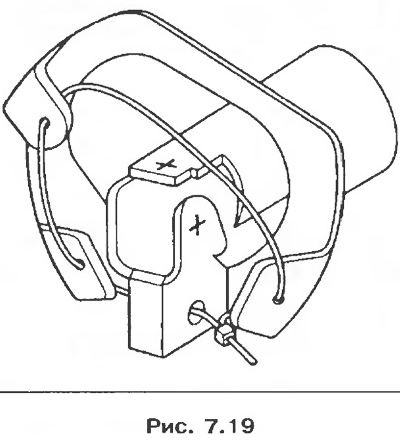
3. Installation is carried out in the reverse order of removal.
4. Check that the instrument cluster connectors are connected correctly.
5. Features of cars with a driver's airbag.
5.1. Set the steering wheels in the direction of straight-ahead movement (before installation, check that the spiral current-transmitting device is locked).
5.2 If the current-transmitting device is not blocked:
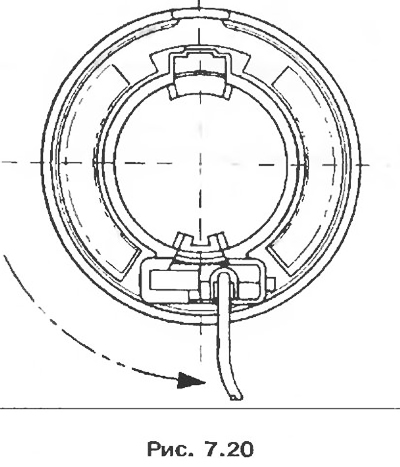
- turn the top of the rotary contact counterclockwise. As you approach the extreme position shown in Fig. 7.20, turning will become more difficult (no need to put in unnecessary effort);
- turn the top of the part slightly clockwise and check that the rotary contact is in the position shown in Figure 7.21;
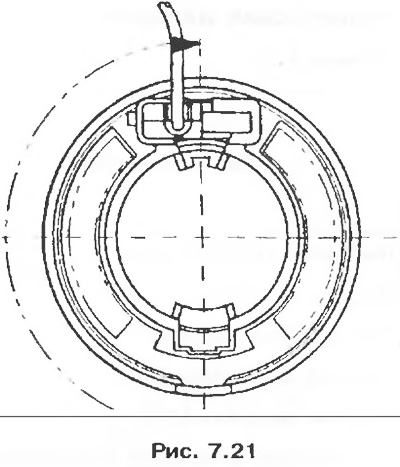
- rotate the part clockwise again, making two full turns, and check that the rotary contact is then in the position described above.
5.3. Replace the steering wheel and replace the bolt with adhesive, applying a tightening torque of 45 Nm.
5.4. Connect the airbag connector and secure it to the steering wheel (tightening torque 5 Nm).
Caution! Before installing the driver's airbag, check its proper operation as follows:
- check that the airbag warning light in the instrument cluster turns on when the ignition is turned on;
- connect an inert igniter to the driver's airbag connector and make sure that the indicator lamp in the instrument cluster goes out;
- turn off the ignition, connect the driver's airbag in place of the inert igniter and secure the airbag to the steering wheel hub;
- turn on the ignition. Make sure that when the ignition is on, the indicator lamp in the instrument cluster lights for three seconds and then goes out and remains off.
If the warning light does not work as described above, check the airbag using the XRBAG tool (Ele. 1288)
Warning! If these instructions are not followed precisely, the airbag will not operate normally and may even deploy at the wrong time.