



Contents: C-series engine 🠛 D-series engine 🠛 E-series engines 🠛 F3P engines 🠛 F7P engine (with 16 valves) 🠛
C-series engine
Removal
1. Open the hood and disconnect the negative cable from the battery.
2. Remove the starter heat shield.
3. Disconnect the wiring from the terminals on the starter solenoid relay.
4. Remove the bolt securing the rear starter bracket to the cylinder block.
5. Unscrew the three bolts and remove the starter from the clutch housing. Note the dowel pin in the clutch housing bolt hole (see illustration).
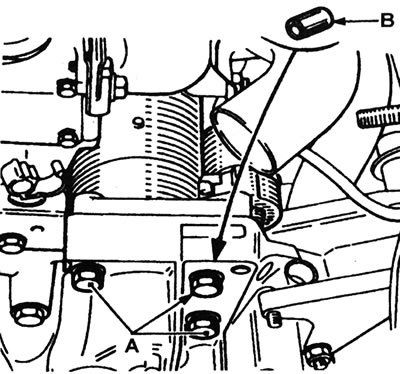
8.5 Starter mounting bolts (A) and mounting pin (B) - C-series engine.
Installation
6. Install in reverse order. Make sure the dowel pin is properly positioned in the clutch housing bolt hole as noted during removal.
D-series engine
Removal
7. Open the hood and disconnect the negative cable from the battery.
8. Apply the handbrake, then jack up the front of the car and place it on axle stands.
9. Disconnect the wiring from the terminals on the starter solenoid relay.
10. Unscrew the two bolts and remove the starter from the clutch housing.
Installation
11. Install in reverse order.
E-series engines
Removal
12. Open the hood and disconnect the negative cable from the battery.
13. Remove the two bolts and nut securing the starter to the gearbox/clutch housing.
14. Apply the handbrake, then jack up the front of the car and place it on axle stands.
15. Disconnect the wiring from the terminals on the starter solenoid relay.
16. Remove the bolt securing the rear starter bracket to the cylinder block, which also secures the wiring harness bracket.
17. Carefully remove the starter from underneath the right side of the vehicle. Note the mounting pin in the hole for the clutch housing bolt.
Installation
18. Install in reverse order. Make sure the dowel pin is properly positioned in the clutch housing bolt hole as noted during removal.
F3P engines
Removal
19. Open the hood and disconnect the negative cable from the battery.
20. Loosen the clamp screws and remove the air filter duct. Please note that on some models you may need to remove the air filter.
21. Remove the three bolts securing the starter to the clutch housing. Note the location of the wiring brackets that are attached with bolts.
22. Jack up the front of the vehicle and support it securely on axle stands.
23. Remove the outlet pipe as described in the relevant Section Section 4.
24. Remove the bolts securing the exhaust heat shield/rear mount bracket to the cylinder block and starter bracket and remove the assembly (see illustration).
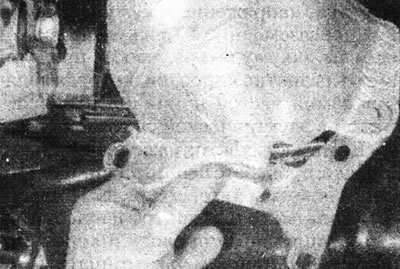
8.24 Remove the exhaust heat shield/rear starter mount - F3P engine.
25. Disconnect the wiring from the terminals on the starter solenoid relay (see illustration).
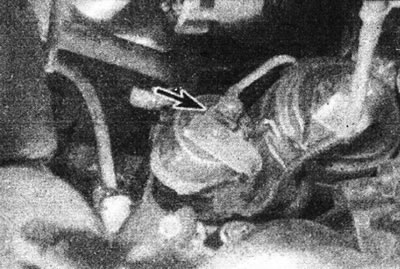
8.25. Starter wiring (marked with an arrow) - F3P engine.
26. Working under the vehicle, remove the starter from the engine (see illustration).
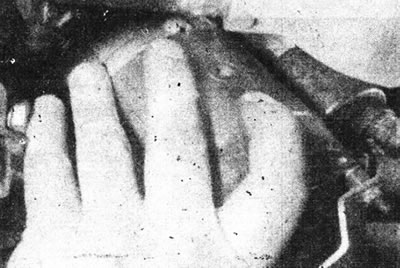
8.26 Remove the starter - F3P engine.
Note the alignment pin in the hole in the clutch housing.
Installation
27. Install in reverse order, paying attention to the following.
- Make sure the dowel pin is properly positioned in the clutch housing bolt hole as noted during removal.
- When connecting the wiring harness to the starter, make sure the terminal at the end of the wiring harness does not touch the starter housing or surrounding components.
- Install the exhaust system heat shield.
- Install the drain pipe as described in the relevant Section Section 4.
- Install the wiring harness brackets under the starter mounting bolts.
F7P engine (with 16 valves)
Removal
28. Remove the battery as described in Chapter 3.
29. Loosen the wiring connector that is secured by one of the upper starter bolts.
30. Remove the three bolts securing the starter to the clutch housing. Note the location of the wiring brackets that are attached with bolts.
31. Remove the two bolts securing the fuel hose shield (see illustration).
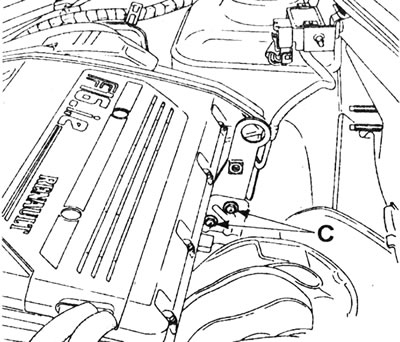
8.31. Fuel hose shield mounting bolts (C) - F7P engine (with 16 valves).
32. Apply the handbrake, then jack up the front of the car and place it on axle stands.
33. Remove the outlet pipe as described in the relevant Section Section 4.
34. Unscrew the two mounting bolts and remove the exhaust system heat shield (see illustration).
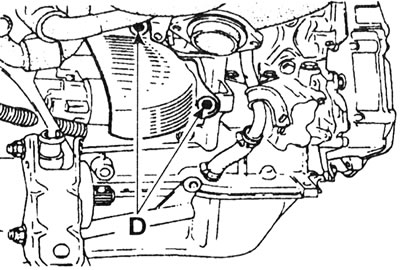
8.34. Exhaust system heat shield mounting bolts (D) - F7P engine (with 16 valves).
35. Unscrew the two mounting bolts and remove the support bracket between the exhaust manifold and the cylinder block.
36. Disconnect the wiring from the terminals on the starter solenoid relay.
37. Working underneath the vehicle, remove the three bolts securing the rear starter bracket to the engine block, note that the bolts also secure the fuel hose shield. Remove the starter from the engine. Note the locating pin in the clutch housing bolt hole.
Installation
38. Install in reverse order, paying attention to the following.
- Make sure the dowel pin is properly positioned in the clutch housing bolt hole.
- Replace the fuel hose shield.
- Install the exhaust system heat shield.
- Install the drain pipe as described in the relevant Section Section 4.
- Where applicable, install wiring harness brackets under the starter mounting bolts.
- Install the battery.