
English Русский
Български
Беларускі
Український
Српски
Hrvatski
Română
Polski
Slovenský
Magyar
Bookmark Contacts Articles Sitemap
Company vehicles Peugeot Company vehicles Opel Company vehicles Skoda Company vehicles Land Rover Company vehicles Mitsubishi Company vehicles Volkswagen Company vehicles Honda
RenaultBook.ru


Duster   Fluence   Kangoo   Laguna   Logan   Megane   Sandero   Scenic   Symbol   Clio   Other
Sandero 1 (2007-2012, petrol)

Removal and installation the steering knuckle (Renault Sandero 1)

  • Main
  • Sandero
  • Sandero 1 (2007-2012, petrol)
  • Chassis, running gear
  • Front suspension
  • Removal and installation the steering knuckle
0
You will need: 18 mm wrenches (two), TORX T30 and T40, 30 mm socket head, ratchet, wheel bolt wrench.

You will need: 18 mm wrenches (two), TORX T30 and T40, 30 mm socket head, ratchet, wheel bolt…


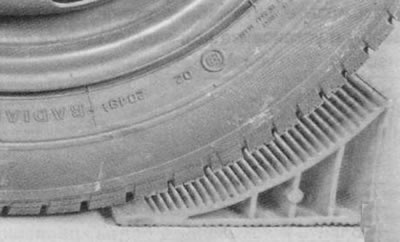
1. Brake the vehicle with the parking brake and install the anti-rollback stops ("shoes") under the rear wheels.
1. Brake the vehicle with the parking brake and install the anti-rollback stops («shoes») under the…


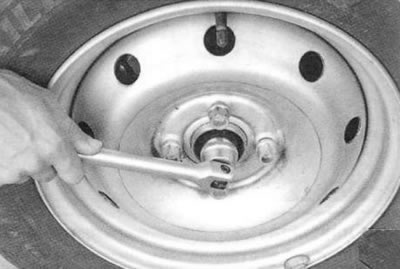
2. Loosen the hub nut and wheel mounting bolts. Jack up the front of the car and place it on supports. Remove the wheel.

Warning: Loosen and tighten the wheel bolts and hub nut only with the vehicle on the ground.

Warning: Loosen and tighten the wheel bolts and hub nut only with the vehicle on the ground.


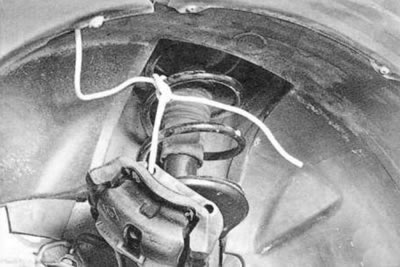
3. Remove the front wheel brake caliper assembly (see "Replacing the front wheel brake caliper"), without disconnecting the brake hose, and secure it with wire, preventing the hose from twisting or being pulled.


3. Remove the front wheel brake caliper assembly (see «Replacing the front wheel brake caliper»),…


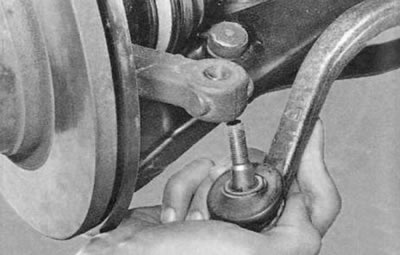
4. Loosen the nut and remove the ball joint pin of the steering tie rod end from the steering knuckle boss (see "Replacing the outer tie rod end").
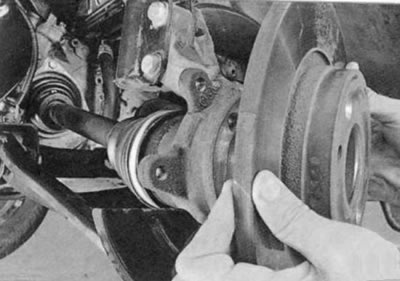
4. Loosen the nut and remove the ball joint pin of the steering tie rod end from the steering…


5. Remove the brake disc (see "Replacing the brake disc").
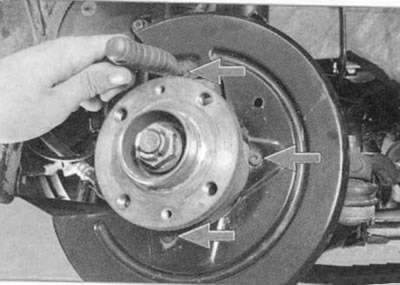
5. Remove the brake disc (see «Replacing the brake disc»).


6. Remove the three bolts securing the brake shield to the steering knuckle...
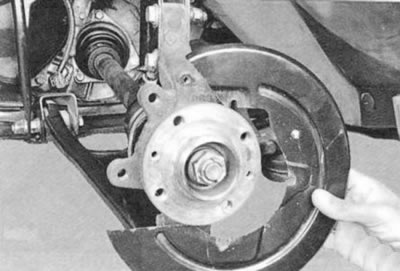
6. Remove the three bolts securing the brake shield to the steering knuckle...


7. ...and take it off.


8. Unscrew the front wheel hub nut.
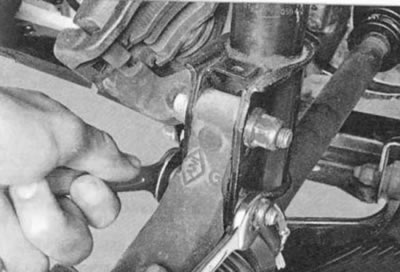
8. Unscrew the front wheel hub nut.


9. Loosen the nuts of the bolts securing the steering knuckle to the shock absorber strut and remove the bolts.
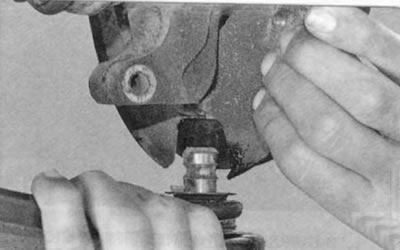
9. Loosen the nuts of the bolts securing the steering knuckle to the shock absorber strut and…


10. Remove the ball joint pin from the steering knuckle (see "Replacing the front suspension arm").

11. Push out of the hub (towards the gearbox), as far as possible, the splined tailpiece of the outer constant velocity joint (CV joint) of the front wheel drive.

Warning: Be careful not to let the drive shaft come out of the axle gear as the joint rollers may fall into the transmission housing.


Helpful advice: If it is difficult to remove the outer joint tailpiece, carefully, without damaging the threads, knock it out of the hub with a hammer through a drift or a wooden block of a suitable size.
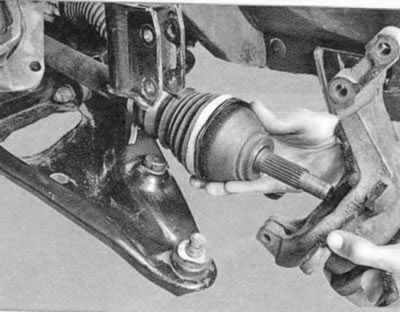


Helpful advice: If it is difficult to remove the outer joint tailpiece, carefully, without damaging…


12. Holding the drive shaft from dropping sharply, remove the steering knuckle assembly with the hub.

13. Hang the drive shaft on the wire.

14. Install the parts in the reverse order of removal. Tighten the bolts and nuts to the torque specified in Appendix 1.
This article is available on: russian, bulgarian, belarusian, ukrainian, serbian, croatian, romanian, polish, slovak, hungarian
Article has been reviewed by editor: Podkrepilov Maxim
Share with friends:
Previous
Sandero 1: Front suspension
Next

Replacement of anti-roll bar components
Replacing the front suspension arm
Shock absorber strut repair
Removal and installation the shock absorber strut
Checking the technical condition of the vehicle's front suspension…
Replacing the front wheel hub bearing
Removal and installation the subframe
Other articles on other Renault models

➽ Steering knuckle Renault Duster 1 (2009-2017)
➽ Steering knuckle Renault Fluence 1 (2009-2020, petrol)
➽ Removal and installation the steering knuckle Renault Laguna 2 (2001-2007)
➽ Removal and installation the steering knuckle Renault Logan 1 (2004-2012, petrol)
➽ Removal and installation the front steering knuckle assembly Renault Megane 1 (1995-2002)
Link to this article in different formats
Reviews and comments of visitors
No comments yet


Add two numbers 50 + 40


Sandero 1 (2007-2012, petrol) 
  • General information
  • Structure of car
  • User manual
  • Troubleshooting
  • Maintenance
  • Practical advice
  • Power unit
  • Engine repair
  • Lubrication system
  • Cooling system
  • Fuel and exhaust system
  • Transmission
  • Clutch
  • Manual gearbox
  • Automatic gearbox
  • Drive shafts
  • Chassis, running gear
  • Front suspension
  • Rear suspension
  • Steering
  • Brake system
  • Wheels and tires
  • Body and interior
  • Exterior (external elements)
  • Interior (internal elements)
  • Doors, locks and windows
  • Car body care
  • Heater and air conditioner
  • Security system
  • Electrical equipment
  • Equipment and devices
  • Headlights and lighting
  • Power devices
  • Ignition system
  • Electrical diagrams
RenaultBook.ru © 2018–2026 | Mobile version | News and articles | Sitemap: EN BG BY UA RS HR RO PL SK HU | Administration | Site search | Bookmark
Duster 1 (2009-2017) | Fluence 1 (2009-2020, petrol) | Kangoo 1 (1997-2007) | Laguna 2 (2001-2007) | Logan 1 (2004-2012, petrol) | Logan 2 (2012-2020) | Megane 1 (1995-2002) | Megan 2 (2002-2009, petrol) | Sandero 1 (2007-2012, petrol) | Scenic 1 (1996-2003) | Symbol 1 (1999-2008, petrol) | Symbol 2 (2008-2013, petrol) | Renault 19 (1988-1996) | Espace I and II (1984-1996) | Espace III (1996-2002) | Clio 1 (1990-1998) |
We want your visit to be comfortable 😌 and use cookies 🍪 to do so.