English Русский
Български
Беларускі
Український
Српски
Hrvatski
Română
Polski
Slovenský
Magyar
Bookmark Contacts Articles Sitemap
Company vehicles Peugeot Company vehicles Opel Company vehicles Skoda Company vehicles Land Rover Company vehicles Mitsubishi Company vehicles Volkswagen Company vehicles Honda
RenaultBook.ru


Duster   Fluence   Kangoo   Laguna   Logan   Megane   Sandero   Scenic   Symbol   Clio   Other
Sandero 1 (2007-2012, petrol)

Checking, removing and installing fuel injectors (Renault Sandero 1)

  • Main
  • Sandero
  • Sandero 1 (2007-2012, petrol)
  • Power unit
  • Fuel and exhaust system
  • Checking, removing and installing fuel injectors
0
Possible signs of injector failure:
  • difficult engine starting;
  • unstable engine operation;
  • engine stop at idle;
  • increased crankshaft speed at idle;
  • engine does not develop full power, insufficient engine response;
  • jerks and dips in engine operation when the car is moving;
  • increased fuel consumption;
  • increased content of CO and CI in exhaust gases;
  • glow ignition due to leaky injectors.

You will need: TORX T30 key, flat-blade screwdriver.

1. To check the injectors, reduce the pressure in the fuel system (see "Decreased pressure in the engine fuel system").

2. Remove the air filter (see "Removal and installation the air filter").

(Original version on our portal: «www.RENAULTBOOK.ru»)

Note: On the K4M engine, additionally remove the fuel rail protection. To do this, do the following:
  • Note: On the K4M engine, additionally remove the fuel rail protection. To do this, do the following:
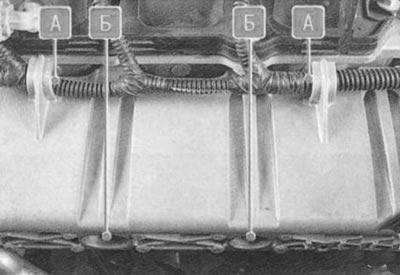
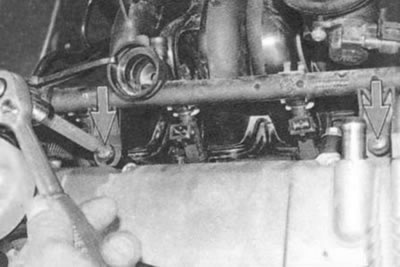
  • remove the wiring harness from the holders A and use a 13 mm socket head to unscrew the two nuts located in the channels B of the fuel rail protection;
  • remove the wiring harness from the holders A and use a 13 mm socket head to unscrew the two nuts…
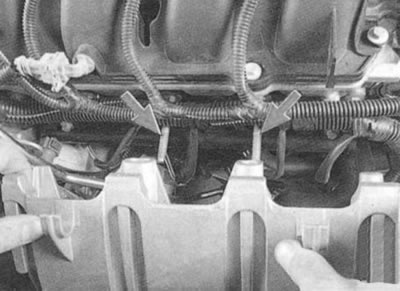
  • carefully remove the fuel rail guard from the studs (indicated by arrows).

carefully remove the fuel rail guard from the studs (indicated by arrows).

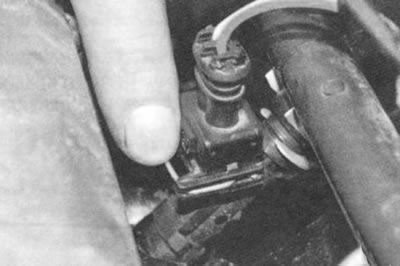
3. Squeeze the retainer and disconnect the wiring harness connector from the injector.


3. Squeeze the retainer and disconnect the wiring harness connector from the injector.


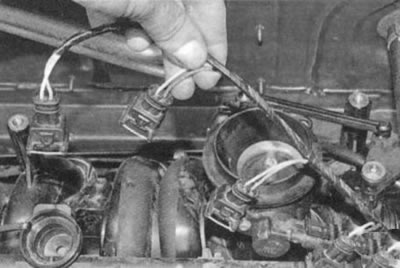
4. Similarly, disconnect the pads from the remaining injectors and move the wiring harness to the side.
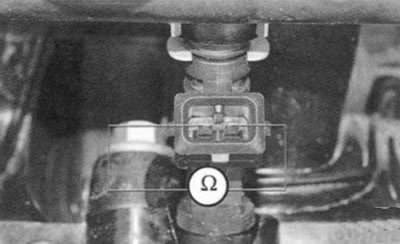
4. Similarly, disconnect the pads from the remaining injectors and move the wiring harness to the…


5. Measure the resistance of the injector winding with a car tester in the ohmmeter mode. At 20°C it should be 12 Ohms. If the resistance of the injector winding does not correspond to the norm, replace the injector, as it is not repairable.

Note: Check the injector for the shape of the sprayed fuel torch and for leaks at specialized service stations, since such a check directly on the vehicle is very fire hazardous.

Note: Check the injector for the shape of the sprayed fuel torch and for leaks at specialized…


6. To replace the injectors, unscrew the two fuel rail mounting bolts.
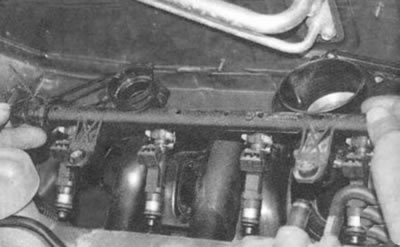


6. To replace the injectors, unscrew the two fuel rail mounting bolts.


7. Remove the ramp by removing the injectors from the holes in the intake pipe and without disconnecting the pipeline from the ramp.

Warning: If any injector remains in the intake manifold when removing the ramp, be sure to replace the retainer for that injector.
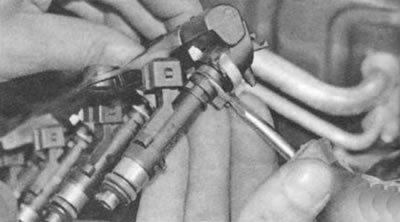

Warning: If any injector remains in the intake manifold when removing the ramp, be sure to replace…


8. Use a screwdriver to pry up the retainer...
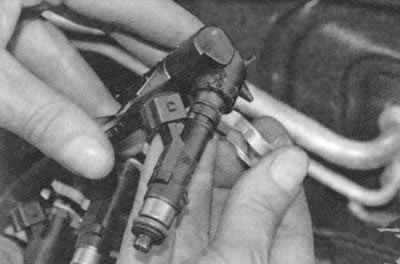
8. Use a screwdriver to pry up the retainer...


9. ...and take it off.
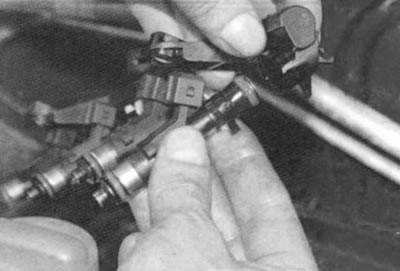


9. ...and take it off.


10. Remove the injector from the fuel rail.

Warning: Replace the rubber sealing rings with new ones each time the injectors are removed.
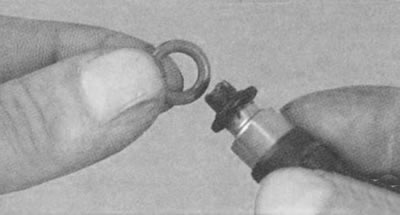

Warning: Replace the rubber sealing rings with new ones each time the injectors are removed.


11. To replace the injector sealing rings, remove them from the spray nozzle...
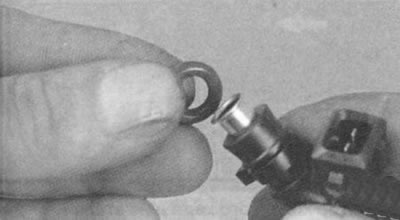
11. To replace the injector sealing rings, remove them from the spray nozzle...


12. ...and from the injector body. After installing new rings, lubricate them with engine oil.

13. Install the parts in the reverse order of removal.
This article is available on: russian, bulgarian, belarusian, ukrainian, serbian, croatian, romanian, polish, slovak, hungarian
Article has been reviewed by editor: Podkrepilov Maxim
Share with friends:
Previous
Sandero 1: Fuel and exhaust system
Next

Checking and replacing the fuel pressure regulator
Replacing the fuel tank
Replacing the fuel pump
Removal and installation the air filter
Replacing the air filter element
Removal and installation the fuel rail
Removal and installation the throttle assembly
Replacing the idle speed control valve
Adjusting the throttle cable tension
Replacing the throttle cable
Other articles on other Renault models

➽ Checking, removing and installing fuel injectors Renault Logan 1 (2004-2012, petrol)
➽ Checking, removing and installing injectors Renault Megane 1 (1995-2002)
➽ Checking the identity of the amount of fuel returned from the… Renault Laguna 2 (2001-2007)
➽ Fuel injectors — checking Renault Scenic 1 (1996-2003)
➽ Checking, removing and installing the reverse light switch Renault Symbol 1 (1999-2008, petrol)
Link to this article in different formats
Reviews and comments of visitors
No comments yet


Add two numbers 39 + 27


Sandero 1 (2007-2012, petrol) 
  • General information
  • Structure of car
  • User manual
  • Troubleshooting
  • Maintenance
  • Practical advice
  • Power unit
  • Engine repair
  • Lubrication system
  • Cooling system
  • Fuel and exhaust system
  • Transmission
  • Clutch
  • Manual gearbox
  • Automatic gearbox
  • Drive shafts
  • Chassis, running gear
  • Front suspension
  • Rear suspension
  • Steering
  • Brake system
  • Wheels and tires
  • Body and interior
  • Exterior (external elements)
  • Interior (internal elements)
  • Doors, locks and windows
  • Car body care
  • Heater and air conditioner
  • Security system
  • Electrical equipment
  • Equipment and devices
  • Headlights and lighting
  • Power devices
  • Ignition system
  • Electrical diagrams
RenaultBook.ru © 2018–2026 | Mobile version | News and articles | Sitemap: EN BG BY UA RS HR RO PL SK HU | Administration | Site search | Bookmark
Duster 1 (2009-2017) | Fluence 1 (2009-2020, petrol) | Kangoo 1 (1997-2007) | Laguna 2 (2001-2007) | Logan 1 (2004-2012, petrol) | Logan 2 (2012-2020) | Megane 1 (1995-2002) | Megan 2 (2002-2009, petrol) | Sandero 1 (2007-2012, petrol) | Scenic 1 (1996-2003) | Symbol 1 (1999-2008, petrol) | Symbol 2 (2008-2013, petrol) | Renault 19 (1988-1996) | Espace I and II (1984-1996) | Espace III (1996-2002) | Clio 1 (1990-1998) |
We want your visit to be comfortable 😌 and use cookies 🍪 to do so.