
Removing
1. Place the vehicle on a two post lift.
2. Disconnect the wires from the battery terminal.
3. Remove the engine cover.
4. Remove the battery.
5. Disconnect connectors:
- injection computer (Gas engine);
- preheater (diesel engine);
- fuel filter (diesel engine);
- inertial interrupter.
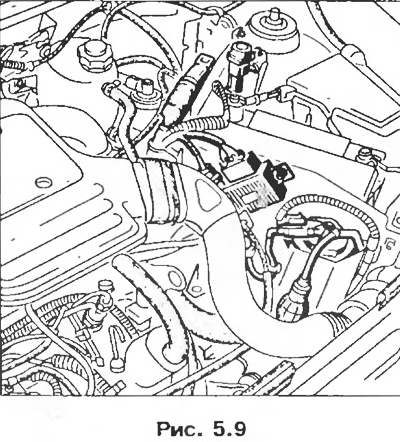
6. Remove the air filter intake pipe (pic. 5.9).
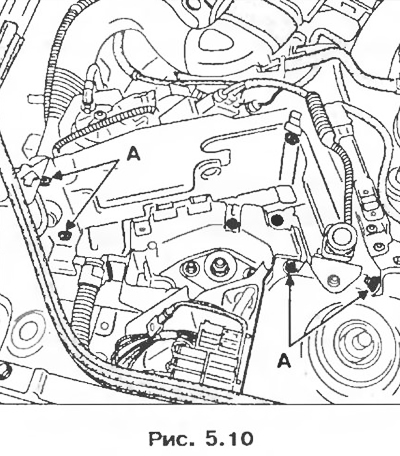
7. Turn away bolts And fastenings of a heat-shielding guard of the storage battery.
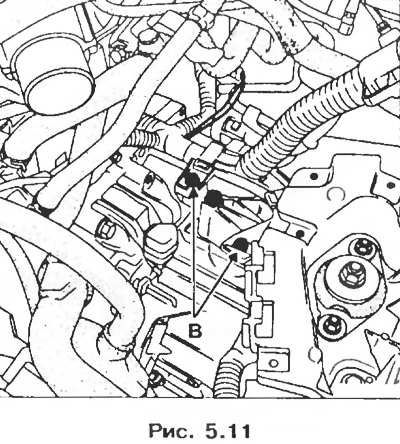
8. Remove the two mounting bolts B.
9. Disconnect the clutch release cable.
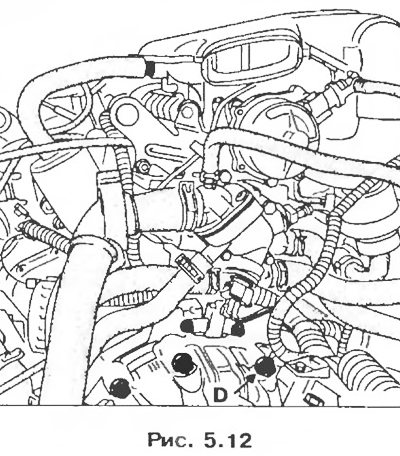
10. Remove the upper bolts of the gearbox housing and starter (Loosen bolt D as far as possible).
11. Remove bolts of fastening of a mass wire on a transmission case.
12. Turn away two bolts of fastening of the TDC sensor.
13. Remove the front wheels.
14. Remove the mudguard from the bottom of the gearbox.
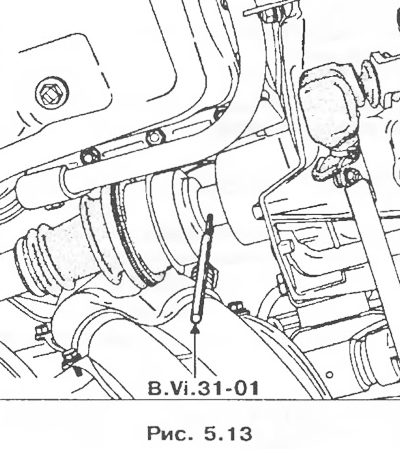
15. On the right side of the car, remove the elastic pins of the drive shafts using the B.VS 31-01 beard.
16. On both sides, remove:
- floating brake calipers and tie them;
- mudguards;
- outer steering ball joints with puller (T.Av. 476);
- bolts of fastening of the bottom support of the shock-absorber;
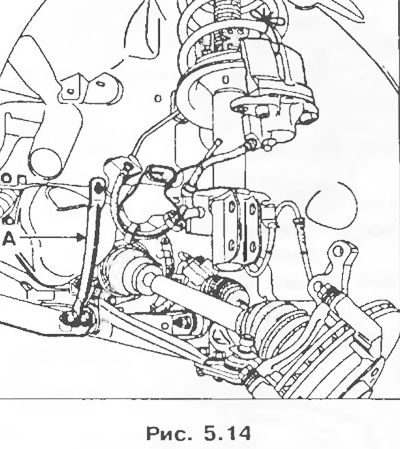
- jet rods A of the subframe supports;
- knuckle from the ball joint of the lower suspension arm.
17. Be convinced that rollers of hinges of the left power shaft do not act in film by hand. Otherwise, make sure that the rollers do not get inside the gearbox.
19. Disconnect and remove a starter.
20. Disconnect connectors:
- reversing light switch;
- speedometer sensor and remove the speedometer sensor.
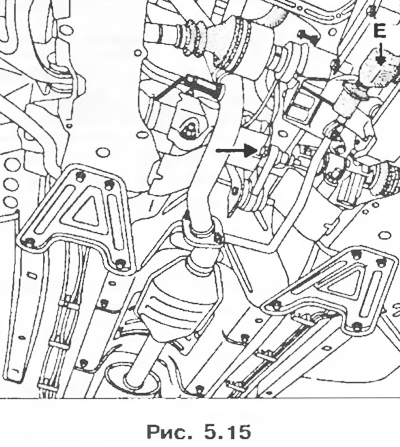
21. Remove:
- receiving pipe;
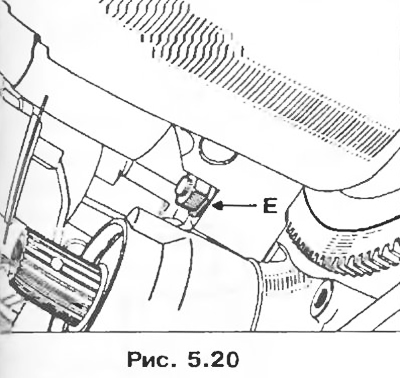
- the gearbox control mechanism, having unscrewed bolt E and three bolts securing the heat shield, in order to gain access to the base of the gear lever;
- engine mount jet thrust bolt;
- rear gearbox support.
22. Remove jet draft of a support of a transmission.
23. To remove the steering gear, install, if necessary, a wedge insert to tilt the engine forward.
24. Remove the steering mechanism and attach it to the body.
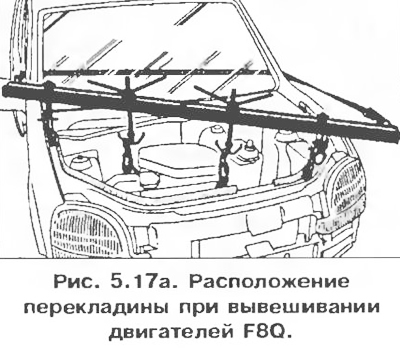
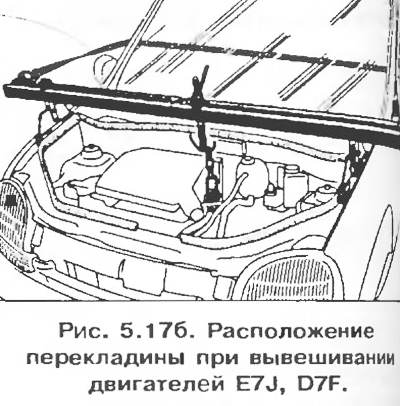
25. Install the engine hanger and hang out the power unit.
 |  |
26. Turn away three bolts of fastening of a support on a transmission case.

27. Lower the engine as far as possible.
28. Remove the last upper flange bolt of the gearbox housing.
29. Remove the bumper.
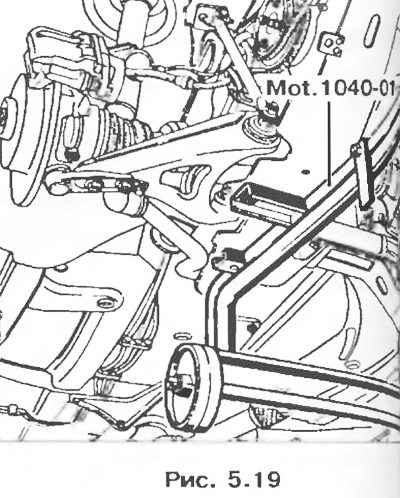
30. Install the Powertrain Removal/Installation Cart (Mot. 1040-01) and lower the car.
31. Remove the subframe by loosening the four mounting bolts.
32. Establish a basic rack from below a transmission, without lifting it.
33. Separate the gearbox from the engine by unscrewing nut E and removing the dowel pins from the bushings on the cylinder block and gearbox housing.
Installation
1. Apply MOLYKOTE BR2 lubricant to the surfaces of the booster sleeve and the sliding surfaces of the release fork.
2. Insert the fork under the tabs on the thrust release bearing race.
3. Connect the gearbox to the engine, taking measures to ensure that the position of the engine in height does not change in time.
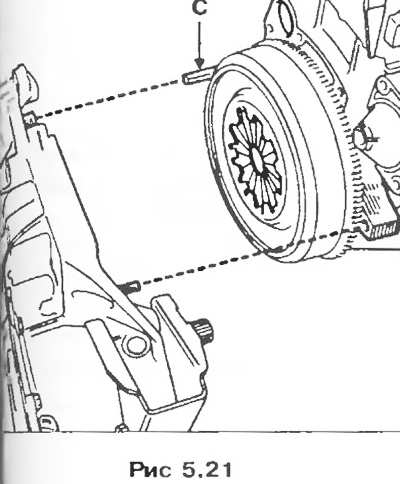
4. Ensure the presence and precise installation of the centering sleeves on the gearbox housing and cylinder block. The presence of studs C facilitates assembly.
Install in place:
- stretcher;
- steering gear;
- receiving pipe;
- jet thrust of the engine mount.
Features of the E7J engine
6. Install downpipe before right drive shaft is installed.
7. Install the remaining parts in the reverse order of their removal.