
| Tightening torques | |
| wire bolt «masses» manual transmission | 24 Nm |
| fastening nuts «mass tire» | 8 Nm |
Conventions
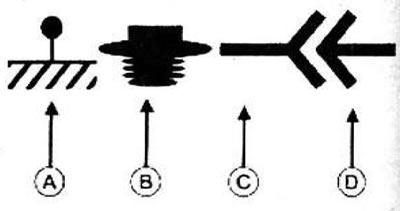
A - Symbol «masses»
B - Attachment symbol (collar, clip, etc.)
C - Symbol of the female part of the connector (2 wire connection)
D - Connector plug symbol (2 wire connection)
Removing
Place the car on a two post lift.
Switch off the ignition.
Disconnect the battery.
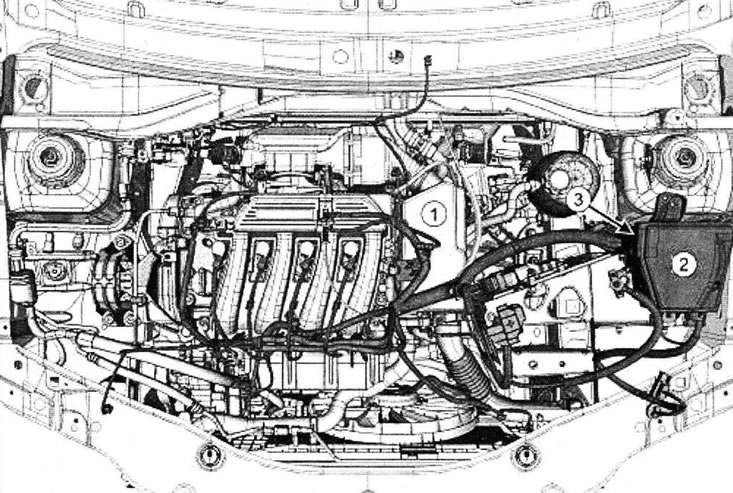
Remove:
- intake silencer (1),
- access hatch cover to the fuse and relay box in the engine compartment (2).
- overlay (3) fuse and relay box in the engine compartment,
- bolts of fastening of protection of the pallet crankcase of the engine,
- protective screen.
Note: Before removing, note the position of the fuses and relays.
Disconnect the fuse holders and engine wiring harness relay from their sockets.
Remove the fuses when replacing the engine wiring harness.
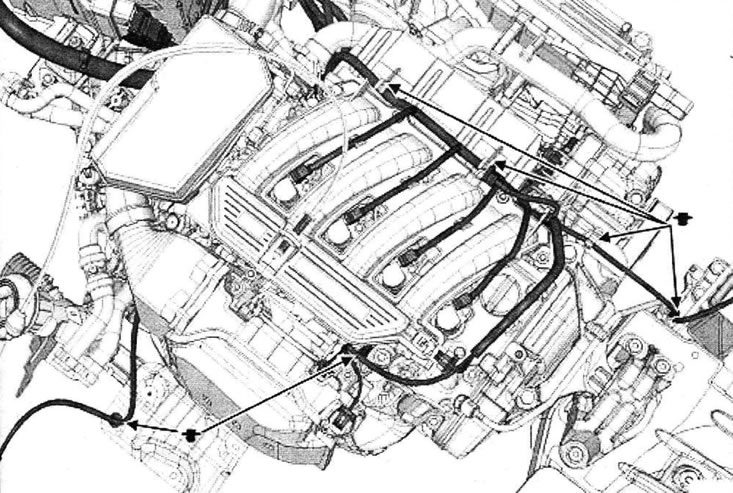
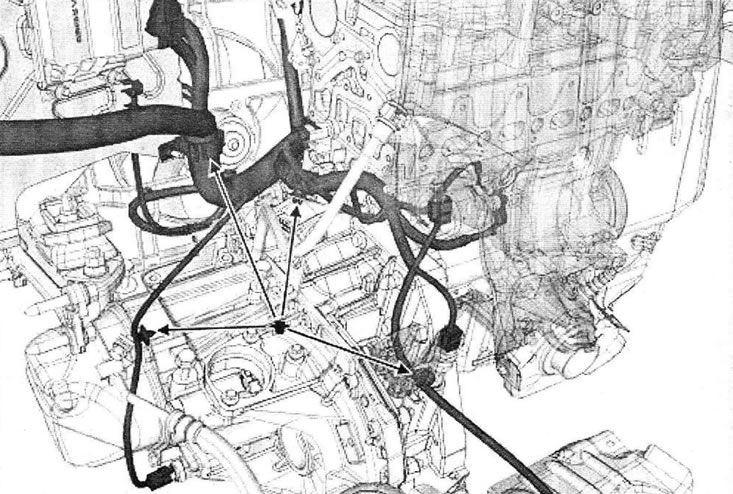
Disconnect all connectors.
Disconnect the engine wiring harnesses at the locations indicated.
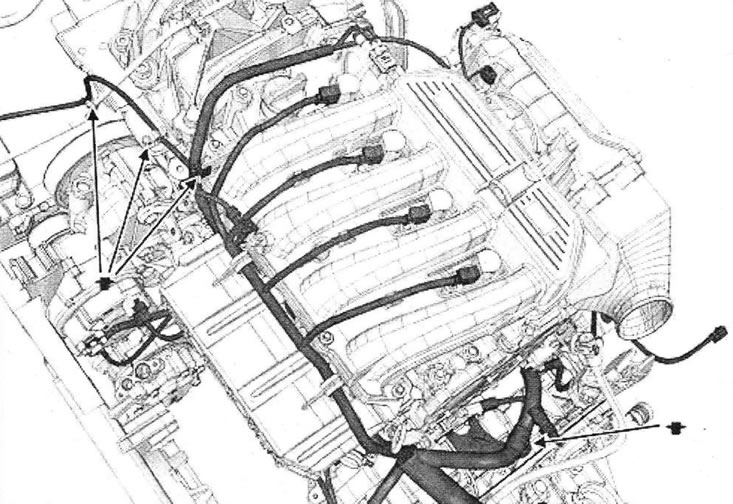
Models with heater
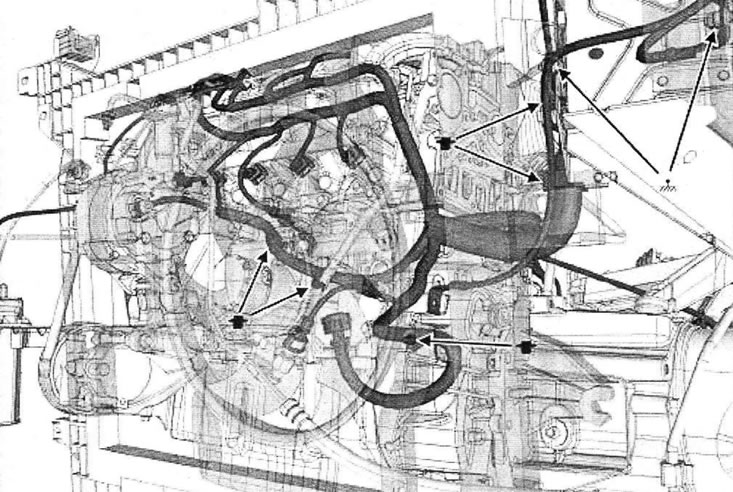
Disconnect all connectors.
Disconnect the engine wiring harnesses at the locations indicated.
Models with air conditioning
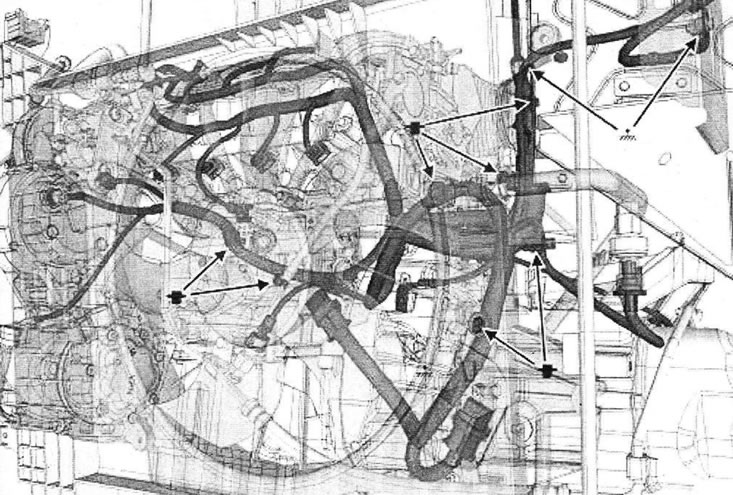
Disconnect all connectors.
Disconnect the engine wiring harnesses at the locations indicated.
All models
Note:
- Before removal «mass» terminals, mark its position with an indelible pencil by drawing a line from «ground terminal» to the gearbox housing.
- Wrong position when assembling «mass» terminals on the gearbox housing can damage «mass» terminals or «mass» wiring.
Remove «massive» wires.
Attention! To prevent damage during installation, make sure the wiring harness is not secured (holder, plastic tie, adhesive tape, non-disconnected connector, etc.).
Remove the engine wiring harness.
Installation
When replacing the engine wiring harness:
Install fuses.
When replacing with a more complete wiring harness, fix unused connectors.
Installation is made in an order, the return to removal.
Note:
- Install the ground wire, aligning the indelible marks on the gearbox crater.
- Wrong position when assembling «mass» terminals on the gearbox housing can damage «mass» terminals or «mass» wiring.
Torque tighten:
- wire bolt «masses» manual transmission (24 Nm),
- fastening nuts «mass tire» (8 Nm).
Connect the battery.
Examination
Turn on the ignition.
Connect the diagnostic tool.
Make sure there are no faults.