
English Русский
Български
Беларускі
Український
Српски
Hrvatski
Română
Polski
Slovenský
Magyar
Bookmark Contacts Articles Sitemap
Company vehicles Peugeot Company vehicles Opel Company vehicles Skoda Company vehicles Land Rover Company vehicles Mitsubishi Company vehicles Volkswagen Company vehicles Honda
RenaultBook.ru


Duster   Fluence   Kangoo   Laguna   Logan   Megane   Sandero   Scenic   Symbol   Clio   Other
Clio 1 (1990-1998)

The tailgate, its hinges and supports — removal and installation (Renault Clio 1)

  • Main
  • Clio
  • Clio 1 (1990-1998)
  • Body and interior
  • Doors, locks and windows
  • The tailgate, its hinges and supports — removal and installation
0
Contents: Luggage compartment door 🠛 Hinges 🠛 Door supports 🠛

Luggage compartment door


Removal


1. Disconnect the negative cable from the battery.

2. Open the trunk door.

3. Carefully remove the trim panel from the tailgate (see illustration).
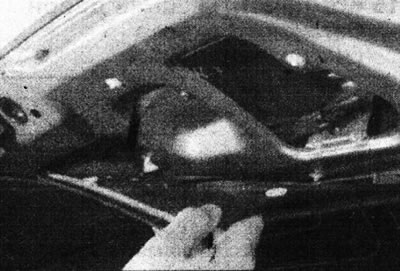
14.3. Remove the tailgate trim panel.

14.3. Remove the tailgate trim panel.


If necessary, release the trim fasteners using a suitable forked tool.

4. Disconnect the wiring from the rear window defroster, windshield wiper motor and central lock motor (where available). Disconnect the washer hose where applicable; be prepared for fluid to come out.

5. Release the wiring and hose seals from the edge of the door. Tie a piece of twine to the wire harness and hose and pull them out through the edge of the door. Leave the twine hanging in the door to make installation easier later.

6. Ask an assistant to support the door. Remove the door supports by pressing the mounting brackets with a screwdriver.

7. Push the plastic covers off the ceiling to gain access to the door mounting nuts (see illustration).
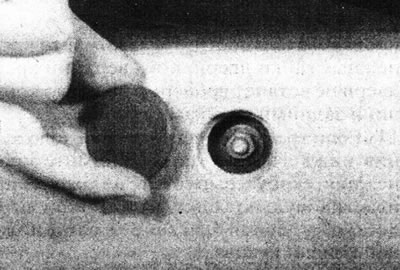
14.7. Remove the tailgate fastening nut cover.

14.7. Remove the tailgate fastening nut cover.


8. If the door is not to be replaced, mark the positions of the mounting nuts on the hinges.

9. Unscrew the nuts and carefully remove the door from the car.

Installation


10. Install in reverse order. Do not tighten the door retaining nuts until the top edge of the door is flush with the roof panel and rear pillars.

11. If adjustment of the lower edge of the door is required, remove the mounting bracket and release the plastic cover from the mountings to gain access to the lock strike plate on the lower body panel.

12. Change the position of the lock strike plate to align the lower edge of the door with the adjacent body panels (see illustration).
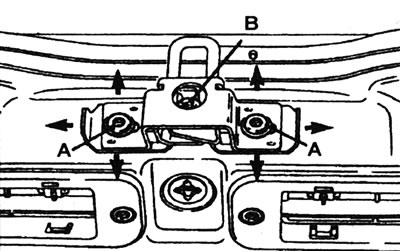
14.12. Assembling the tailgate lock strike plate: A - Impact plate mounting screws; B - Impact…

14.12. Assembling the tailgate lock strike plate: A - Impact plate mounting screws; B - Impact plate adjusting screw.


13. Once the door is in the correct position in the body opening, adjust, if necessary, the ease of its closing using the adjusting screw.

Hinges


14. The tailgate hinges are welded to the door and the hinge pins are pressed in. It is not possible to remove the hinges.

Door supports


Removal


15. Open the tailgate and have an assistant hold it in this position.


16. Disconnect the support from the door by pressing the mounting bracket with a screwdriver (see illustration).
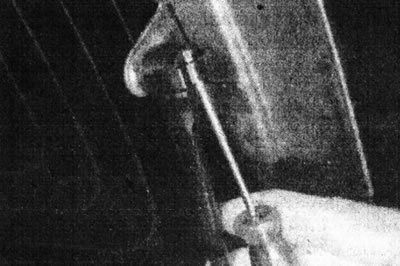
14.16. Use a screwdriver to pry up the tailgate support mounting bracket.

14.16. Use a screwdriver to pry up the tailgate support mounting bracket.


17. Press back the bracket that secures the support to the body and remove the support.

Installation


18. Install in reverse order.
This article is available on: russian, bulgarian, belarusian, ukrainian, serbian, croatian, romanian, polish, slovak, hungarian
Article has been reviewed by editor: Fedoseev Denis
Share with friends:
Previous
Clio 1: Doors, locks and windows
Next

Door glass and window lifters — removal and installation
Door Lock Handles and Lock Components — removal and installation
Doors and their travel limiters — removal, installation and adjustment
Tailgate Lock Components — removal and installation
Central locking components — removal and installation
Power Window Components — removal and installation
Other articles on other Renault models

➽ Tailgate — Removal and Installation Renault Duster 1 (2009-2017)
➽ Tailgate and trunk lid Renault Fluence 1 (2009-2020, petrol)
➽ Tailgate Renault Kangoo 1 (1997-2007)
➽ Unlocking and locking the side doors and tailgate Renault Laguna 2 (2001-2007)
➽ Lubrication of hinges and locks Renault Megane 1 (1995-2002)
Link to this article in different formats
Reviews and comments of visitors
No comments yet


Add two numbers 36 + 12


Clio 1 (1990-1998) 
  • General information
  • Maintenance
  • Troubleshooting
  • Power unit
  • Petrol engines 1.1 l (C)
  • Petrol engines 1.2 l (D)
  • Petrol engines 1.2/1.4 l (E)
  • Petrol engines 1.8 l (F)
  • Diesel engines
  • Overhaul of engines
  • Cooling and heating
  • Fuel system (carburetor)
  • Central fuel injection
  • Distributed fuel injection
  • Fuel system (diesel)
  • Starting and charging system
  • Ignition system (transistor)
  • Ignition system (electronic)
  • Pre-heating of diesel engines
  • Transmission
  • Clutch
  • Manual gearbox
  • Automatic gearbox
  • Drive shafts
  • Chassis, running gear
  • Brake system
  • Car suspension
  • Steering system
  • Body and interior
  • Exterior (external elements)
  • Doors, locks and windows
  • Electrical equipment
  • Equipment and devices
  • Electrical circuits
RenaultBook.ru © 2018–2026 | Mobile version | News and articles | Sitemap: EN BG BY UA RS HR RO PL SK HU | Administration | Site search | Bookmark
Duster 1 (2009-2017) | Fluence 1 (2009-2020, petrol) | Kangoo 1 (1997-2007) | Laguna 2 (2001-2007) | Logan 1 (2004-2012, petrol) | Logan 2 (2012-2020) | Megane 1 (1995-2002) | Megan 2 (2002-2009, petrol) | Sandero 1 (2007-2012, petrol) | Scenic 1 (1996-2003) | Symbol 1 (1999-2008, petrol) | Symbol 2 (2008-2013, petrol) | Renault 19 (1988-1996) | Espace I and II (1984-1996) | Espace III (1996-2002) | Clio 1 (1990-1998) |
We want your visit to be comfortable 😌 and use cookies 🍪 to do so.